Understanding your Singing Machine requires a detailed guide‚ especially with over 43 billion serial numbers cataloged since 1850. This manual assists enthusiasts
in navigating models like SML-383‚ ensuring optimal karaoke enjoyment and resolving potential issues with this United States-made device.
What is a Singing Machine?
A Singing Machine is a consumer electronics device designed for home karaoke entertainment. These machines‚ like the SML-383 series‚ typically play CDG (CD + Graphics) discs‚ which contain music and synchronized lyrics displayed on a television screen. Beyond CDs‚ modern Singing Machines often support digital file playback via USB and SD cards‚ expanding your song library considerably.
Essentially‚ it’s a self-contained karaoke system‚ offering a fun and interactive musical experience for individuals and groups. The core function revolves around providing backing tracks and displaying lyrics‚ allowing users to sing along and enjoy a performance-like atmosphere. With features like microphone inputs‚ volume controls‚ and echo effects‚ the Singing Machine aims to replicate the karaoke bar experience within the comfort of your home. It’s a popular choice for parties‚ family gatherings‚ and casual entertainment.
Importance of the Instruction Manual
Given the vast number of Singing Machine serial numbers – exceeding 43 billion from 1850 to 1971 – and the variety of models like SML-383P‚ a comprehensive instruction manual is crucial. It unlocks the full potential of your device‚ guiding you through setup‚ operation‚ and troubleshooting. Without it‚ maximizing features like digital file playback (USB/SD) or adjusting microphone volume and echo becomes challenging.
The manual ensures safe and correct usage‚ preventing potential damage to the machine or connected components. It’s especially vital for vintage models where identifying the exact configuration can be difficult. Understanding the manual empowers users to resolve common issues like no sound output or microphone malfunctions independently‚ saving time and frustration. It’s your key to a seamless karaoke experience.
Understanding Your Singing Machine Model
Identifying your specific Singing Machine‚ such as SML-383 or SML383P‚ is the first step to utilizing its features and accessing relevant support resources.
Identifying Your Model Number (SML-383‚ SML-383P‚ SML383‚ SML383P)
Locating your Singing Machine’s model number is crucial for accessing the correct documentation and support. Common variations include SML-383‚ SML-383P‚ SML383‚ and SML383P – seemingly minor differences can impact feature sets and troubleshooting steps.
The model number is typically found on a sticker located on the back or bottom of the unit. It may also be present on the original packaging or your purchase receipt. Carefully compare the number on your machine with the options listed here. Accurate identification ensures you’re referencing the correct instruction manual and utilizing compatible accessories. With over 43 billion serial numbers in the database‚ precise model identification is paramount for a smooth karaoke experience.
Key Features and Components
Your Singing Machine boasts a range of features designed for immersive karaoke fun. Core components include a CDG disc player for traditional karaoke tracks‚ and USB/SD card slots for digital file playback. Expect integrated microphone inputs‚ allowing dual-singer performances‚ alongside adjustable volume controls and echo effects to enhance vocal delivery.
Many models‚ like the SML-385W‚ feature built-in disco lighting to create a vibrant atmosphere. Understanding each component’s function – from power connections to audio outputs – is key. With a database tracking over 43 billion serial numbers‚ each machine’s specific features are documented‚ ensuring a tailored user experience and optimal performance.
Setting Up Your Singing Machine
Proper setup involves connecting to a power source‚ linking microphones for singing‚ and establishing audio outputs to speakers – ensuring a fantastic karaoke experience.
Connecting to Power
Before you begin your karaoke adventure‚ ensuring a stable power connection is paramount. Locate the power input socket on the rear panel of your Singing Machine – typically‚ this accepts a standard AC power cord. Verify that your power outlet provides the correct voltage‚ as using an incorrect voltage could damage the unit.
Carefully insert the power cord into both the Singing Machine and the wall outlet. A properly connected power cord will fit snugly and securely. Once connected‚ locate the power switch‚ usually found on the front or side of the machine‚ and switch it to the ‘ON’ position. You should observe a power indicator light illuminating‚ confirming that the machine is receiving power.
If the machine fails to power on‚ double-check the power cord connection at both ends and ensure the outlet is functioning correctly. Avoid using extension cords if possible‚ and if necessary‚ use a heavy-duty extension cord rated for the machine’s power consumption.
Connecting Microphones
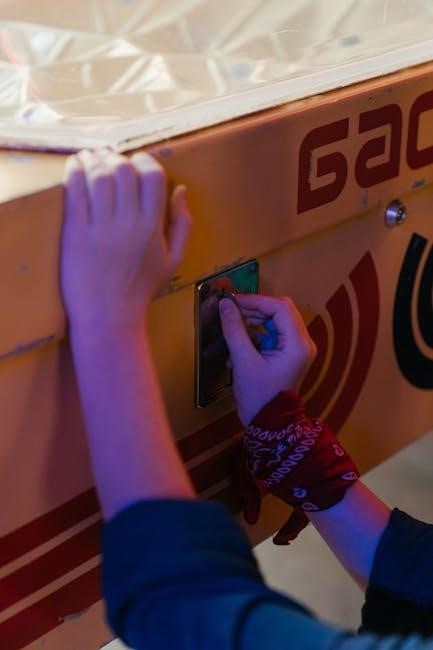
To unleash your inner superstar‚ connecting the microphones is essential. Your Singing Machine typically features one or more microphone inputs‚ usually 6.35mm (1/4 inch) jacks‚ located on the front or rear panel. Gently insert the microphone cable’s plug into one of these inputs.
Ensure the microphone is switched ‘ON’ if it has a separate power switch. Some microphones require batteries‚ so verify they are adequately charged or replaced; Once connected‚ adjust the microphone volume control – often a dedicated knob – to a moderate level to prevent feedback or distortion.
Experiment with different microphone positions to achieve optimal sound quality. Remember to speak or sing into the microphone at a comfortable distance. If you encounter issues‚ check the microphone cable for damage and ensure it’s securely plugged in at both ends.
Connecting Speakers & Audio Outputs
Expanding your Singing Machine’s audio capabilities involves connecting external speakers or utilizing audio outputs. Locate the speaker output jacks‚ commonly RCA (red and white) or 3.5mm headphone-style connections‚ on the machine’s rear panel.
Connect your powered speakers to these outputs using appropriate cables. If using a receiver or amplifier‚ connect the Singing Machine’s audio outputs to the receiver’s corresponding inputs. Adjust the volume levels on both the Singing Machine and the external amplifier to achieve a balanced sound.
For private listening‚ headphones can be connected to the headphone jack. Ensure the volume is set to a safe level to prevent hearing damage. Experiment with different speaker configurations to optimize the sound for your space.
Using the Karaoke Functionality
Enjoy karaoke with CDG discs‚ USB drives‚ or SD cards; control microphone volume and echo for a personalized singing experience with your Singing Machine!
CDG Disc Playback
To initiate CDG disc playback‚ ensure the machine is powered on and the disc tray is open. Gently insert a compatible CDG disc‚ label side up‚ into the tray. Close the tray‚ and the machine will automatically begin reading the disc.
The lyrics will be displayed simultaneously with the music‚ creating a full karaoke experience. Utilize the forward‚ backward‚ pause‚ and play buttons on the machine’s control panel to navigate through tracks.
If the disc does not play‚ verify it is a genuine CDG disc and free from scratches or damage. Some older discs may require cleaning with a soft cloth. Ensure the disc is properly seated within the tray for optimal performance. Enjoy singing along to your favorite tunes!
Digital File Playback (USB/SD)
Your Singing Machine supports digital file playback via USB flash drives and SD cards. Locate the designated USB and SD card slots on the machine – typically found on the front or side panel. Insert your prepared storage device containing compatible audio files‚ such as MP3 or WAV formats.
The machine will automatically detect the device and display the file list on the screen. Use the navigation buttons to select your desired track. Press play to begin playback‚ and enjoy karaoke with your digital music library!
Ensure files are not DRM-protected‚ as these may not play correctly. Regularly back up your files to prevent data loss.
Microphone Volume Control & Echo
Adjusting microphone volume is crucial for a balanced karaoke experience. Locate the dedicated microphone volume control knobs‚ usually positioned on the machine’s front panel. Turn clockwise to increase volume and counter-clockwise to decrease it. Start with a low setting and gradually increase until the desired level is reached.
The echo effect adds depth and richness to your vocals. The echo control knob adjusts the intensity of this effect. Experiment with different settings to find your preferred sound. Too much echo can sound muddy‚ while too little may be unnoticeable.
Remember to test microphone levels before starting a performance!

Troubleshooting Common Issues
Addressing sound‚ microphone‚ or disc playback problems is vital for uninterrupted fun; this section provides solutions for typical issues encountered with your Singing Machine.
No Sound Output
Experiencing a complete lack of sound is a frustrating‚ yet common‚ issue with karaoke machines. First‚ verify the power connection to both the Singing Machine and any connected speakers. Ensure the volume control on the machine and the speakers are turned up sufficiently – sometimes the simplest solutions are overlooked!
Next‚ check all audio cables (RCA‚ or 3.5mm) connecting the machine to the speakers‚ confirming they are securely plugged in at both ends. If using an external amplifier‚ ensure it’s powered on and the correct input source is selected. Also‚ test the speakers with another audio source (like a phone) to rule out speaker failure. Finally‚ confirm that a CDG disc or digital file is actually playing; a paused or stopped track will obviously produce no sound. Remember over 43 billion serial numbers exist‚ but basic checks remain consistent!
Microphone Not Working
A non-functional microphone can quickly derail a karaoke session. Begin by ensuring the microphone is properly connected to the designated microphone input jack on the Singing Machine – often a 6.35mm or ¼ inch connector. Confirm the microphone is switched ‘on’ if it has a power switch; many require batteries or external power.
Next‚ adjust the microphone volume control on the machine; it may be set too low or muted. Test with a different microphone if available‚ to determine if the issue lies with the microphone itself or the machine. Also‚ check the echo control – excessive echo can sometimes mask the microphone signal. With over 43 billion serial numbers registered‚ troubleshooting steps remain consistent across models like the SML-383. Finally‚ ensure the microphone cable isn’t damaged.
Disc Playback Errors
Encountering issues during CDG disc playback is common. First‚ verify the disc is inserted correctly‚ label-side up. Ensure the disc is clean and free of scratches‚ as damage can prevent proper reading. Try a different CDG disc to rule out a problem with the specific disc itself.
If the error persists‚ check the disc drive lens for dust or debris; a gentle cleaning with a soft cloth may resolve the issue. Confirm the disc is a compatible format (CDG). With a database exceeding 43 billion serial numbers‚ consistent troubleshooting applies to models like the SML-383. Finally‚ if the machine still fails to play‚ a potential internal drive malfunction may require professional repair.
Singing Machine Serial Numbers & Dating
Decoding your Singing Machine’s serial number—from a database of over 43 billion—can reveal its manufacturing date‚ particularly for models between 1850 and 1971.
Understanding Serial Number Location
Locating the serial number on your Singing Machine is crucial for identifying its model and approximate manufacturing date. While specific placement can vary slightly between models – such as the SML-383‚ SML-383P‚ SML383‚ and SML383P – it’s generally found on a sticker affixed to the rear or bottom of the unit.
Carefully inspect the back panel‚ often near the power input or audio output jacks. Alternatively‚ check the underside of the machine; you may need to gently tilt or lift it to access this area. The serial number is typically a long string of numbers‚ potentially exceeding ten digits‚ reflecting the extensive database of over 43 billion records compiled since 1850.
This number is vital for accessing support resources and verifying your machine against the 727 already verified entries‚ aiding fellow enthusiasts in their vintage machine explorations.
Dating Your Machine Based on Serial Number (1850-1971 data)

Determining the manufacturing year of your Singing Machine using its serial number‚ particularly for models dating between 1850 and 1971‚ requires referencing historical production data. With a database encompassing over 43 billion serial numbers‚ pinpointing the exact year can be complex‚ but possible.
Currently‚ the available data allows for estimations based on serial number ranges. While a precise lookup isn’t always feasible‚ the 727 verified machines offer a benchmark for understanding the progression of serial number assignments during this period.
Enthusiasts have compiled resources to assist in this process‚ though definitive dating can be challenging. Remember that serial number sequences weren’t always strictly linear‚ so results should be considered approximate‚ especially for models like the SML-383 series.