terra kaffe tk-01 manual

Terra Kaffe‚ founded by Sahand Dilmaghani‚ champions a pristine coffee experience‚ prioritizing sustainability and eliminating single-serve pod waste—offsetting over a million pods!

Overview of the Terra Kaffe Brand and Philosophy

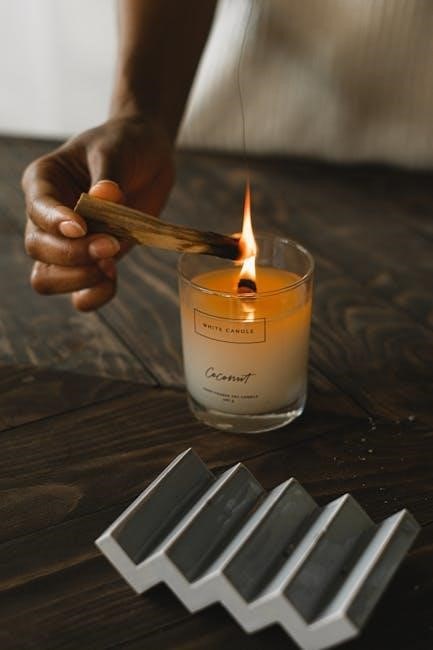
Terra Kaffe distinguishes itself through a deep commitment to both exceptional coffee and environmental responsibility. Founder Sahand Dilmaghani’s vision centers on delivering a regret-free experience‚ meticulously crafting a pristine journey for every coffee lover. This isn’t merely about brewing a cup; it’s about a holistic approach that values quality‚ convenience‚ and sustainability in equal measure.

The brand actively combats the waste associated with single-serve coffee pods‚ having already offset the use of over a million. This dedication reflects a core philosophy of minimizing environmental impact without compromising on the rich‚ flavorful coffee experience consumers desire. Terra Kaffe aims to redefine the coffee ritual‚ making it both indulgent and ecologically conscious.

What is the Terra Kaffe TK-01? ౼ A Super-Automatic Espresso Machine

The Terra Kaffe TK-01 is a revolutionary super-automatic espresso machine designed to seamlessly integrate into modern lifestyles. It’s a complete bean-to-cup solution‚ eliminating the need for separate grinders and complex brewing processes. Many users have found it capable of replacing all other coffee appliances‚ streamlining their morning routines with a single‚ elegant device.

This machine isn’t just about convenience; it’s about consistently delivering high-quality espresso. The TK-01’s appeal lies in its ability to provide a premium coffee experience with minimal effort‚ making freshly brewed coffee a readily accessible daily pleasure. It’s a testament to thoughtful design and a passion for exceptional coffee.

Key Features and Specifications

The TK-01 boasts bean-to-cup functionality‚ an integrated conical burr grinder‚ and a focus on sustainability by eliminating wasteful single-serve pods.

Bean-to-Cup Functionality: Grinding‚ Brewing‚ and Frothing

The Terra Kaffe TK-01 truly excels with its complete bean-to-cup process. This means fresh coffee beans are ground immediately before brewing‚ maximizing flavor and aroma – a significant advantage over pre-ground coffee. The machine seamlessly handles grinding‚ brewing‚ and even milk frothing‚ offering a convenient‚ all-in-one experience.

Users can enjoy a variety of coffee styles‚ from a simple espresso to more complex creations. This streamlined process‚ coupled with the machine’s design‚ has even led some users to replace all other countertop coffee appliances‚ highlighting its versatility and efficiency. It delivers a consistently high-quality cup‚ simplifying the morning routine.

Integrated Conical Burr Grinder – Grind Settings and Adjustment

The TK-01 features an integrated conical burr grinder‚ crucial for achieving optimal extraction and flavor. Unlike blade grinders‚ burr grinders produce a consistent particle size‚ leading to a more balanced brew. The machine allows for adjustable grind settings‚ empowering users to fine-tune their coffee based on bean type and personal preference.

Experimenting with grind size is key to unlocking the full potential of your beans. A finer grind is suitable for espresso‚ while a coarser grind works better for longer brews. This level of customization ensures a consistently delicious cup‚ tailored to individual tastes and allowing for exploration of different coffee profiles.

Water Tank Capacity and Filtration System

The Terra Kaffe TK-01 boasts a generous water tank capacity‚ minimizing the frequency of refills during extended use. This is particularly convenient for households with multiple coffee drinkers or those who enjoy brewing several cups throughout the day. Crucially‚ the machine incorporates a sophisticated water filtration system.

This filtration system actively reduces impurities and chlorine present in tap water‚ significantly enhancing the taste and aroma of the brewed coffee. Regular filter replacement‚ as outlined in the manual‚ is essential for maintaining optimal water quality and ensuring the longevity of the machine. Clean water equals cleaner‚ better-tasting coffee!

Setting Up Your Terra Kaffe TK-01

Initial setup involves cleaning and connecting to a water source‚ detailed in the manual‚ ensuring optimal performance and pristine coffee from the very first brew.

Initial Machine Setup and Cleaning

Before your first cup‚ a thorough cleaning process is crucial for the Terra Kaffe TK-01. The manual guides you through removing all packaging materials and wiping down the exterior with a damp cloth.

Crucially‚ run several cycles with only water to flush the system of any residual manufacturing dust or debris. This ensures a pristine taste from the outset. Pay close attention to the drip tray and grounds container‚ ensuring they are properly installed and empty before operation.

The manual emphasizes the importance of descaling regularly‚ but initial cleaning focuses on physical residue. This initial flush primes the machine for consistently excellent espresso‚ aligning with Terra Kaffe’s commitment to quality.

Connecting to a Water Source and Filling the Tank

The Terra Kaffe TK-01 utilizes a removable water tank‚ detailed in the manual‚ for convenient filling. Use filtered water only‚ as recommended‚ to prevent scale buildup and maintain optimal flavor. The tank’s capacity is substantial‚ minimizing frequent refills.

The manual clearly illustrates how to detach‚ fill‚ and securely reattach the tank‚ ensuring a watertight seal. Avoid overfilling‚ as this can cause spillage during operation. Proper water quality is paramount to the machine’s longevity and the quality of your espresso.

Terra Kaffe’s focus on sustainability extends to water usage; efficient operation and filtration contribute to a reduced environmental impact.

Adjusting Grind Size and Coffee Strength

The TK-01 manual provides detailed instructions on adjusting the integrated conical burr grinder. Finer settings yield stronger‚ more concentrated espresso‚ while coarser settings produce a lighter brew. Experimentation is key to finding your preferred taste profile.

Coffee strength is also customizable‚ allowing you to control the amount of coffee grounds used per brew. The manual guides you through adjusting these parameters‚ offering recommendations for different bean types and roast levels.

Sahand Dilmaghani’s vision for a pristine experience is reflected in these customizable features‚ ensuring a perfect cup tailored to individual preferences.

Brewing with the TK-01

The TK-01 manual details brewing single and double espresso shots‚ Americanos‚ and Long Blacks‚ delivering a freshly brewed cup—a morning ritual for many!

Brewing Espresso – Single and Double Shots

The Terra Kaffe TK-01 manual guides users through crafting perfect espresso. Begin by ensuring the machine is properly warmed up for optimal temperature stability. Select either the single or double shot option on the intuitive touchscreen interface. The machine automatically grinds the beans‚ tamps the grounds‚ and brews the espresso directly into your cup.

Experiment with different grind settings and coffee strength levels‚ as detailed in the manual‚ to personalize your espresso. The TK-01 consistently delivers rich‚ crema-topped espresso‚ rivaling café quality. Remember to purge the brew group briefly before each shot for the freshest flavor. Enjoy the convenience of a barista-style experience at home!

Making Americanos and Long Blacks

The Terra Kaffe TK-01 manual simplifies creating Americanos and Long Blacks. For an Americano‚ brew a shot (or double shot) of espresso directly into your cup‚ then add hot water to your desired strength – typically 1:2 or 1:3 espresso to water ratio. The machine’s hot water dispensing function makes this effortless.

A Long Black reverses this process: hot water is added first‚ followed by a shot of espresso‚ preserving the crema. The manual details precise water volumes for consistent results. The TK-01’s ability to deliver both strong espresso and hot water streamlines the process‚ offering café-style beverages with ease and convenience.

Frothing Milk – Steam Wand Operation and Techniques

The Terra Kaffe TK-01 manual guides users through mastering milk frothing with its steam wand. Begin by purging the wand to remove condensation. Submerge the wand tip just below the milk surface‚ creating a vortex. Slowly lower the pitcher to introduce air‚ building microfoam – essential for latte art and a velvety texture.

The manual emphasizes proper milk temperature (around 140-150°F/60-65°C). After frothing‚ tap the pitcher to eliminate large bubbles and swirl to integrate the foam. Clean the wand immediately after use with a damp cloth to prevent milk buildup‚ ensuring optimal performance and hygiene.

Maintenance and Cleaning

The Terra Kaffe TK-01 manual stresses daily cleaning and regular descaling to maintain peak performance and longevity‚ preventing milk buildup and ensuring quality.

Daily Cleaning Procedures

Following the Terra Kaffe TK-01 manual‚ daily maintenance is crucial for optimal performance. After each use‚ the drip tray and grounds container should be emptied and rinsed thoroughly with warm water. Wipe down the exterior of the machine with a damp cloth to remove any spills or coffee residue.

The brew group requires regular attention; the manual details a simple rinsing process. Pay close attention to the steam wand – immediately wipe it clean with a damp cloth after each milk frothing session to prevent milk from drying and clogging the nozzle. Consistent daily cleaning prevents buildup and ensures consistently delicious coffee‚ extending the machine’s lifespan and maintaining hygiene.

Descaling the Machine – Frequency and Process

The Terra Kaffe TK-01 manual recommends descaling every 2-3 months‚ depending on water hardness. Descaling removes mineral buildup that can affect brewing performance and coffee taste. Use a descaling solution specifically designed for espresso machines‚ following the manual’s precise dilution instructions.

The process involves running the solution through the machine‚ followed by several clear water rinses. The manual provides a step-by-step guide‚ including specific button combinations to initiate and complete the descaling cycle. Regular descaling ensures optimal water flow‚ consistent temperature‚ and prolongs the machine’s life‚ maintaining the quality of your brew.

Troubleshooting Common Issues

The Terra Kaffe TK-01 manual addresses frequent concerns. If the machine displays an error message‚ consult the manual’s dedicated troubleshooting section for specific codes and solutions. Weak coffee often indicates insufficient grounds or a coarse grind setting – adjust accordingly.

For issues with milk frothing‚ ensure the steam wand is properly purged and the milk is cold. If the machine isn’t brewing‚ check the water tank and bean hopper. The manual emphasizes regular cleaning and descaling to prevent many problems. Contact Terra Kaffe support for unresolved issues‚ referencing the machine’s serial number.

Sustainability and Environmental Impact

The Terra Kaffe TK-01’s podless design‚ as highlighted in its manual‚ actively reduces waste and demonstrates a commitment to environmental responsibility‚ offsetting over a million pods.

Terra Kaffe’s Commitment to Sustainability

Terra Kaffe‚ spearheaded by founder Sahand Dilmaghani‚ isn’t just building coffee machines; they’re fostering a movement towards conscious consumption. Their dedication to sustainability is deeply ingrained in the TK-01’s design and philosophy‚ moving beyond simply brewing a great cup.

The core of this commitment lies in the machine’s podless system‚ a direct response to the environmental impact of single-serve coffee pods. Terra Kaffe proudly reports having offset the use of over one million such pods‚ demonstrating a tangible positive effect. This isn’t merely marketing; it’s a fundamental principle guiding their operations and product development‚ as detailed within the TK-01 manual.

Podless System and Waste Reduction

The Terra Kaffe TK-01 distinguishes itself through its innovative podless system‚ a key feature highlighted in the user manual. This design directly addresses the significant waste generated by single-serve coffee pods‚ a growing environmental concern. By utilizing whole beans‚ the TK-01 eliminates the need for disposable plastic or aluminum capsules.

This commitment to waste reduction isn’t just a feature; it’s a core tenet of the Terra Kaffe brand‚ founded on principles of sustainability by Sahand Dilmaghani. The manual emphasizes the environmental benefits‚ noting the machine has already offset the use of over a million single-serve pods‚ contributing to a more eco-friendly coffee ritual.

Advanced Features and Customization

The TK-01 manual details user profiles for personalized brewing‚ hinting at potential smart features—allowing a customized coffee experience tailored to individual preferences.

User Profiles and Customization Options

The Terra Kaffe TK-01 manual extensively covers the machine’s user profile capabilities‚ a standout feature for households with varied coffee preferences. Each profile allows independent saving of grind size‚ coffee strength‚ and brew volume settings. This ensures every user receives a consistently personalized cup without requiring manual adjustments each time.

Beyond pre-sets‚ the manual details fine-tuning options. Users can adjust parameters like pre-infusion time and brewing temperature (within specified ranges) to further refine their espresso. The intuitive interface‚ as explained in the manual‚ makes navigating these settings straightforward‚ even for beginners. This level of customization elevates the TK-01 beyond a simple automatic machine‚ transforming it into a truly bespoke coffee experience.

Connectivity and Potential Smart Features

The Terra Kaffe TK-01 manual currently details limited connectivity features‚ focusing primarily on potential future updates; While the machine doesn’t presently boast full “smart” integration like app control or voice command‚ the manual hints at over-the-air firmware updates to expand functionality. These updates‚ according to the documentation‚ could introduce features like remote diagnostics and refined brewing algorithms.

The manual also mentions a potential for integration with smart home ecosystems‚ though specifics remain unconfirmed. This suggests Terra Kaffe envisions a future where the TK-01 can be seamlessly incorporated into a connected home environment. Users are encouraged to regularly check for updates to unlock these evolving smart capabilities‚ enhancing the machine’s overall user experience.

revelation book study guide

Revelation, a pivotal text, unveils God’s ultimate triumph; study guides aid comprehension of its complex symbolism and prophetic visions, offering believers encouragement.

BibleProject and other resources provide animated overviews, while commentaries from scholars like Gill and Tabb illuminate its historical and theological depths.

Understanding the letters to the seven churches is crucial, as Revelation encourages perseverance and expectant hope for Christ’s glorious return, a central theme.

Historical Context of Revelation

Revelation emerged from a period of intense persecution for Christians under the Roman Empire, particularly during the reign of Emperor Domitian in the late first century AD.
This era witnessed widespread hostility towards the faith, demanding unwavering loyalty to the emperor and participation in Roman state religion.

The seven churches addressed in Revelation 2-3 were real congregations located in Asia Minor (modern-day Turkey), serving as representative examples of the broader Christian community facing societal pressures.
These churches grappled with issues like false teaching, moral compromise, and external threats, mirroring the challenges experienced by believers throughout the Roman world.

Understanding this historical backdrop is vital for interpreting the book’s symbolic language and discerning its original message of hope and encouragement amidst tribulation. The context reveals Revelation wasn’t merely a futuristic prophecy, but a relevant word to first-century Christians.

Author and Date of Writing

Revelation identifies its author as “John,” who also refers to himself as a servant of Jesus Christ and a brother of James. Traditionally, this John is believed to be John the Apostle, one of the twelve disciples, though some scholars propose a different John associated with the early church.

Determining the precise date of writing remains debated among biblical scholars. The most widely accepted view places the composition around 95-96 AD, during the reign of Emperor Domitian.
However, earlier dates, around 68-69 AD during Nero’s persecution, are also proposed, based on internal evidence and historical considerations.

The later date aligns with the book’s mature theological themes and its reflection of established church structures. Regardless of the exact date, Revelation was penned within the first century, addressing the immediate concerns of its original audience while offering enduring hope.

Genre and Literary Style

Revelation defies easy categorization, blending elements of several genres. Primarily, it’s considered apocalyptic literature, characterized by symbolic visions, dramatic imagery, and a focus on God’s ultimate victory over evil. However, it also incorporates prophetic, epistolary (letter) and liturgical elements.

Its literary style is highly symbolic and figurative, employing vivid metaphors, allegories, and numerical symbolism. Understanding these symbols—like beasts, dragons, and numbers—is crucial for interpretation. The book utilizes a unique narrative structure, shifting between visions, dialogues, and poetic pronouncements.

John Gill’s Exposition highlights the importance of recognizing the book’s figurative language. Revelation isn’t a literal, chronological prediction of future events, but a powerful message of hope and encouragement conveyed through symbolic representation, accessible with biblical understanding.

Understanding Revelation’s Structure

Revelation unfolds through distinct sections: letters to seven churches, a throne room vision, and the unveiling of symbolic scrolls, revealing God’s plan.

The Seven Churches (Revelation 2-3)

Revelation’s initial focus centers on messages to seven churches in Asia Minor – Ephesus, Smyrna, Pergamum, Thyatira, Sardis, Philadelphia, and Laodicea.

These aren’t merely historical addresses; they represent universal church conditions throughout all ages, offering both commendation and rebuke.

Each message follows a pattern: Christ’s self-identification, knowledge of their deeds, commendation for faithfulness, criticism of shortcomings, and a call to repentance.

Promises are extended to “those who overcome,” highlighting the importance of perseverance and faithfulness amidst trials and temptations.

Studying these churches provides invaluable insight into the challenges faced by believers and the qualities God desires in His followers, offering practical guidance.

Understanding their specific contexts—spiritual, cultural, and geographical—deepens appreciation for the nuanced nature of these prophetic letters.

The Throne Room Vision (Revelation 4-5)

Revelation chapters 4 and 5 dramatically shift focus, unveiling a breathtaking vision of God’s heavenly throne room, a spectacle of glory and worship.

John witnesses God seated on His throne, surrounded by twenty-four elders and countless angelic beings, all offering ceaseless praise and adoration.

The scene emphasizes God’s sovereignty, majesty, and holiness, establishing the cosmic setting for the unfolding events of the apocalypse.

Central to this vision is the scroll sealed with seven seals, representing God’s plan for redemption and judgment, a mystery needing unlocking.

No one is found worthy to open the scroll except the “Lamb who was slain,” Jesus Christ, signifying His sacrificial victory and authority.

This vision powerfully portrays Christ’s role as both judge and redeemer, worthy of all power and glory, inspiring awe and reverence.

The Scroll and the Lamb (Revelation 5-8)

Revelation 5-8 builds upon the throne room vision, detailing the unfolding of God’s plan as the Lamb begins to open the seven-sealed scroll.

Each seal’s opening unleashes a series of judgments upon the earth – conquest, war, famine, death, and persecution – representing escalating tribulation.

These judgments aren’t arbitrary but are expressions of God’s righteous response to human sin and rebellion, a call for repentance and justice.

The four living creatures and twenty-four elders continue their worship, acknowledging God’s holiness and the Lamb’s redemptive sacrifice.

A great multitude from every nation joins in praise, demonstrating the universality of salvation through Christ, a testament to His grace.

The seventh seal introduces a period of silence followed by seven trumpets, signaling further judgments and intensifying the cosmic conflict.

Key Symbols and Imagery in Revelation

Revelation employs rich symbolism – numbers like 7 and 12, beasts, and the woman with the child – revealing spiritual truths and prophetic meanings.

Numbers in Revelation (7, 12, 666)

Numbers within Revelation aren’t arbitrary; they carry significant symbolic weight, demanding careful study. The number 7 frequently represents completeness or perfection – seen in the seven churches, seven spirits, and seven seals.

Conversely, 12 symbolizes God’s people, often linked to the twelve tribes of Israel and the twelve apostles, signifying divine authority and comprehensive representation.

However, 666 stands apart, famously identified with the “beast,” representing ultimate imperfection and rebellion against God. Interpretations vary, but it’s widely understood as a symbol of earthly power opposing divine rule.

Understanding these numerical patterns unlocks deeper layers of meaning within Revelation’s prophetic visions, enriching comprehension of its message and unveiling its spiritual depth.

Beasts and Dragons

Beasts and dragons dominate Revelation’s imagery, representing powerful, antagonistic forces opposing God and His people. The dragon, often equated with Satan, embodies ultimate evil and seeks to devour the Christ child and persecute believers.

Various beasts emerge, symbolizing earthly kingdoms and political powers aligned against God. The beast from the sea represents a tyrannical, persecuting empire, while the beast from the earth serves as its deceptive propagandist.

These creatures aren’t literal beings, but symbolic representations of spiritual realities – the forces of evil actively working to undermine God’s plan and mislead humanity.

Deciphering their symbolism requires understanding the historical context and recognizing their role in the cosmic conflict between good and evil, as depicted throughout Revelation.

The Woman and the Child

The woman and the child in Revelation 12 represent a profound symbolic narrative. The woman, often interpreted as Israel or the Church, is depicted as giving birth to a male child, symbolizing Jesus Christ, the Messiah.

This imagery highlights the protective nature of God towards His people and the ongoing spiritual battle surrounding the arrival and reign of Christ. The dragon, representing Satan, actively seeks to destroy the child from birth.

The woman’s flight into the wilderness signifies the Church’s period of persecution and preservation throughout history, sustained by God’s provision.

Understanding this symbolism reveals the intense spiritual warfare at play and the ultimate triumph of Christ over evil, offering hope and encouragement to believers facing trials.

Major Themes in Revelation

Revelation powerfully proclaims God’s absolute sovereignty, the relentless conflict between good and evil, and the enduring hope and steadfast perseverance for faithful believers.

The Sovereignty of God

Revelation emphatically asserts God’s ultimate control and authority over all creation and history, even amidst chaos and suffering. This isn’t merely a philosophical concept, but a vibrant reality displayed throughout the book’s prophetic visions.

From the opening depiction of Christ among the lampstands representing the churches, to the final glorious vision of the New Jerusalem, God remains firmly on the throne. The seemingly unstoppable forces of evil, represented by the beasts and the dragon, operate only within the parameters of His permissive will.

Understanding this divine sovereignty is crucial for believers facing trials; it provides unwavering assurance that God is working all things together for good, according to His perfect plan. Revelation doesn’t present a struggle where God is merely reacting, but one where He orchestrates events to achieve His ultimate purposes, demonstrating His power and faithfulness.

This theme offers profound comfort and strengthens faith, reminding readers that victory is assured through God’s unwavering reign.

The Conflict Between Good and Evil

Revelation vividly portrays an epic cosmic battle between the forces of good, led by God and the Lamb, and the forces of evil, embodied by Satan and his demonic allies. This isn’t a simplistic duality, but a complex struggle with profound spiritual implications.

The imagery of beasts and dragons symbolizes the power and deception of evil, actively opposing God’s kingdom and persecuting His followers. However, Revelation consistently emphasizes that evil is ultimately defeated; God’s power surpasses all opposition.

This conflict manifests in various ways – through persecution of believers, false teachings, and the allure of worldly power. Yet, the book assures us that God’s faithful will persevere, sustained by His grace and ultimately victorious with Christ.

Understanding this struggle encourages believers to remain steadfast in their faith, resisting temptation and actively participating in God’s redemptive work, knowing that ultimate triumph belongs to Him.

Hope and Perseverance for Believers

Revelation, despite its depictions of tribulation, is fundamentally a book of hope for believers. It assures Christians that even amidst suffering and persecution, God remains sovereign and faithful to His promises. The letters to the seven churches specifically encourage perseverance through trials.

The book’s imagery, while symbolic, reinforces the certainty of ultimate victory. The Lamb who was slain—Jesus Christ—is presented as the conquering King, guaranteeing a future free from pain, sorrow, and death for those who remain steadfast.

This hope isn’t passive; it fuels active obedience and courageous witness. Believers are called to maintain their testimony, resist compromise, and eagerly anticipate Christ’s return, knowing their faithfulness will be rewarded.

Revelation provides a powerful reminder that suffering is temporary, and eternal glory awaits those who endure, offering strength and encouragement in the face of adversity.

Different Interpretational Approaches

Revelation’s interpretation varies: Preterist views events as past, Historicist sees a church history timeline, and Futurist anticipates future fulfillment of prophecies.

Preterist View

The Preterist interpretation of Revelation posits that most, if not all, of the prophecies within the book were fulfilled in the first century AD, primarily concerning events surrounding the destruction of the Second Temple in Jerusalem in 70 AD.

Proponents of this view believe the book was written to encourage Christians facing persecution under the Roman Empire, offering hope amidst immediate trials rather than predicting distant future events.

Key symbols and imagery are understood as allusions to historical realities of that era – the beast representing Rome, for example – rather than futuristic entities.

This approach emphasizes understanding Revelation within its original historical context, focusing on its relevance to the first-century church and its struggles. It minimizes or rejects a future-focused apocalyptic reading.

Essentially, the Preterist view sees Revelation as a historical document addressing a specific time and place, offering comfort and guidance to believers then.

Historicist View

The Historicist interpretation views Revelation as a symbolic prophecy outlining the entire course of church history, from the apostolic age to the Second Coming of Christ. This perspective interprets the book as a chronological unfolding of events.

Each symbol, beast, and seal is believed to represent specific historical figures, empires, or movements – for instance, the Papacy often identified as the Antichrist in this framework.

Proponents attempt to correlate the prophecies with major historical events like the rise and fall of empires, the Reformation, and periods of religious persecution.

This view gained prominence during the Reformation, as Protestants sought to demonstrate the historical failings of the Catholic Church through Revelation’s imagery.

However, the Historicist approach often faces challenges due to subjective interpretations and difficulties in definitively linking symbols to specific historical occurrences.

Futurist View

The Futurist interpretation posits that most of Revelation, specifically chapters 4-22, describes events that will unfold in the future, immediately preceding Christ’s return. It largely disregards applying the prophecies to past historical events.

This view typically anticipates a seven-year tribulation period, marked by escalating judgments and the emergence of the Antichrist, a powerful political and religious figure who will oppose God.

The seals, trumpets, and bowls are understood as sequential judgments poured out during this tribulation, culminating in the battle of Armageddon and the establishment of Christ’s millennial kingdom.

Popularized in the 19th century by figures like John Nelson Darby, the Futurist view heavily influences dispensational premillennialism, a widely held eschatological position.

Critics argue that this approach can lead to speculative date-setting and overlooks the book’s relevance to the original audience.

Practical Application for Today

Revelation empowers believers to face trials victoriously, maintain unwavering hope, and live faithfully while eagerly anticipating Christ’s imminent and glorious return.

Encouragement for Trials and Tribulations

Revelation, despite its often-intimidating imagery, fundamentally serves as a beacon of hope for Christians facing persecution and hardship. The letters to the seven churches directly address believers enduring various trials, offering specific encouragement to remain steadfast in their faith.

The book assures believers that God is sovereignly in control, even amidst chaos and suffering. Understanding the ultimate victory of Christ over evil, as depicted in Revelation, provides strength and perspective during times of tribulation.

It reminds us that our struggles are not meaningless but are part of a larger cosmic conflict with a guaranteed triumphant conclusion. This perspective fosters perseverance and a confident expectation of God’s ultimate justice and reward.

Study guides and commentaries help unlock these encouraging truths, empowering believers to navigate difficulties with courage and unwavering faith, knowing their hope is secure in Christ.

Living a Victorious Christian Life

Revelation isn’t merely about future events; it’s a call to present-day faithfulness; The book challenges believers to maintain their testimony, resisting compromise and remaining true to Christ amidst a world increasingly hostile to biblical values. A victorious Christian life, according to Revelation, is characterized by unwavering obedience and steadfast devotion.

Study guides emphasize that overcoming—referenced repeatedly in the letters to the seven churches—isn’t about avoiding hardship, but about remaining faithful through it. This requires actively engaging with God’s Word and cultivating a deep relationship with Him.

Understanding the symbolic imagery and prophetic warnings motivates believers to prioritize spiritual disciplines and live with eternal perspectives. It’s a life marked by holiness, integrity, and a passionate pursuit of God’s will, reflecting the character of the Lamb who conquered.

Commentaries illuminate how to practically apply these principles, fostering a life of genuine victory in Christ.

Looking Forward to Christ’s Return

Revelation culminates in the glorious return of Jesus Christ, the central hope for believers. Study guides highlight this promise as the ultimate resolution to the conflict between good and evil, offering comfort and assurance amidst present tribulations. The book paints a vivid picture of Christ’s reign, establishing justice and peace eternally.

Understanding the prophetic timelines and symbolic representations of His coming fuels expectant anticipation. Revelation isn’t intended to breed fear, but rather to inspire holy living and unwavering faith, knowing that victory is assured through Christ.

Commentaries emphasize that focusing on His return provides perspective, enabling believers to navigate earthly challenges with resilience and joy. It’s a call to readiness, urging us to live as ambassadors of His kingdom, proclaiming the hope of salvation.

This hopeful outlook, rooted in Revelation’s promises, transforms our present reality.

ftxs12lvju manual

FTXS12LVJU Manual: Comprehensive Guide

This comprehensive guide details the FTXS12LVJU air conditioner, covering installation, operation, maintenance, and repair procedures. It includes safety precautions and technical data for optimal performance.

The FTXS12LVJU is a high-performance split system air conditioner designed for efficient cooling and heating. This manual provides essential information for installers, technicians, and users. It covers models including FTXS09LVJU, FTXS12LVJU, and CTXS07LVJU. Understanding the safety precautions is crucial before installation or service.

This unit utilizes R410A refrigerant and features a heat pump system. Proper installation, as outlined in this guide, ensures optimal operation and longevity. Refer to the detailed sections for repair procedures and component identification. Always prioritize safety and follow the guidelines provided.

Model Specifications: FTXS12LVJU

The FTXS12LVJU is part of the R410A Split Series, offering both cooling and heating capabilities. It’s paired with outdoor unit RXS12LVJU. This manual applies to related models like FTXS09LVJU and CTXS07LVJU. Detailed technical data, including temperature legends (Ta, Tb), are provided for performance analysis.

Specific specifications regarding capacity, power consumption, and dimensions are available in the technical data section. Ensure compatibility with the power supply requirements before installation. Refer to the parts list for available service components and repair options.

Safety Precautions

Prioritize safety during installation and service of the FTXS12LVJU. Carefully read all precautions before proceeding. If refrigerant leakage occurs during repair or maintenance, immediately ventilate the area to prevent health hazards. Use stranded cable for interunit wiring as recommended.

Always measure actual refrigerant pipe distances before installation. Ensure proper grounding and adhere to all electrical safety standards. Only qualified personnel should perform repair work, utilizing listed service parts and appropriate tools.

General Safety Guidelines

Installation must adhere to local regulations and safety codes. Disconnect power before any service or maintenance. Ensure the unit is properly grounded to prevent electrical shock. Never attempt repair without proper training and tools.

Keep the surrounding area clear of flammable materials. Always consult the full installation manual for detailed instructions. For specialist maintenance, contact an authorized service shop. Follow all warnings and cautions outlined within this guide for safe operation of the FTXS12LVJU.

Refrigerant Handling Safety

R410A refrigerant requires careful handling. If refrigerant gas leaks during repair or service, immediately ventilate the area. Avoid direct contact with refrigerant, as it can cause frostbite.

Ensure proper recovery and disposal of refrigerant according to environmental regulations. Never release refrigerant into the atmosphere. Use appropriate personal protective equipment, including gloves and eye protection. Always measure the actual distance between refrigerant pipes before installation. Consult a qualified technician for refrigerant-related service.

Installation Procedures

Proper installation is crucial for optimal performance of the FTXS12LVJU. Begin with a thorough pre-installation checklist, verifying all components are present and undamaged. Carefully install refrigerant pipes, ensuring correct bending and curing techniques are employed.

Always measure the actual distance between liquid and gas pipe ends before installation. Recommend stranded cable for interunit wiring. Follow all safety precautions during installation, and consult the complete installation manual for detailed instructions and model-specific guidance.

Pre-Installation Checklist

Before beginning installation of the FTXS12LVJU, a detailed checklist is essential. Verify the indoor and outdoor units (RXS09LVJU/RXS12LVJU) are present and undamaged. Confirm all necessary components, including refrigerant pipes and wiring, are available.

Ensure the installation location meets the specified requirements. Check for adequate space and structural support. Review safety precautions thoroughly. Having all items ready streamlines the process and ensures a secure, efficient installation.

Refrigerant Pipe Installation

Proper refrigerant pipe installation is crucial for FTXS12LVJU performance. Always measure the actual distance between the liquid and gas pipe ends before installation. When bending or curving pipes, avoid kinking to maintain refrigerant flow.

Use appropriate tools for cutting and flaring. Ensure tight connections to prevent leaks. Following these guidelines, alongside the installation manual’s diagrams, guarantees optimal cooling and heating efficiency, and prevents potential system failures.

Electrical Connections

Safe and correct electrical connections are vital for the FTXS12LVJU air conditioner. It is recommended to use stranded cable for interunit wiring, ensuring flexibility and reliability. Adhere strictly to local electrical codes and regulations during installation.

Verify the power supply requirements match the unit’s specifications; Incorrect wiring can cause malfunctions or pose a safety hazard. Always disconnect power before making any electrical connections or performing service.

Interunit Wiring Recommendations

For optimal performance and reliability of the FTXS12LVJU, stranded cable is strongly recommended for all interunit wiring connections. This type of cable offers increased flexibility, crucial for navigating tight spaces within the system.

Ensure proper cable sizing to handle the electrical load without voltage drop. Securely connect all wires, utilizing appropriate connectors and following the wiring diagrams provided in the installation manual. Double-check all connections before restoring power.

Power Supply Requirements

The FTXS12LVJU air conditioner requires a dedicated power supply circuit, adhering to local and national electrical codes. Verify the voltage and frequency match the unit’s specifications, typically 220-240V/50Hz or 110-120V/60Hz, depending on the region.

A properly sized circuit breaker is essential for protection. Grounding is mandatory for safety. Consult a qualified electrician to ensure correct installation and compliance with all applicable regulations before powering on the unit.

Operation Manual Overview

The FTXS12LVJU operation manual provides detailed instructions for utilizing all features of your air conditioning system. It explains the control panel functions, including mode selection, temperature adjustment, and fan speed control.

Users will learn about cooling and heating modes, timer settings, and any specialized functions. Familiarizing yourself with the manual ensures efficient operation and maximizes comfort. Refer to the manual for troubleshooting tips and optimal performance guidance.

Understanding the Control Panel

The FTXS12LVJU control panel is designed for intuitive operation. Key buttons include power, mode selection (cooling, heating, auto), temperature up/down, and fan speed adjustment. The display indicates the set temperature, operating mode, and any active features.

Understanding each button’s function allows for precise control of your indoor climate. The manual details specific button combinations for advanced settings like timer functions and error code displays. Proper use ensures optimal comfort and efficiency.

Operating Modes: Cooling & Heating

The FTXS12LVJU offers versatile cooling and heating modes. In cooling mode, the unit removes heat from the room, lowering the temperature. Heating mode reverses this process, providing warmth during colder months. Auto mode intelligently switches between cooling and heating to maintain a set temperature.

Fan speed can be adjusted within each mode for personalized comfort. The operation manual details optimal settings for various room sizes and external temperatures, maximizing efficiency and user satisfaction.

Maintenance and Cleaning

Regular maintenance ensures optimal performance and longevity of your FTXS12LVJU air conditioner. Key tasks include frequent air filter cleaning to maintain air quality and efficiency. Periodic coil cleaning is also crucial, removing dust and debris that can hinder heat exchange.

For specialist maintenance, it’s recommended to contact a qualified service shop. Always use listed service parts when conducting any repair work, ensuring compatibility and reliability.

Air Filter Cleaning

Consistent air filter cleaning is vital for maintaining optimal performance of the FTXS12LVJU. Regularly inspect the filters – typically monthly – for dust and debris accumulation. Remove the filters carefully and vacuum or wash them with mild detergent and water.

Ensure filters are completely dry before reinstalling to prevent mold growth. Clean filters improve air quality, enhance cooling/heating efficiency, and prolong the unit’s lifespan.

Coil Cleaning Procedures

Periodically cleaning the indoor and outdoor coils of the FTXS12LVJU is crucial for efficient operation. Before cleaning, disconnect the power supply. Use a commercially available coil cleaner, following the product’s instructions carefully.

Gently brush the coils to remove dirt and debris, avoiding damage to the fins. Rinse thoroughly with water, ensuring no cleaner residue remains. Clean coils maximize heat transfer, improving cooling and heating performance and reducing energy consumption.

Troubleshooting Common Issues

Addressing issues promptly ensures optimal FTXS12LVJU performance. If the unit isn’t cooling or heating, check the air filter and thermostat settings first. Verify power supply and circuit breaker status.

Consult the error code list within this manual to diagnose specific problems. If refrigerant leaks are suspected, immediately ventilate the area and contact a qualified service technician. Do not attempt repair work yourself; professional assistance is vital for safety and effectiveness.

Unit Not Cooling/Heating

If your FTXS12LVJU isn’t cooling or heating, several factors could be at play. Begin by inspecting the air filter for blockage – a dirty filter restricts airflow. Confirm the thermostat is set correctly to the desired mode and temperature.

Check the outdoor unit for obstructions and ensure proper ventilation. A frozen coil can also cause issues. If problems persist, consult the error code section or contact a qualified service professional for repair assistance.

Error Codes and Their Meanings

The FTXS12LVJU air conditioner utilizes error codes to diagnose internal issues. These codes, displayed on the unit or remote control, indicate specific problems. For example, a code might signal a refrigerant leak, sensor malfunction, or communication error between indoor and outdoor units.

Refer to the detailed error code list within this manual for precise definitions and recommended troubleshooting steps. Service professionals utilize these codes during repair to efficiently identify and resolve the issue.

Service Access and Component Location

Accessing the FTXS12LVJU’s internal components requires removing the service lid. This lid is an opening/closing type, secured by a screw. Carefully remove the screw and pull the lid diagonally downwards. Inside, key components like the control board, fan motor, and refrigerant coils are readily identifiable.

Proper identification is crucial for repair and maintenance. Refer to detailed diagrams within this manual for precise component locations. Always disconnect power before accessing internal parts to ensure safety.

Opening the Service Lid

To begin service access on the FTXS12LVJU, locate the service lid screw. Using the appropriate screwdriver, carefully remove this screw. Once the screw is removed, gently grasp the lid and pull it diagonally downwards. This action releases the lid, allowing for access to internal components.

Exercise caution during removal to avoid damaging the lid or underlying parts. Ensure the area is well-lit for clear visibility. Remember to disconnect the power supply before proceeding with any internal inspections or repair work.

Identifying Key Components

Once the service lid is removed on the FTXS12LVJU, several key components become visible. These include the compressor, fan motor, control board, and refrigerant coils. The heat pump system’s indoor and outdoor unit details are crucial for diagnostics.

Locate the electrical connections and refrigerant pipes. Familiarize yourself with their arrangement before undertaking any repair or maintenance. Refer to the parts list for specific component identification. Proper understanding aids efficient troubleshooting and component replacement.

Repair Procedures

When performing repair work on the FTXS12LVJU, always use parts listed in the service parts list and appropriate tools. If refrigerant leaks occur during service, immediately ventilate the area. Addressing refrigerant leaks requires specialized skills and equipment.

Component replacement should follow manufacturer guidelines. Ensure proper electrical connections and refrigerant charging after any repair. Prioritize safety and consult the technical data for correct specifications. Incorrect procedures can compromise system performance and safety.

Refrigerant Leak Repair

If a refrigerant leak is detected in the FTXS12LVJU, immediate action is crucial. First, ventilate the area thoroughly. Locating the leak requires specialized tools and knowledge; professional assistance is often recommended. Once identified, the leak must be stopped using appropriate brazing or sealing techniques.

After repair, a vacuum must be pulled, and the system recharged with R410A refrigerant; Verify the repair with a leak detector before full operation. Improper repair can lead to further leaks and system damage. Always adhere to safety guidelines when handling refrigerants.

Component Replacement Guidelines

When replacing components in the FTXS12LVJU, always use genuine Daikin service parts. Refer to the parts list for correct part numbers and compatibility. Ensure the unit is completely de-energized before beginning any replacement procedure. Carefully disconnect and reconnect wiring, noting the original configuration.

Proper tools are essential for safe and effective component replacement. Follow the service manual’s instructions meticulously. After replacement, verify functionality and check for any new leaks or issues. Incorrect installation can void the warranty and compromise system performance.

Service Manual Information

The FTXS12LVJU service manual provides detailed insights into the heat pump system, covering both indoor (CTXS07LVJU, FTXS12LVJU) and outdoor (RXS09LVJU, RXS12LVJU) unit specifics. It outlines system operation, component locations, and troubleshooting procedures.

This manual is crucial for qualified technicians performing maintenance or repairs. It details the system’s cooling and heating cycles, electrical schematics, and diagnostic charts. Accessing this information ensures accurate diagnosis and efficient service, maintaining optimal performance and longevity of the unit.

Heat Pump System Overview

The FTXS12LVJU utilizes a sophisticated heat pump system for both cooling and heating. This system efficiently transfers heat, offering energy savings compared to traditional methods. The indoor unit (CTXS07LVJU, FTXS12LVJU) circulates air, while the outdoor unit (RXS09LVJU, RXS12LVJU) exchanges heat with the outside environment.

Refrigerant R410A is crucial to this process, absorbing and releasing heat as it cycles through the system. Understanding this cycle is vital for effective troubleshooting and service, ensuring optimal performance and consistent temperature control.

Indoor and Outdoor Unit Details

The FTXS12LVJU system comprises distinct indoor and outdoor units. Indoor units, like the CTXS07LVJU and FTXS12LVJU, distribute conditioned air within the space. Corresponding outdoor units, RXS09LVJU or RXS12LVJU, are responsible for heat exchange with the external environment.

Each unit features specific components essential for operation. Proper identification of these parts is crucial during service or repair. Refer to the parts list for detailed diagrams and component locations within each unit, ensuring accurate maintenance and replacements.

Parts List and Availability

Obtaining the correct replacement parts is vital for maintaining the FTXS12LVJU’s performance. A detailed service parts list, specific to each model (FTXS09LVJU, FTXS12LVJU, etc.), is essential for identifying components. Always use parts listed in the applicable model’s service parts list.

Availability may vary depending on your location. Contact authorized DAIKIN dealers or service centers to inquire about part availability and ordering procedures. Ensure you have the model and part numbers when placing an order for swift and accurate fulfillment.

Locating Service Parts

Identifying the correct service parts for your FTXS12LVJU begins with the detailed parts list found in the service manual. This list categorizes components by function and provides specific part numbers for accurate ordering. Referencing the indoor and outdoor unit details (RXS09LVJU, RXS12LVJU) is crucial.

DAIKIN’s official website and authorized dealer networks are primary resources. Utilize model-specific diagrams to pinpoint the required part. Be sure to use parts listed in the service parts list to ensure compatibility and maintain warranty validity.

Ordering Replacement Parts

To order replacement parts for your FTXS12LVJU, contact an authorized DAIKIN dealer. Provide the precise part number obtained from the service parts list to avoid errors. Locating service parts efficiently requires this detail.

Alternatively, DAIKIN’s online parts portal may offer direct ordering options. Ensure the dealer or portal confirms part availability and compatibility with your specific model. Always verify the part number before finalizing the order to guarantee a successful repair.

Technical Data

The FTXS12LVJU utilizes R410A refrigerant, a standard in modern air conditioning systems. Temperature legends are crucial for performance assessment: Ta represents outdoor temperature, while Tb indicates the outdoor heat exchanger temperature.

Understanding these parameters aids in accurate diagnostics and efficient troubleshooting; Detailed specifications, including cooling and heating capacities, are available in the full service manual. Refer to these values when conducting maintenance or repair work to ensure optimal system operation.

Temperature Legends (Ta, Tb)

Understanding ‘Ta’ and ‘Tb’ is vital for accurate FTXS12LVJU system analysis. ‘Ta’ specifically denotes the outdoor ambient temperature, a key factor influencing cooling and heating performance. ‘Tb’ represents the temperature of the outdoor heat exchanger, directly impacting refrigerant cycle efficiency.

These legends are crucial during service and troubleshooting, allowing technicians to assess operational parameters. Proper interpretation of Ta and Tb values ensures correct diagnosis and effective repair strategies, maintaining optimal system functionality.

Refrigerant Type: R410A

The FTXS12LVJU air conditioner is designed to operate with R410A refrigerant. This refrigerant offers enhanced cooling capacity and improved energy efficiency compared to older alternatives. Proper handling of R410A is crucial, requiring certified technicians for any service or repair involving the refrigerant circuit.

Always adhere to safety guidelines when dealing with R410A, ensuring adequate ventilation and using appropriate recovery equipment. Using the correct refrigerant type is essential for optimal performance and longevity of the FTXS12LVJU unit.

Warranty Information

The FTXS12LVJU air conditioner is covered by a limited warranty, protecting against defects in materials and workmanship. Coverage details vary based on the component and registration status. To initiate a claim, retain proof of purchase and contact the service shop where the unit was originally purchased.

Warranty does not cover issues arising from improper installation, misuse, or lack of regular maintenance. Review the full warranty documentation for specific terms and conditions. Proper repair work must be performed by qualified technicians to maintain warranty validity.

Coverage Details

The FTXS12LVJU warranty typically covers compressor defects for a specified period, often five to seven years. Parts and labor are usually covered for the first year, protecting against manufacturing flaws. Coverage extends to components essential for heating and cooling functionality.

Limitations apply; cosmetic issues, refrigerant recharge after leaks (unless due to defect), and filters are generally excluded. Registration within a defined timeframe often extends the warranty period. Proper maintenance and repair are crucial for claim approval.

Claim Procedures

To initiate a warranty claim for your FTXS12LVJU, contact the dealer where you purchased the unit. Provide proof of purchase, the model and serial number, and a detailed description of the issue. A qualified technician may be dispatched for diagnosis.

Keep records of all communication and service visits. Claims are subject to verification and may require component return for inspection. Ensure maintenance records are available. Daikin’s approval is necessary before undertaking significant repair work.

wheel bolt pattern guide pdf

Wheel Bolt Pattern Guide: A Comprehensive Overview

Mastering vehicle wheel fitment is now easier with our printable 5-lug bolt pattern chart, offering accurate measurements for common patterns like 5×114.3.

Download the comprehensive PDF guide, ensuring compatibility across Ford, Honda, BMW, and more, eliminating guesswork at swap meets or assisting friends’ purchases.

Understanding Wheel Bolt Patterns

Delving into wheel bolt patterns reveals a crucial aspect of vehicle compatibility and safety, often simplified through readily available PDF guides. These patterns, denoted by numbers like 5×114.3, represent the number of lug nuts (the first number) and the diameter of the circle they form (the second number, in millimeters).

A downloadable wheel bolt pattern guide acts as an invaluable resource, providing a comprehensive list for easy reference. Understanding this system prevents mismatched wheel installations, which can lead to vibration, instability, and potentially dangerous situations while driving. Some wheels even accommodate multiple bolt patterns, expanding their usability across various vehicle makes and models.

Utilizing a printable chart or online database streamlines the process of identifying the correct bolt pattern for your vehicle, ensuring a secure and proper fit. These resources are particularly helpful when considering aftermarket wheels or assisting others with their wheel selections.

What is a Wheel Bolt Pattern?

A wheel bolt pattern defines the number and arrangement of studs on a wheel, crucial for proper mounting and detailed in PDF guides.

Defining Bolt Circle Diameter (BCD)

The Bolt Circle Diameter (BCD), a fundamental aspect detailed within comprehensive wheel bolt pattern guides – often available as PDFs – represents the imaginary circle that passes through the center of each wheel stud or bolt hole.

Understanding BCD is paramount because it dictates which wheels are compatible with your vehicle’s hub. Measuring BCD isn’t simply the distance across the wheel; it’s a calculated diameter passing through the stud centers.

PDF resources frequently illustrate this with diagrams, showing how to accurately measure from stud center to stud center, then calculate the diameter. Incorrect BCD matching can lead to improper wheel seating, vibration, and potentially dangerous driving conditions.

These guides emphasize that the BCD is expressed in millimeters or inches, and it’s crucial to use the correct unit of measurement when comparing wheel specifications. Always consult a reliable PDF or online resource to confirm your vehicle’s BCD before purchasing new wheels.

Understanding Lug Nut Size and Thread Pitch

Beyond the bolt pattern, comprehensive wheel bolt pattern guides – frequently found as downloadable PDFs – highlight the critical importance of lug nut size and thread pitch for secure wheel mounting.

Lug nut size refers to the diameter of the nut itself, while thread pitch defines the distance between threads. Mismatched lug nuts can damage wheel studs or fail to tighten properly, creating a severe safety hazard.

PDF guides often include charts detailing compatible lug nut sizes and thread pitches for various vehicle makes and models. They emphasize that these specifications are not interchangeable.

Always verify that the lug nuts you use match both the wheel studs and the wheel’s lug seat style (conical, ball, or flat). Utilizing the correct components, as detailed in these resources, ensures proper clamping force and prevents wheel detachment while driving.

Why is Knowing Your Bolt Pattern Important?

PDF wheel bolt pattern guides ensure wheel compatibility, preventing incorrect purchases and avoiding potentially dangerous safety risks associated with improperly fitted wheels.

Ensuring Wheel Compatibility

Utilizing a wheel bolt pattern guide, particularly in PDF format, is absolutely crucial for guaranteeing compatibility when selecting new wheels for your vehicle. These guides meticulously detail the specific bolt patterns required for various makes and models, eliminating the frustrating guesswork often involved in wheel shopping.

Incorrect bolt patterns simply won’t align with your vehicle’s wheel studs, rendering the wheels unusable. A downloadable PDF provides a readily accessible reference point, allowing you to quickly verify if a prospective wheel set will physically fit your car. This proactive approach saves valuable time and prevents costly mistakes, ensuring a seamless and successful wheel upgrade.

Furthermore, these guides often include information on offset and center bore, additional factors impacting wheel fitment. By consulting a comprehensive PDF resource, you can confidently choose wheels that not only bolt on correctly but also maintain proper clearance and handling characteristics.

Avoiding Safety Risks

Employing a wheel bolt pattern guide, especially a downloadable PDF, isn’t merely about convenience; it’s a critical safety measure. Incorrectly fitted wheels, due to a mismatched bolt pattern, pose significant risks while driving, potentially leading to catastrophic consequences.

Wheels that aren’t securely mounted can loosen during operation, causing vibrations, steering instability, and ultimately, wheel detachment. This can result in loss of vehicle control and a serious accident. A PDF guide ensures you select wheels specifically designed for your vehicle’s configuration, minimizing this danger.

Ignoring bolt pattern compatibility demonstrates a disregard for vehicle safety. Always verify the pattern before purchasing, referencing a reliable PDF resource to confirm proper fitment and secure wheel attachment, safeguarding yourself and others on the road.

Common Wheel Bolt Patterns

PDF guides detail popular patterns like 5×114.3, 5×120, and 5×112, crucial for identifying compatible wheels across various vehicle makes and models.

5×114.3 Bolt Pattern – Vehicles and Applications

The 5×114.3 bolt pattern is exceptionally common, appearing on a diverse range of vehicles, making accurate identification vital when sourcing new wheels. Printable PDF guides specifically highlight this pattern’s prevalence across numerous makes and models, simplifying the selection process.

Vehicles frequently utilizing this bolt pattern include many Honda and Toyota models, as well as certain Nissan, Mazda, and Hyundai vehicles. Beyond passenger cars, it’s also found on some SUVs and crossovers. A comprehensive PDF resource will list specific years and trims for each vehicle, ensuring precise matching.

Understanding the applications of this pattern is crucial for avoiding compatibility issues. The downloadable guides provide a detailed reference, allowing users to quickly verify if a wheel with a 5×114.3 bolt pattern will fit their specific vehicle, preventing costly mistakes and ensuring safe operation.

5×120 Bolt Pattern – Vehicles and Applications

The 5×120 bolt pattern is prominently featured on BMW vehicles, making it a key specification within wheel fitment guides and PDF resources. It’s also commonly found on several other European and American car brands, demanding careful consideration when upgrading wheels.

Vehicles like many BMWs (3 Series, 5 Series, X models), certain older Volkswagens, and some General Motors SUVs utilize this pattern. A detailed PDF chart will delineate specific model years and variations to guarantee accurate wheel selection. Knowing this is essential for proper fitment.

Utilizing a downloadable PDF guide focused on the 5×120 pattern ensures compatibility, preventing issues like improper wheel seating or lug nut misalignment. These resources streamline the process, offering a quick reference for enthusiasts and mechanics alike, ensuring safe and reliable vehicle operation.

5×112 Bolt Pattern – Vehicles and Applications

The 5×112 bolt pattern is widely adopted by Volkswagen Group vehicles, including Audi, Volkswagen, and Škoda, making it a crucial entry in any comprehensive wheel bolt pattern PDF guide. This pattern also extends to some Mercedes-Benz models, increasing its prevalence.

Common applications include Audi A4, A6, and Q series models, as well as Volkswagen Passat, Golf, and Tiguan. A detailed PDF resource will specify exact model year compatibility, as variations can occur. Accurate information is paramount for safe wheel installation.

Downloading a dedicated 5×112 PDF chart simplifies wheel selection, avoiding potential fitment problems. These guides provide a quick reference for enthusiasts and professionals, ensuring proper lug nut engagement and preventing wheel detachment, ultimately enhancing vehicle safety.

How to Determine Your Vehicle’s Bolt Pattern

Utilize a downloadable PDF wheel bolt pattern guide, or measure the bolt circle diameter directly for accurate results and safe wheel selection.

Measuring the Bolt Circle Diameter

Accurately determining the Bolt Circle Diameter (BCD) is crucial for ensuring wheel compatibility and safety; a PDF wheel bolt pattern guide can assist, but direct measurement offers precision.

Begin by identifying a lug nut and imagining a circle connecting the centers of all lug nuts – this is your BCD.

Measure from the center of one lug nut to the center of the opposite lug nut, directly across the wheel; repeat this measurement several times, taking the average for accuracy.

Alternatively, measure from the center of any lug nut to the center of an adjacent lug nut, then multiply this distance by the number of lug nuts; divide the result by two to obtain the BCD.

Remember to measure in millimeters for consistency with standard bolt pattern specifications found in guides and databases, including those available as PDF downloads.

Precise measurement prevents incorrect wheel purchases and potential safety hazards, so double-check your calculations before proceeding.

Using Online Bolt Pattern Guides & PDF Resources

Numerous online resources and downloadable PDF guides simplify identifying your vehicle’s wheel bolt pattern, offering convenience and accessibility.

Websites dedicated to wheel and tire information often feature comprehensive bolt pattern databases searchable by vehicle make, model, and year.

Many manufacturers and aftermarket wheel suppliers provide PDF bolt pattern charts for their products, ensuring compatibility with various vehicles.

Printable bolt pattern guides, readily available as PDF downloads, are handy for quick reference during wheel shopping or at car shows.

These resources typically display bolt patterns in the format “X x Y,” where X represents the number of lug nuts and Y is the BCD in millimeters.

Always cross-reference information from multiple sources to confirm accuracy, as errors can occur; a PDF is a good starting point, but verification is key.

Wheel Bolt Pattern Charts and PDF Downloads

Access comprehensive, free printable wheel bolt pattern guides in PDF format for easy reference, covering popular patterns like 5×114;3 and 5×120.

Free Printable Wheel Bolt Pattern Guides

Unlock instant access to meticulously crafted, free printable wheel bolt pattern guides designed to simplify your wheel and tire selection process! These downloadable PDF resources are invaluable tools for both seasoned automotive enthusiasts and those new to customizing their vehicles.

Our guides consolidate essential bolt pattern data, including bolt circle diameters (BCD) and corresponding vehicle applications, presented in a clear and easily digestible format. Forget the frustration of uncertainty – quickly determine if a wheel will fit your car with confidence.

These printable charts feature popular patterns like 5×114.3, 5×120, and 5×112, covering a wide range of vehicle makes and models, including Ford, Honda, and BMW. Keep a copy in your garage, glove compartment, or digital toolkit for convenient access whenever you’re shopping for wheels or assisting a friend.

Download today and eliminate the guesswork!

Accessing Comprehensive Online Databases

Beyond printable guides, a wealth of information awaits within comprehensive online databases dedicated to wheel bolt patterns! These digital resources offer an interactive and frequently updated alternative to static PDF charts, providing a dynamic search experience.

Many websites allow you to input your vehicle’s year, make, and model to instantly retrieve the correct bolt pattern, lug nut size, and thread pitch. Some databases even include compatibility information for aftermarket wheels, saving you valuable research time.

These online tools often feature extensive vehicle coverage, extending beyond common passenger cars to include trucks, SUVs, and even vintage vehicles. Utilizing these resources ensures accuracy and minimizes the risk of purchasing incompatible wheels. Explore these databases for the most current and detailed information available!

Find your vehicle’s perfect fit online today!

Resources for Finding Wheel Bolt Patterns

Vehicle forums and manufacturer documentation provide crucial bolt pattern details, complementing PDF guides; ensuring accurate wheel selection and avoiding compatibility issues.

Vehicle-Specific Forums and Communities

Engaging with online vehicle-specific forums and communities represents a valuable resource for pinpointing your car’s exact wheel bolt pattern, often surpassing generalized PDF guides.

Dedicated enthusiasts frequently share detailed fitment information, including successful wheel swaps and documented bolt pattern confirmations, offering real-world insights.

These platforms allow you to directly query owners of the same vehicle model, receiving tailored advice and avoiding potential compatibility errors.

Searching forum archives often reveals threads discussing wheel bolt patterns, providing a historical record of solutions and experiences.

Furthermore, many forums host dedicated sections for wheels and tires, streamlining your search for relevant information and fostering collaborative problem-solving.

Remember to verify information from multiple sources, but vehicle-specific communities offer a uniquely focused and practical approach to identifying your bolt pattern.

Manufacturer Websites and Documentation

Consulting the official website of your vehicle’s manufacturer is a primary step in accurately determining its wheel bolt pattern, often providing definitive answers beyond general PDF guides.

Owner’s manuals typically include specifications detailing wheel and tire compatibility, including the crucial bolt pattern information.

Many manufacturers offer online vehicle build sheets or specification tools, allowing you to input your VIN for precise details.

Technical service bulletins (TSBs) may also contain relevant information regarding wheel fitment and bolt pattern specifications.

Accessing these resources ensures you’re referencing data directly from the source, minimizing the risk of inaccuracies.

While third-party guides can be helpful, manufacturer documentation provides the most reliable and authoritative confirmation of your vehicle’s bolt pattern.

quadricep tendonitis exercises pdf

Article Plan: Quadriceps Tendonitis Exercises PDF

This article details a structured rehabilitation approach, outlining exercises for a downloadable PDF guide, focusing on phases post-injury or surgery․

Quadriceps tendonitis, an overuse injury, causes pain just above the kneecap where the quadriceps tendon attaches․ This condition impacts individuals engaging in frequent jumping, running, or explosive movements․ Effective rehabilitation, often guided by a PDF exercise plan, is crucial for recovery․

Understanding the progressive nature of this injury is key; a phased approach—spanning from initial range of motion exercises to advanced strengthening and functional training—is generally recommended․ Protocols like the Alfredson protocol, emphasizing eccentric strengthening, are frequently incorporated․

A well-designed PDF provides a convenient, accessible resource for patients to follow their rehabilitation program consistently․ It’s vital to avoid aggravating exercises like deep squats and lunges during the healing process, prioritizing proper form and technique throughout each phase․ This article will explore a comprehensive rehabilitation pathway, suitable for creating a personalized PDF guide․

Understanding the Quadriceps Tendon

The quadriceps tendon is a strong fibrous cord connecting the quadriceps muscles (front of the thigh) to the patella (kneecap)․ Its primary function is to extend the knee, enabling activities like walking, running, and jumping․ This tendon withstands significant force, making it susceptible to inflammation and degeneration – leading to quadriceps tendonitis․

A PDF exercise guide must acknowledge the tendon’s role in knee stability and movement․ Damage occurs through repetitive strain, causing microscopic tears․ Understanding its anatomy is crucial for targeted rehabilitation․

Rehabilitation protocols, often detailed in a PDF, aim to restore the tendon’s strength and flexibility․ Eccentric exercises, a cornerstone of recovery, specifically target the tendon’s ability to withstand load․ A comprehensive PDF will illustrate proper technique to maximize effectiveness and minimize further injury risk, guiding users through a safe and progressive recovery․

Causes and Risk Factors of Quadriceps Tendonitis

Quadriceps tendonitis typically arises from overuse, repetitive strain, or sudden increases in activity levels․ Sports involving frequent jumping – like basketball or volleyball – significantly elevate risk․ Insufficient warm-up routines and inadequate stretching contribute to tendon stress;

A PDF exercise guide should highlight these contributing factors․ Other risks include muscle imbalances, improper biomechanics, and pre-existing conditions like arthritis․ Age-related tendon degeneration also plays a role, reducing tissue elasticity․

Post-operative rehabilitation, detailed in a PDF protocol, must consider individual risk factors․ A thorough assessment is vital before initiating exercises․ The PDF should emphasize gradual progression, avoiding activities that exacerbate pain․ Understanding these causes informs a personalized exercise plan, optimizing recovery and preventing recurrence․

Symptoms of Quadriceps Tendonitis

Quadriceps tendonitis manifests primarily as pain just above the kneecap, often worsening with activity․ Initially, discomfort may only occur during or after exercise, but it can progress to constant pain even at rest․ A PDF exercise guide should clearly explain these symptom patterns․

Individuals may experience tenderness to the touch over the quadriceps tendon․ Stiffness in the knee, particularly in the morning or after periods of inactivity, is common․ Swelling around the kneecap can also occur, though it’s usually mild․

A comprehensive PDF should detail how symptoms impact daily function․ Pain during activities like walking, running, or climbing stairs is typical․ Ignoring these signals can lead to chronic tendon issues․ Early recognition, aided by a PDF’s symptom checklist, is crucial for effective rehabilitation․

Diagnosis of Quadriceps Tendonitis

Diagnosing quadriceps tendonitis typically begins with a thorough physical examination by a healthcare professional․ This involves assessing pain location, range of motion, and tenderness along the quadriceps tendon․ A PDF exercise guide should emphasize the importance of professional evaluation․

Imaging tests, while not always necessary, can help confirm the diagnosis and rule out other conditions․ X-rays can exclude bone abnormalities, and MRI scans provide detailed views of the tendon, revealing inflammation or tears․

A PDF resource should highlight that accurate diagnosis is vital before starting any exercise program․ Self-diagnosis can be misleading․ Clinicians will assess gait and knee mechanics․ A detailed PDF can prepare patients for what to expect during the diagnostic process, ensuring informed participation in their rehabilitation․

The Role of a PDF Exercise Guide

A downloadable PDF exercise guide for quadriceps tendonitis serves as a crucial tool for patient education and adherence to a rehabilitation program․ It provides a structured, accessible resource outlining appropriate exercises, progression criteria, and important safety considerations․ The guide empowers individuals to actively participate in their recovery․

A well-designed PDF should include clear illustrations or videos demonstrating proper form for each exercise, minimizing the risk of re-injury․ It allows for convenient access to information outside of clinic visits, reinforcing learned techniques․

Furthermore, a PDF can be personalized by a physical therapist to address individual needs and goals․ It facilitates consistent exercise routines and tracks progress, ultimately optimizing outcomes․ The guide complements professional guidance, fostering a collaborative approach to healing․

Phase 1 Rehabilitation (0-2 Weeks Post-Injury/Surgery)

Initial rehabilitation (0-2 weeks) focuses on minimizing pain and inflammation while protecting the repaired tendon․ Weight-bearing is typically limited, as tolerated, utilizing crutches and a brace locked in full extension․ The goal is to gradually progress weight-bearing as pain allows․

Range of motion (ROM) exercises are initiated gently, focusing on achieving full knee extension and gradually increasing flexion․ Early strengthening involves isometric quadriceps contractions – tightening the muscle without moving the joint – and gentle ankle pumps to promote circulation․

Avoidance of exercises that overload the quadriceps and patellar tendons, such as squats and lunges, is critical during this phase․ The emphasis is on controlled movements and respecting pain boundaries, establishing a foundation for subsequent phases․

Weight Bearing and Bracing in Phase 1

Weight-bearing protocols during the initial 0-2 week phase are carefully managed, typically as tolerated with the assistance of crutches․ Full weight-bearing is generally not permitted immediately post-surgery or injury, prioritizing tendon protection․

A brace is crucial, initially locked in full extension to immobilize the knee and prevent stress on the healing tendon․ Gradual progression of weight-bearing is dictated by pain levels and the rehabilitation provider’s assessment of tissue healing․

The ability to discontinue crutches is determined by leg control and progress, guided by both the patient and physician․ Consistent use of the brace, locked in extension, is maintained throughout this initial phase, ensuring optimal tendon support and minimizing the risk of re-injury․

Range of Motion Exercises (Phase 1)

Early range of motion (ROM) exercises in Phase 1 focus on restoring basic knee movement without stressing the quadriceps tendon․ Gentle heel slides are initiated, progressing the knee bend as tolerated, always within a pain-free range․

Patellar mobilization is also key, carefully moving the kneecap in all directions to prevent stiffness and maintain joint mobility․ These movements should be performed slowly and gently, avoiding any forceful manipulation․

The goal is to achieve a comfortable, limited range of motion, prioritizing pain management and protecting the healing tendon․ Active quadriceps sets, without attempting to straighten the knee fully, help maintain muscle activation without excessive strain․ Consistent, controlled movements are vital during this initial stage․

Initial Strengthening Exercises (Phase 1)

Phase 1 strengthening focuses on isometric exercises, engaging the quadriceps without joint movement, minimizing stress on the healing tendon․ Quadriceps sets – tightening the thigh muscles while keeping the leg straight – are performed frequently throughout the day․

Gluteal squeezes and hamstring sets are incorporated to maintain overall leg muscle activation and stability․ Ankle pumps help improve circulation and reduce swelling․ These exercises are performed within a pain-free range, prioritizing muscle activation over significant resistance․

Avoid exercises like straight leg raises initially, as they can overload the quadriceps tendon․ The emphasis is on gentle muscle engagement to prevent atrophy and prepare for more advanced strengthening in subsequent phases․ Controlled, low-intensity contractions are crucial for safe and effective rehabilitation․

Phase 2 Rehabilitation (2-6 Weeks Post-Injury/Surgery)

Phase 2 marks a progression in weight-bearing and exercise intensity, building upon the foundation established in Phase 1․ Gradual increases in weight-bearing are implemented, guided by pain levels and functional progress, potentially transitioning from crutches to partial weight-bearing․

Range of motion exercises are advanced, incorporating gentle stretching to improve knee flexion and extension․ Strengthening exercises begin to include closed-chain activities, like mini-squats and leg presses with light resistance, carefully avoiding overload․

Focus remains on quadriceps strengthening, but with controlled movements and attention to proper form․ The goal is to restore functional strength and prepare the leg for more demanding activities in Phase 3․ Continued monitoring for pain and swelling is essential throughout this phase․

Progression of Weight Bearing (Phase 2)

Weight-bearing progression in Phase 2 is carefully managed, transitioning from the initial protected weight-bearing of Phase 1․ The aim is to gradually increase the load on the affected leg, guided by pain tolerance and functional improvements․

Initially, partial weight-bearing with crutches continues, with the goal of weaning off crutches as quadriceps control and pain allow․ The brace may remain locked in extension during early stages, providing stability․

Progression is individualized, based on the patient’s response to exercises and daily activities․ Clinicians monitor gait pattern and assess for any signs of increased pain or swelling․ Full weight-bearing is only permitted when adequate quadriceps strength and control are demonstrated, ensuring safe and effective rehabilitation․

Advanced Range of Motion Exercises (Phase 2)

Phase 2 introduces more challenging range of motion (ROM) exercises, building upon the foundation established in Phase 1․ The focus shifts towards restoring full knee flexion and extension, while minimizing stress on the quadriceps and patellar tendons․

Heel slides are progressed, increasing the range of flexion․ Gentle stationary cycling without resistance is introduced to promote smooth joint movement․ Wall slides are performed cautiously, ensuring proper form and avoiding pain․

Active-assisted ROM exercises, utilizing a towel or strap, can help improve flexion․ It’s crucial to avoid forceful stretching or movements that provoke pain․ The goal is to achieve a functional ROM necessary for daily activities, preparing the knee for more advanced strengthening exercises․

Strengthening Exercises – Focus on Quadriceps (Phase 2)

Phase 2 emphasizes progressive quadriceps strengthening, carefully avoiding exercises that overload the tendon․ Initial strengthening focuses on isometric exercises, such as quad sets – tightening the thigh muscles without moving the knee․ These are held for several seconds and repeated․

Short-arc quads, performed with a small range of motion, begin to build dynamic strength․ Straight leg raises, performed in various positions (supine, side-lying), further engage the quadriceps․

Resistance bands are introduced for gentle strengthening, focusing on extension and abduction․ Crucially, squats and lunges are avoided during this phase due to their high impact on the quadriceps and patellar tendons․ The aim is to gradually increase strength while protecting the healing tendon․

Phase 3 Rehabilitation (6-12 Weeks Post-Injury/Surgery)

Phase 3 focuses on restoring full function and preparing for return to activity․ Functional exercises are key, gradually reintroducing movements required for daily life and sport․ This includes controlled squats (initially shallow), step-ups, and controlled lunges – always monitoring for pain․

Proprioceptive training is vital to regain balance and coordination․ Exercises like single-leg stance, wobble board activities, and agility drills challenge the body’s awareness of joint position․

Progressive loading continues, increasing resistance and complexity of exercises․ The goal is to build strength, endurance, and confidence․ A gradual return to sport-specific activities is implemented, guided by pain levels and functional assessments․

Functional Exercises (Phase 3)

Functional exercises bridge the gap between controlled rehabilitation and real-world activities․ Begin with controlled squats, progressing in depth as tolerated, ensuring proper form to avoid overloading the quadriceps and patellar tendons․ Step-ups onto a low platform challenge strength and stability․

Controlled lunges, both forward and lateral, improve functional movement patterns․ Emphasis should be on maintaining alignment and avoiding pain․ Introduce agility drills like cone drills and shuttle runs to enhance coordination and responsiveness․

Simulate sport-specific movements gradually, if applicable․ This could involve light jogging, jumping, or cutting maneuvers, always monitoring for any discomfort․ The focus remains on quality of movement over quantity․

Proprioceptive Training (Phase 3)

Proprioception, or body awareness, is crucial for preventing re-injury․ Single-leg stance exercises, initially on a stable surface, challenge balance and stability․ Progress to unstable surfaces like a foam pad or wobble board to increase the difficulty․

Balance exercises can include reaching in different directions while maintaining single-leg stance․ Incorporate dynamic movements, such as tossing a ball while balancing, to further challenge proprioceptive abilities․

Plyometric exercises, like controlled jumps and hops, improve reactive strength and neuromuscular control․ Begin with low-impact plyometrics and gradually increase the intensity․ These exercises should only be introduced when pain-free and with adequate strength and control․

The Alfredson Protocol for Quadriceps Tendonitis

The Alfredson protocol is a well-regarded treatment for quadriceps tendonitis, focusing on eccentric strengthening․ It involves performing squats against a wall, slowly lowering the body weight over several seconds, and then using both legs to return to the starting position․

The protocol consists of three phases: Phase 1 involves performing 15 repetitions with both legs, then one leg at a time․ Phase 2 adds weight by holding a weight or using a weighted vest․ Phase 3 increases the difficulty by performing the exercise on an incline․

It’s recommended to perform the exercises daily, and pain levels should be monitored․ The protocol is designed to gradually load the tendon, promoting healing and reducing pain․ Consistency is key for optimal results․

Eccentric Strengthening Exercises

Eccentric exercises are crucial for quadriceps tendonitis rehabilitation, focusing on lengthening the muscle while contracting․ A primary example is the decline squat, performed by slowly lowering into a squat position and using both legs to return to standing․

Another effective exercise is the eccentric step-up, where you step up onto a platform with one leg and slowly lower yourself down, controlling the descent․ These exercises target the quadriceps and patellar tendons, promoting collagen realignment and strengthening․

Start with a low number of repetitions and gradually increase as tolerated, prioritizing proper form over quantity․ Pain should be monitored; a slight discomfort is acceptable, but sharp pain indicates the need to reduce intensity; Consistent eccentric training is vital for long-term recovery․

Exercises to Avoid During Rehabilitation

During quadriceps tendonitis recovery, certain exercises can exacerbate the condition and hinder progress․ High-impact activities like jumping, running, and plyometrics should be avoided initially, as they place significant stress on the tendon․

Exercises that create overload on the quadriceps and patellar tendons, such as deep squats and lunges, are also contraindicated, especially in the early phases of rehabilitation․ These movements can increase pain and inflammation․

Avoid straight leg raises without proper control, as they can strain the tendon․ Focus on controlled movements and gradually progress the intensity as healing occurs․ Prioritize exercises that minimize stress on the affected area and promote gradual strengthening․

Importance of Proper Form and Technique

Maintaining correct form during exercises is paramount for effective rehabilitation and preventing re-injury․ Incorrect technique can place undue stress on the quadriceps tendon, hindering healing and potentially worsening symptoms․

Focus on controlled movements, avoiding jerky or rushed motions․ Engage core muscles to stabilize the body and ensure proper alignment throughout each exercise; Pay close attention to knee alignment, preventing valgus or varus stress․

Consider working with a physical therapist to learn proper form and receive personalized guidance․ They can assess your technique and provide feedback to optimize exercise effectiveness and minimize risk․ Prioritize quality over quantity, ensuring each repetition is performed correctly․

Creating a Personalized PDF Exercise Plan

A tailored PDF exercise plan is crucial for optimal recovery from quadriceps tendonitis, acknowledging individual needs and progress․ Begin with a thorough assessment of your current functional level, pain levels, and range of motion․

The PDF should clearly outline each exercise, including detailed instructions, images or videos demonstrating proper form, and specific sets and repetitions․ Categorize exercises by rehabilitation phase (Phase 1, 2, 3) for progressive overload․

Incorporate a tracking system within the PDF to monitor progress, noting pain levels, completed sets, and any modifications made․ Regularly review and adjust the plan based on your response to treatment, consulting with a physical therapist for guidance․

Resources for Downloadable PDF Guides

Finding reliable PDF guides for quadriceps tendonitis exercises requires careful selection․ Many healthcare providers create customized plans for their patients, offering a strong starting point․

Online resources, such as hospital websites and physical therapy clinics, often provide downloadable protocols․ Search for guides specifically outlining post-operative rehabilitation for patella/quad tendon repairs, ensuring they align with your situation․

Consider resources focusing on the Alfredson protocol, a well-regarded eccentric strengthening program․ Always prioritize guides created by qualified professionals and review them with your physical therapist before starting any new exercise regimen․

Remember that a generic PDF may need personalization to address your specific needs and progress;

Long-Term Management and Prevention

Sustained quadriceps tendon health necessitates ongoing commitment beyond initial rehabilitation․ Consistent eccentric strengthening, like the Alfredson protocol, helps maintain tendon resilience and prevent re-injury․

Prioritize proper warm-up and cool-down routines before and after physical activity․ Incorporate regular stretching to maintain flexibility in the quadriceps and surrounding muscles․

Gradual progression of activity levels is crucial; avoid sudden increases in intensity or duration․ Pay attention to your body and modify activities if pain arises․

Maintaining optimal weight reduces stress on the knee joint․ Consider supportive footwear and address any biomechanical imbalances through targeted exercises․

Proactive management ensures long-term function and minimizes the risk of chronic tendon issues․

asa private oral exam guide

ASA Private Pilot Oral Exam Guide: A Comprehensive Plan

ASA’s guides‚ like the Private Pilot Oral Exam Guide‚ are excellent study tools‚ utilizing a question-and-answer format to thoroughly prepare applicants for FAA checkrides.

Understanding the FAA Oral Exam

The FAA oral exam is a crucial component of the pilot certification process‚ evaluating a candidate’s understanding of aviation principles and regulations. ASA’s Oral Exam Guide Series‚ including the Private Pilot edition‚ aims to demystify this process.

These guides‚ authored by Michael D. Hayes‚ employ a question-and-answer format‚ mirroring the actual exam experience. They aren’t intended as rote memorization tools‚ but rather to foster genuine comprehension. The oral exam isn’t about trick questions; it’s about confirming the applicant can apply knowledge safely and effectively.

ASA materials help students and instructors alike navigate the scope of topics covered‚ ensuring thorough preparation and building confidence for a successful checkride.

Purpose and Scope of the Oral Exam

The primary purpose of the FAA oral exam is to assess the applicant’s aeronautical knowledge‚ risk management skills‚ and ability to make sound judgments. ASA’s guides‚ like the Private Pilot Oral Exam Guide‚ directly address this need. The scope is broad‚ encompassing air regulations‚ aircraft systems‚ meteorology‚ and emergency procedures.

ASA materials help clarify what examiners are looking for‚ moving beyond simply reciting facts. The exam tests the applicant’s ability to apply knowledge to real-world scenarios. The guides are arranged in a question-and-answer format‚ covering a comprehensive range of potential topics.

Effective preparation‚ aided by ASA resources‚ ensures a confident and successful outcome.

ASA Oral Exam Guide Series: Overview

The ASA Oral Exam Guide Series is designed as a comprehensive study tool for both student pilots and flight instructors. These guides‚ including the Private Pilot edition‚ utilize a question-and-answer format‚ mirroring the actual oral exam experience. They cover a wide spectrum of aviation topics‚ ensuring thorough preparation.

ASA’s series isn’t just about memorization; it focuses on understanding the “why” behind aviation principles. The guides are written by experienced aviation educators‚ like Michael D. Hayes‚ to help applicants confidently engage with FAA examiners.

ASA offers guides for various pilot certificates‚ including Helicopter and Instrument ratings.

Key Features of the ASA Private Pilot Oral Exam Guide

The ASA Private Pilot Oral Exam Guide distinguishes itself through its realistic question-and-answer format‚ directly simulating the FAA oral exam. It’s arranged to facilitate effective study‚ covering all critical areas a pilot applicant must know.

A key feature is its comprehensive scope‚ ensuring no essential topic is overlooked. The guide doesn’t simply present answers; it encourages understanding of underlying principles. It’s designed for both self-study and instructor-led review.

Regular editions‚ like the Fourteenth Edition‚ demonstrate ASA’s commitment to keeping the content current with FAA regulations and best practices.

Air Regulations and FAA Requirements

The ASA Private Pilot Oral Exam Guide places significant emphasis on mastering air regulations and FAA requirements‚ a cornerstone of pilot competency. Expect detailed questioning on Part 61 and Part 141 training differences‚ crucial for understanding your certification path.

The guide thoroughly covers medical certification requirements‚ ensuring applicants are aware of necessary standards and procedures. It prepares you to discuss airspace classifications‚ operating limitations‚ and pilot responsibilities with confidence.

Understanding these regulations isn’t just about passing the exam; it’s about safe and compliant flying. ASA’s approach focuses on practical application of the rules‚ not just rote memorization.

Part 61 vs. Part 141 Training

The ASA Private Pilot Oral Exam Guide dedicates specific attention to the distinctions between Part 61 and Part 141 flight training programs. Examiners frequently assess a candidate’s understanding of these differences‚ focusing on the structured curriculum of Part 141 versus the more flexible approach of Part 61.

The guide prepares you to articulate the minimum hour requirements for each program‚ highlighting how Part 141 can potentially reduce the total flight time needed for certification. It also covers the FAA’s oversight of approved Part 141 schools.

Knowing these nuances demonstrates a comprehensive grasp of the training landscape and regulatory framework governing pilot certification.

Medical Certification Requirements

The ASA Private Pilot Oral Exam Guide thoroughly prepares candidates for questions regarding FAA medical certification. Expect detailed inquiries about the classes of medical certificates – first‚ second‚ and third – and which is required for a private pilot license.

The guide emphasizes understanding the duration of each medical certificate and the process for renewal. It covers common disqualifying conditions and the potential for waivers‚ demonstrating a comprehensive knowledge of medical standards.

Be prepared to discuss the role of Aviation Medical Examiners (AMEs) and the FAA’s medical certification website. A solid grasp of these requirements is crucial for a successful oral exam.

Aircraft Systems Knowledge

The ASA Private Pilot Oral Exam Guide places significant emphasis on aircraft systems. Expect detailed questioning about the primary flight control systems – ailerons‚ elevator‚ and rudder – and their operation. Understanding how these controls affect the aircraft’s attitude is vital.

The guide prepares you for questions regarding fuel‚ electrical‚ and pitot-static systems. Be ready to explain the function of key components like the fuel pump‚ alternator‚ and altimeter. Knowledge of hydraulic systems‚ if equipped‚ is also important.

Demonstrate a clear understanding of system failures and associated emergency procedures. This section ensures a comprehensive grasp of aircraft functionality.

Engine Operation and Systems

The ASA Private Pilot Oral Exam Guide dedicates substantial coverage to engine operation and systems. Expect in-depth questions about the engine cycle – intake‚ compression‚ combustion‚ and exhaust – and how each stage functions. Be prepared to discuss the roles of key engine components like the carburetor or fuel injection system‚ magnetos‚ and propeller.

Understanding engine instruments‚ such as the tachometer‚ manifold pressure gauge‚ and cylinder head temperature gauge‚ is crucial. The guide prepares you to explain how these instruments indicate engine health and performance.

Furthermore‚ anticipate questions about potential engine malfunctions and appropriate corrective actions‚ demonstrating a proactive safety mindset.

Flight Controls and Instrumentation

The ASA Private Pilot Oral Exam Guide thoroughly prepares candidates for questions regarding flight controls and instrumentation. Expect detailed inquiries about the primary flight controls – ailerons‚ elevator‚ and rudder – and their effects on aircraft movement. You’ll need to articulate how these controls interact to achieve desired maneuvers.

Instrumentation knowledge is paramount. Be ready to explain the function of essential instruments like the airspeed indicator‚ altimeter‚ vertical speed indicator‚ and heading indicator. Understanding how these instruments work‚ and potential errors‚ is vital.

The guide aids in mastering the interpretation of instrument readings and their role in maintaining safe flight operations.

Aerodynamics and Principles of Flight

The ASA Private Pilot Oral Exam Guide dedicates significant attention to aerodynamics‚ a cornerstone of flight knowledge. Expect questions probing your understanding of the four forces: lift‚ drag‚ thrust‚ and weight‚ and their interplay during various flight phases.

The guide assists in explaining Bernoulli’s principle and how it generates lift. Be prepared to discuss the angle of attack‚ its impact on lift‚ and the critical angle leading to a stall. Understanding factors affecting stall speed is crucial.

Mastering these principles‚ as facilitated by ASA‚ is essential for demonstrating a solid foundation in flight theory during the oral exam.

Lift‚ Drag‚ Thrust‚ and Weight

The ASA Private Pilot Oral Exam Guide emphasizes a thorough understanding of the four forces acting on an aircraft: lift‚ drag‚ thrust‚ and weight. Expect detailed questioning on each force’s definition‚ how it’s generated‚ and its impact on flight performance.

The guide will help you articulate how lift opposes weight‚ and thrust overcomes drag‚ achieving and maintaining flight. Be prepared to discuss different types of drag – parasitic and induced – and how they vary with airspeed and aircraft configuration.

Successfully explaining these forces‚ as prepared by ASA materials‚ demonstrates a fundamental grasp of aerodynamic principles vital for the oral exam.

Stall Speed and Factors Affecting It

The ASA Private Pilot Oral Exam Guide dedicates significant attention to stall speed‚ a critical aspect of flight safety and performance. Expect questions defining stall‚ explaining the angle of attack’s role‚ and identifying factors influencing stall speed.

The guide prepares you to discuss how weight‚ load factor‚ and wing configuration (flaps‚ ice) affect stall speed. Understand the relationship between stall speed and airspeed indicators‚ and the importance of maintaining sufficient airspeed above stall.

Mastering this topic‚ as ASA resources facilitate‚ showcases a pilot’s understanding of aerodynamic limitations and safe flight practices‚ crucial for examiner confidence.

Flight Planning and Meteorology

The ASA Private Pilot Oral Exam Guide emphasizes thorough flight planning and meteorological knowledge as cornerstones of safe flying. Expect detailed questioning on obtaining weather briefings‚ interpreting forecasts‚ and understanding various weather reports like METARs and TAFs.

The guide prepares you to discuss the impact of weather on flight performance‚ including wind‚ temperature‚ and density altitude. Be ready to explain how to analyze weather charts‚ identify potential hazards‚ and make go/no-go decisions.

Proficiency in these areas‚ fostered by ASA’s resources‚ demonstrates a pilot’s commitment to informed decision-making and responsible flight operations.

Weather Briefings and Resources

The ASA Private Pilot Oral Exam Guide stresses the importance of comprehensive pre-flight weather briefings. Expect questions regarding available resources like 1-800-WXBRIEF‚ Flight Service Stations‚ and online weather services.

The guide prepares you to discuss the types of weather information obtainable – including forecasts‚ current conditions (METCON)‚ and NOTAMs – and how to interpret them effectively. You should be able to articulate the benefits of each resource.

Understanding how to access and utilize these tools‚ as highlighted by ASA‚ is crucial for safe and informed flight planning‚ demonstrating a pilot’s proactive approach to risk management.

Cross-Country Flight Planning Procedures

The ASA Private Pilot Oral Exam Guide emphasizes meticulous cross-country flight planning. Expect detailed questioning on procedures‚ including route selection utilizing charts‚ calculating true course‚ and determining estimated time en route (ETE).

The guide prepares you to discuss wind correction angles‚ fuel requirements considering reserves‚ and altitude selection based on performance and weather. You’ll need to demonstrate proficiency in weight and balance calculations.

ASA materials highlight the importance of identifying alternate airports and understanding the regulations governing their use. Thorough preparation‚ as outlined in the guide‚ showcases a pilot’s commitment to safety and responsible decision-making.

Emergency Procedures and Risk Management

The ASA Private Pilot Oral Exam Guide heavily focuses on emergency procedures and proactive risk management. Expect in-depth questioning regarding responses to various in-flight emergencies‚ such as engine failures‚ electrical malfunctions‚ and loss of communication.

The guide prepares you to articulate appropriate actions‚ utilizing checklists and adhering to established protocols. It stresses the importance of decision-making under pressure and prioritizing safety.

ASA materials emphasize a thorough understanding of risk assessment – identifying potential hazards‚ evaluating their severity‚ and implementing mitigation strategies before and during flight. Demonstrating this proactive approach is crucial for a successful oral exam.

Emergency Landing Procedures

The ASA Private Pilot Oral Exam Guide dedicates significant attention to emergency landing procedures‚ a critical component of pilot preparedness. Expect detailed questioning on forced landing scenarios‚ including site selection criteria – considering wind‚ terrain‚ and obstacles.

The guide prepares you to discuss the proper execution of emergency landings‚ encompassing pre-landing checklists‚ radio calls‚ and securing the aircraft post-landing. It emphasizes maintaining aircraft control and minimizing risk to occupants.

ASA materials stress the importance of practicing emergency procedures mentally and‚ when feasible‚ with a flight instructor. A confident and knowledgeable response regarding emergency landings demonstrates a commitment to safety and proficiency.

Decision-Making and Risk Assessment

The ASA Private Pilot Oral Exam Guide heavily emphasizes decision-making and risk assessment‚ recognizing these as fundamental pilot skills. Expect questions probing your ability to evaluate situations‚ identify potential hazards‚ and implement appropriate mitigation strategies.

The guide prepares you to articulate the IMSAFE checklist (Illness‚ Medication‚ Stress‚ Alcohol‚ Fatigue‚ Environment) and how it applies to pre-flight self-assessment. It also covers risk management techniques‚ like the PAVE (Pilot‚ Aircraft‚ Environment‚ and External pressures) model.

ASA materials highlight the importance of sound judgment and a conservative approach to flight‚ demonstrating a proactive safety mindset. A strong understanding of these concepts is crucial for a successful oral exam.

Oral Exam Preparation Strategies

The ASA Private Pilot Oral Exam Guide advocates for a comprehensive study approach‚ moving beyond rote memorization. It encourages utilizing the question-and-answer format to actively engage with the material and identify knowledge gaps.

While some pilots avoid pre-packaged kits‚ ASA’s series is frequently cited as a valuable tool for both students and instructors. The guide suggests simulating the exam environment through mock oral exams with a flight instructor or fellow student.

Effective techniques include reviewing all course materials‚ focusing on areas of weakness‚ and practicing verbalizing answers clearly and concisely. The ASA guide aims to build confidence and preparedness.

Effective Study Techniques

The ASA Oral Exam Guide series emphasizes active learning‚ suggesting students move beyond simply reading the material. Utilizing the question-and-answer format within the guide is key to solidifying understanding and pinpointing areas needing further review.

Mock oral exams‚ conducted with instructors or peers‚ are highly recommended. This simulates the actual exam environment‚ building confidence and refining verbal communication skills. Consistent review of all course materials‚ including flight maneuvers and regulations‚ is crucial.

Focus on understanding the why behind the regulations and procedures‚ not just memorizing them. This deeper comprehension will aid in formulating thoughtful responses during the oral exam.

Common Questions and Answers to Expect

The ASA Oral Exam Guide is structured around a question-and-answer format‚ directly mirroring the FAA examiner’s approach. Expect questions covering air regulations‚ aircraft systems‚ emergency procedures‚ and flight planning. Be prepared to explain aerodynamic principles and demonstrate a thorough understanding of weather.

Typical inquiries include discussions on stall speed factors‚ cross-country planning calculations‚ and the decision-making process during emergencies. Examiners assess not just factual knowledge‚ but also the applicant’s ability to apply that knowledge safely and effectively.

Practice articulating clear‚ concise answers‚ referencing relevant regulations and demonstrating sound judgment. The guide provides sample answers‚ but personalize them to reflect your understanding.

jurassic world evolution 2 trophy guide

Jurassic World Evolution 2 Trophy Guide ー Overview

Jurassic World Evolution 2 boasts 55 trophies, including a coveted Platinum, demanding dedication across base game and DLC content for completion.

Players will encounter 35 Bronze, 18 Silver, and 1 Gold trophy, alongside challenging scenarios and genome library goals.

Embarking on the Jurassic World Evolution 2 trophy hunt is a substantial undertaking, requiring both skillful park management and a thorough understanding of the game’s mechanics. With a total of 55 achievements to unlock, players should prepare for a lengthy and rewarding journey. This guide aims to provide a comprehensive roadmap, detailing each trophy’s requirements and offering strategies for efficient acquisition.

The difficulty varies significantly, ranging from easily obtainable Bronze trophies earned through basic gameplay to the demanding Platinum trophy, “It Was an Eventuality,” which necessitates unlocking all others. Be aware that DLC expansions, like Dominion Biosyn, introduce additional trophies, increasing the overall challenge. Familiarity with Nexus Mods can also prove beneficial.

Trophy List Breakdown

The Jurassic World Evolution 2 trophy list is diverse, categorized by rarity and challenge. Expect a large collection of 35 Bronze trophies, representing early-game accomplishments and foundational park building. Progressing further unlocks 18 Silver trophies, demanding more complex strategies and successful scenario completion. A single Gold trophy, “You Could Predict Anything,” tests genome library mastery.

Finally, the ultimate prize – the Platinum trophy, “It Was an Eventuality” – signifies complete dedication. DLC content adds further layers, with expansions introducing their own sets of Bronze, Silver, and Gold achievements. Secret trophies also exist, requiring specific actions to unlock, adding an element of discovery to the hunt.

Core Game Trophies

Jurassic World Evolution 2’s core game features 45 trophies, encompassing Bronze, Silver, and Gold challenges, culminating in the prestigious Platinum achievement.

Bronze Trophies ー Early Game Achievements

Jurassic World Evolution 2 offers a wealth of Bronze trophies, easily attainable during initial gameplay, focusing on foundational park management skills. These include “Welcome to Jurassic World,” earned upon completing the first campaign mission, and “Facility Manager,” awarded for constructing a set number of facilities.

Expect trophies for successfully hatching your first dinosaur (“Life Finds a Way”), researching a specific number of genomes (“Geneticist”), and releasing dinosaurs into the park (“New Attractions”). “First Response” requires dealing with a breakout, while “Brand Awareness” is granted for achieving a certain park rating. Many Bronze trophies are story-related, progressing naturally with the campaign, providing a gentle introduction to the game’s mechanics and rewarding early milestones.

Completing these early objectives builds momentum towards more challenging Silver and Gold trophies.

Silver Trophies ー Mid-Game Challenges

Jurassic World Evolution 2’s Silver trophies demand more strategic park management and a deeper understanding of dinosaur needs. “Park Planner” requires achieving a five-star rating in a specific park, while “Containment Breach” is earned by successfully managing multiple breakouts simultaneously. Expect challenges involving guest satisfaction, financial stability, and dinosaur welfare.

“Five Star Facility” necessitates upgrading facilities to maximum level, and “Paleontologist” is awarded for fully researching a dinosaur’s genome. “Security Expert” involves implementing advanced security measures. These trophies often require careful planning, resource allocation, and proactive problem-solving. Mastering the game’s systems is crucial for success, moving beyond basic park building towards complex operational control.

Successfully obtaining these signifies a solid grasp of the game’s core mechanics.

Gold Trophies ⎻ Advanced Park Management

Jurassic World Evolution 2’s Gold trophies represent a significant achievement, demanding mastery of the game’s intricate systems. “You Could Predict Anything” is a substantial undertaking, requiring 100% completion of the Genome Library – a feat of extensive research and genetic manipulation. This necessitates unlocking every trait and variant for each dinosaur species.

This trophy tests patience and dedication, pushing players to fully explore the depth of the game’s paleontological aspects. It’s a testament to a comprehensive understanding of dinosaur genetics and a commitment to scientific accuracy within the game’s framework. Expect a considerable time investment and meticulous attention to detail.

Earning this signifies true expertise in park management and dinosaur research.

Platinum Trophy ⎻ “It Was an Eventuality”

Unlocking the Platinum Trophy, aptly named “It Was an Eventuality,” in Jurassic World Evolution 2 signifies complete mastery of the game. This prestigious award isn’t simply about accumulating points; it demands dedication and skill across all facets of park management, dinosaur care, and scenario completion.

Players must earn every other trophy, including conquering challenging scenarios on the hardest difficulty, completing the Genome Library, and successfully releasing diverse dinosaur genera. It’s a true test of endurance and strategic thinking, requiring hundreds of hours of gameplay.

This trophy represents the ultimate achievement for any Jurassic World Evolution 2 enthusiast.

Dominion Biosyn Expansion Trophies

The Dominion Biosyn Expansion introduces additional trophies, including Bronze, Silver, and Gold ranks, adding to the challenge and rewarding exploration.

Dominion Specific Bronze Trophies

Dominion’s Bronze trophies often focus on initial progression within the expansion’s scenarios. Expect tasks like successfully completing introductory missions, researching specific dinosaur variants unique to the Biosyn storyline, and achieving certain park rating milestones.

Many require simply engaging with new features, such as deploying Biosyn security measures or utilizing the amber mines. “New Dig Site” is awarded for discovering a new dig site, while others involve releasing a set number of Dominion-era dinosaurs. These trophies are generally straightforward, serving as stepping stones to more complex challenges, and are easily obtainable during normal gameplay progression.

Dominion Specific Silver Trophies

Dominion’s Silver trophies demand a deeper understanding of the expansion’s mechanics and a more strategic approach to park management. These often involve successfully navigating complex Biosyn research projects, achieving high park ratings under challenging conditions, and effectively managing new dinosaur behaviors introduced in the DLC.

Expect trophies tied to completing specific story objectives with certain parameters met, like maintaining a specific security level or guest satisfaction. “Containment Breach” requires dealing with a significant security incident. Mastering the new amber-based research system and utilizing Biosyn’s unique facilities are key to unlocking these achievements, demanding more focused effort than the Bronze tier.

Dominion Specific Gold Trophies

Dominion’s Gold trophies represent the pinnacle of achievement within the expansion, demanding exceptional park management skills and a thorough grasp of its unique challenges. These are typically awarded for completing the Biosyn campaign on a high difficulty setting, achieving incredibly high park ratings consistently, and successfully implementing complex research strategies.

Expect a significant time investment and meticulous planning. One Gold trophy, “You Could Predict Anything,” requires 100% completion of the Genome Library, a monumental task. These trophies aren’t about luck; they’re about mastering the Dominion content and demonstrating a comprehensive understanding of the game’s systems.

Secret Trophies

Jurassic World Evolution 2 includes hidden achievements, adding replayability! Discovering these requires exploration and experimentation within the game’s diverse scenarios.

Hidden Achievements and How to Obtain Them

Jurassic World Evolution 2 doesn’t explicitly list all trophies, concealing some until earned. Many relate to specific in-game actions or reaching milestones. For example, completing challenging scenarios on the hardest difficulty unlocks several hidden awards, demanding strategic park management.

Genome library completion also hides trophies; fully researching dinosaurs triggers secret unlocks. Releasing specific dinosaur genera, like the Tyrannosaurus Rex, can also contribute. Pay attention to in-game events and experiment with different park configurations. Regularly check your trophy progress to identify newly unlocked secrets, as some are tied to Dominion Biosyn expansion content.

Nexus Mods and online guides can assist in uncovering these elusive achievements.

Difficulty-Related Trophies

Jurassic World Evolution 2 challenges players with trophies tied to scenario completion on the hardest difficulty, significantly increasing the strategic demand.

Completing Scenarios on Hardest Difficulty

Jurassic World Evolution 2 presents a substantial hurdle for trophy hunters: conquering five challenging scenarios on the game’s most difficult setting. This demands exceptional park management skills and a deep understanding of dinosaur needs and guest behavior. Prepare for increased storm frequency, disease outbreaks, and financial constraints.

Success requires meticulous planning, efficient resource allocation, and proactive responses to crises. Familiarity with the menu systems and overall gameplay is crucial before attempting these scenarios. Don’t underestimate the importance of research and careful breeding programs to maintain a stable and profitable park. Patience and adaptability are key to earning these prestigious trophies!

Genome Library Completion

The “You Could Predict Anything” trophy requires complete genome sequencing – 100% of the Genome Library – a lengthy but rewarding endeavor for completionists.

“You Could Predict Anything” Trophy Guide

Achieving 100% Genome Library completion is a significant undertaking, demanding extensive research and careful management of your dinosaur populations. This Gold trophy, “You Could Predict Anything,” requires players to fully unlock the genetic code for every dinosaur species available in Jurassic World Evolution 2.

Focus on completing research tasks, successfully incubating dinosaurs, and extracting DNA from amber. Prioritize species with low completion percentages first. Utilizing the expedition feature is crucial for acquiring missing DNA strands. Remember that the Dominion Biosyn Expansion adds further species to the library, so ensure you explore all available content. Patience and methodical research are key to unlocking this prestigious achievement!

Dinosaur Release Trophies

Unlock “One More for the Sticker Book” by releasing at least one dinosaur from each genus, and “So Many Teeth” by releasing a Tyrannosaurus Rex!

“One More for the Sticker Book” ー Genus Collection

Achieving the “One More for the Sticker Book” trophy requires a significant commitment to dinosaur diversity within your parks. You must successfully release at least one dinosaur representing each of the game’s genera.

This isn’t simply about hatching every species; it’s about ensuring a representative from each distinct genus is thriving in a suitable habitat. Careful planning and resource management are crucial, as some genera are more challenging to acquire and maintain than others.

Prioritize research to unlock new dinosaurs and focus on completing contracts that reward you with desired species. Remember to check your genome library frequently to track your progress and identify missing genera. This trophy is a testament to your comprehensive dinosaur park building skills!

Useful Resources and Links

Nexus Mods provides valuable tools and modifications, while online trophy guides offer detailed strategies for unlocking all 55 achievements in Jurassic World Evolution 2.

Nexus Mods and Trophy Guides

Nexus Mods serves as an invaluable resource for Jurassic World Evolution 2 players pursuing trophy completion. The platform hosts a variety of user-created modifications that can streamline certain tasks or even alter gameplay to make challenging trophies more attainable. Specifically, look for mods that assist with genome research or park management efficiency.

Alongside Nexus Mods, numerous online trophy guides are available. These guides often provide step-by-step instructions, video walkthroughs, and helpful tips for unlocking each of the game’s 55 trophies. Websites and forums dedicated to gaming achievements are excellent places to start your search. Remember to cross-reference information from multiple sources to ensure accuracy and find the strategies that best suit your playstyle.

omron manual bp786n

Omron BP786N Blood Pressure Monitor: A Comprehensive Guide

Omron delivers innovative solutions across diverse sectors‚ including healthcare‚ aiming to address societal challenges and enhance quality of life globally‚ per their philosophy.

Omron’s commitment extends beyond promoting healthy lifestyles; they actively support individuals managing chronic conditions‚ striving to restore their well-being and full participation in life. The BP786N represents a significant advancement in home blood pressure monitoring technology‚ offering users a reliable and convenient way to track their cardiovascular health. As an official dealer‚ access to original Omron products with up to a five-year warranty is assured‚ alongside swift delivery across Moscow and the surrounding region.

This guide provides a comprehensive overview of the Omron BP786N‚ covering everything from its key features and setup to accurate measurement techniques and troubleshooting. Whether you’re a first-time user or familiar with blood pressure monitoring‚ this resource will empower you to effectively utilize the device and understand your readings. Explore detailed instructions and error resolution guidance for optimal performance.

Key Features and Benefits

The Omron BP786N boasts advanced features designed for user convenience and accurate results. It facilitates seamless data transfer to platforms like Samsung Health‚ enabling comprehensive health tracking for those seeking integrated wellness solutions. Omron’s dedication to innovation is evident in its industrial sensors and automation solutions‚ extending to healthcare devices like this monitor.

Benefits include a user-friendly interface‚ reliable measurement accuracy‚ and substantial data storage capacity. Access to a free downloadable instruction manual ensures easy understanding and operation. Purchasing from an exclusive distributor guarantees genuine Omron products‚ alongside potential discounts and gifts. With a warranty of up to five years and free service‚ the BP786N offers peace of mind and long-term value.

Understanding the Device

Omron’s commitment extends to providing robust automation solutions and healthcare tools‚ including the BP786N‚ designed to assist individuals managing chronic conditions effectively.

Components of the BP786N

The Omron BP786N blood pressure monitor comprises several key components working in harmony to deliver accurate readings. Primarily‚ it features an inflatable cuff‚ available in various sizes to ensure a proper fit for different arm circumferences – crucial for reliable results. The monitor itself houses a sophisticated pressure sensor and an electronic control unit responsible for processing the data.

A clear digital display presents the systolic and diastolic blood pressure values‚ alongside pulse rate. The device operates using batteries‚ providing portability and convenience; Furthermore‚ the BP786N is designed for data connectivity‚ enabling users to transfer readings to the Omron Connect application for tracking and analysis. The unit also includes buttons for operation‚ memory recall‚ and settings adjustments. Original packaging typically includes the monitor‚ cuff‚ batteries‚ and a quick start guide‚ though a comprehensive manual is often available online.

Display Symbols and Indicators

The Omron BP786N’s display utilizes a range of symbols and indicators to convey information beyond just blood pressure and pulse readings. A heart symbol typically indicates the pulse rate‚ displayed in beats per minute. Systolic and diastolic pressure values are clearly shown‚ often with a color-coded indicator – green for normal‚ yellow for pre-hypertension‚ and red for hypertension – providing an immediate assessment of your readings.

Other symbols alert users to potential issues. A low battery indicator signals the need for replacement. Error messages‚ denoted by specific codes (like ‘Err’ followed by a number)‚ indicate problems with the measurement process‚ requiring troubleshooting. The memory symbol signifies stored readings‚ while a cuff inflation symbol shows the cuff is actively inflating. Understanding these indicators‚ as detailed in the Omron manual‚ is vital for correct interpretation and device operation.

Setting Up Your BP786N

Proper setup involves installing batteries‚ correctly attaching the cuff‚ and accurately setting the date and time for reliable blood pressure monitoring and data storage.

Installing Batteries

Omron BP786N operates using batteries‚ crucial for portable and reliable function. To install‚ locate the battery compartment‚ typically on the device’s underside or rear panel. Open the compartment cover‚ usually with a sliding or hinged mechanism. Insert the specified type and number of batteries – commonly AA or AAA – ensuring correct polarity‚ as indicated by the + and ⸺ symbols inside the compartment.

Incorrect battery installation can prevent the monitor from powering on or lead to inaccurate readings. Once batteries are securely in place‚ close the compartment cover until it clicks shut. Regularly check battery levels‚ as low batteries can affect performance. Replace all batteries simultaneously with new ones of the same type for optimal results. Proper battery management ensures consistent and accurate blood pressure measurements.

Attaching the Cuff Correctly

Proper cuff attachment is paramount for accurate Omron BP786N readings. Ensure the cuff is positioned correctly on your upper arm‚ approximately one inch above the elbow. The artery mark on the cuff should align with the brachial artery‚ typically located on the inner side of your elbow.

Wrap the cuff snugly‚ but not too tightly‚ around your arm. The cuff should be smooth and even‚ without any bunching or twisting. Most cuffs have size indicators; select the appropriate size for your arm circumference. Incorrect cuff size or placement can significantly affect measurement accuracy. Avoid applying the cuff over clothing; bare skin is recommended. Secure the cuff firmly‚ ensuring it remains stable throughout the measurement process for reliable results.

Setting Date and Time

Accurate date and time settings are crucial for proper data logging and tracking with your Omron BP786N monitor. Upon initial setup‚ or after battery changes‚ the device may prompt you to set the current date and time. Typically‚ this is achieved by pressing and holding the ‘Memory’ or ‘Start/Stop’ button for a few seconds‚ activating the setting mode.

Use the ‘+’ and ‘-’ buttons to adjust the year‚ month‚ day‚ hour‚ and minute. Confirm each setting by pressing the ‘Memory’ or ‘Start/Stop’ button again. Ensure the correct AM/PM designation is selected. Properly configured date and time stamps allow for accurate review of your blood pressure history within the device’s memory and when synced with the Omron Connect app.

Taking Accurate Measurements

Consistent technique is vital for reliable readings; remain still‚ sit upright‚ and ensure the cuff is correctly positioned‚ following the Omron guidelines carefully.

Proper Measurement Technique

Achieving accurate blood pressure readings with your Omron BP786N requires adherence to a specific technique. Before starting‚ rest for five minutes in a quiet room. Sit comfortably with your back supported and feet flat on the floor – avoid crossing your legs.

Ensure your arm is supported at heart level‚ and the cuff is positioned correctly‚ typically one inch above the elbow. The cuff should be snug but not too tight. Avoid talking or moving during the measurement process.

Follow the on-screen prompts and remain still until the measurement is complete. Taking multiple readings‚ spaced a minute or two apart‚ can provide a more comprehensive assessment. Consistency in your technique is key for reliable results and tracking changes over time. Refer to the Omron manual for detailed illustrations and guidance.

Understanding Your Readings

Interpreting your blood pressure readings from the Omron BP786N is crucial for monitoring your health. Systolic pressure‚ the top number‚ represents the pressure when your heart beats‚ while diastolic‚ the bottom number‚ indicates pressure between beats. Generally‚ a normal reading is considered below 120/80 mmHg.

However‚ individual targets may vary based on age‚ health conditions‚ and doctor’s recommendations. The device may also display a pulse rate‚ indicating your heart’s beats per minute. Irregular heartbeat detection is a feature of some Omron models.

Consistent high readings warrant medical attention. Regularly record your measurements and share them with your healthcare provider for accurate assessment and personalized guidance. Consult the Omron manual for a detailed explanation of reading classifications and potential health implications.

Memory Function and Data Storage

The Omron BP786N boasts a robust memory function‚ storing multiple readings for tracking trends over time. This allows users and healthcare providers to monitor blood pressure fluctuations effectively. The device typically stores readings with date and time stamps‚ facilitating accurate analysis;

Data can often be transferred to a computer or smartphone via Omron Connect‚ enabling detailed charting and reporting. This connectivity feature enhances data management and facilitates sharing information with physicians. The manual details the specific memory capacity and data transfer procedures.

Regularly reviewing stored data helps identify patterns and potential health concerns. Utilizing the memory function empowers proactive health management and informed decision-making‚ alongside professional medical advice.

Troubleshooting Common Issues

Omron BP786N manuals detail error messages and solutions‚ alongside connectivity guidance with Omron Connect‚ assisting users in resolving typical operational challenges efficiently.

Error Messages and Solutions

The Omron BP786N manual provides detailed explanations for various error messages that may appear on the device’s display. Understanding these messages is crucial for accurate troubleshooting and ensuring reliable blood pressure readings. Common errors often relate to cuff application – ensuring it’s securely and correctly positioned is paramount.

Other errors can stem from movement during measurement‚ requiring stillness for optimal results. The manual also addresses issues concerning low battery power‚ prompting timely replacement. For connectivity problems with Omron Connect‚ the guide offers steps to re-establish a stable Bluetooth connection.

Specific error codes are clearly defined‚ accompanied by suggested solutions‚ ranging from re-starting the device to checking the tubing for proper connection. Consulting the manual’s troubleshooting section before seeking further assistance is highly recommended for quick and effective resolution of most common issues.

Connectivity with Omron Connect

The Omron BP786N seamlessly integrates with the Omron Connect mobile app via Bluetooth‚ enabling users to track their blood pressure readings over time and gain valuable insights into their cardiovascular health. The Omron manual details the pairing process‚ ensuring a smooth connection between the monitor and your smartphone or tablet.

Once paired‚ data is automatically transferred to the app‚ allowing for easy visualization of trends and patterns. Users can also share this data with their healthcare providers for more informed consultations. For those wishing to transfer data to Samsung Health‚ specific instructions are available.

Omron Connect offers features like medication reminders and personalized insights‚ enhancing the overall management of hypertension. Troubleshooting tips within the manual address common connectivity issues‚ ensuring a reliable data transfer experience.

Frequently Asked Questions (FAQ)

Q: Where can I find the complete instruction manual for the Omron BP786N? A: A free downloadable manual is readily available online‚ providing detailed guidance on all aspects of the device’s operation‚ from setup to troubleshooting.

Q: What do the error messages mean? A: The Omron manual comprehensively lists all potential error messages displayed on the BP786N‚ along with clear explanations and suggested solutions to resolve the issues.

Q: Is the Omron BP786N compatible with Samsung Health? A: Yes‚ instructions are provided for transferring data from Omron Connect to Samsung Health‚ allowing for centralized health data management.

Q: Where can I purchase original Omron products? A: Authorized dealers and the official online store offer genuine Omron products with warranty support‚ ensuring quality and reliability.

Maintaining Your BP786N

Omron devices require regular cleaning and timely battery replacements for optimal performance and longevity‚ as detailed within the comprehensive user manual guidelines.

Cleaning and Storage

To ensure the longevity and accuracy of your Omron BP786N blood pressure monitor‚ regular cleaning is essential. Gently wipe the main unit and cuff with a soft‚ dry cloth. Avoid using abrasive cleaners‚ solvents‚ or water directly on the device‚ as this could cause damage.

For the cuff‚ if more thorough cleaning is needed‚ slightly dampen a cloth with mild detergent and wipe carefully. Ensure no moisture remains before reattaching. Proper storage is also crucial. Keep the monitor in a cool‚ dry place‚ away from direct sunlight and extreme temperatures.

Avoid storing the device in humid environments or with corrosive materials. When not in use‚ store the cuff flat or loosely rolled to prevent creases that could affect its performance. Following these simple cleaning and storage guidelines will help maintain the reliability of your Omron BP786N for years to come.

Battery Replacement

The Omron BP786N monitor requires regular battery replacement to maintain accurate readings. The device typically uses AA or AAA batteries‚ depending on the model variation – consult your device’s specific documentation for confirmation. When the low battery indicator appears on the display‚ it’s time to replace the batteries promptly.

Always use new batteries of the same type and capacity. Do not mix old and new batteries‚ or different battery types‚ as this can cause leakage or damage to the device. To replace the batteries‚ locate the battery compartment (usually on the back or bottom of the unit) and follow the polarity markings (+ and -) inside.

Ensure the batteries are securely inserted before closing the compartment. Proper battery maintenance is vital for consistent and reliable blood pressure monitoring with your Omron BP786N.

Warranty Information

Omron provides a warranty for the BP786N blood pressure monitor‚ offering customers peace of mind regarding potential defects in materials or workmanship. The standard warranty period is typically up to five years from the date of purchase‚ but this can vary depending on the region and retailer. It’s crucial to retain your proof of purchase – the original receipt or invoice – as it’s required for any warranty claim.

The warranty generally covers repairs or replacement of the defective unit‚ at Omron’s discretion. It does not cover damage caused by misuse‚ accidents‚ unauthorized repairs‚ or normal wear and tear. To initiate a warranty claim‚ contact Omron’s customer support or an authorized service center.

Detailed warranty terms and conditions are available in the product manual and on the official Omron website. Registering your device online may also provide additional benefits and streamline the warranty process.

xxx pdf

xXx: Return of Xander Cage, released in 2017, blends action and espionage, featuring Vin Diesel’s return as Xander Cage. The film navigates themes surrounding the controversial .xxx domain, sparking online discussions and cultural impact.

Overview of the Film

xXx: Return of Xander Cage is a high-octane action spectacle centering on extreme sports enthusiast and reluctant spy, Xander Cage. Recruited to recover the dangerous Pandora Project – a device with global control potential – Xander assembles a new team. The narrative touches upon the .xxx domain’s association with adult content, briefly acknowledged within online discussions surrounding the film’s title and marketing, adding a layer of intrigue.

The xXx Franchise: A Brief History

The xXx franchise debuted in 2002 with xXx, starring Vin Diesel as an extreme athlete recruited by the NSA. A sequel, xXx: State of the Union (2005), followed. Return of Xander Cage (2017) revived the series, acknowledging the notoriety surrounding the .xxx domain through online commentary. The franchise consistently blends action with a rebellious spirit, often sparking conversations about its provocative title and associated imagery.

Vin Diesel as Xander Cage

Vin Diesel embodies Xander Cage, a charismatic extreme sports enthusiast turned government operative, delivering high-octane action and a rebellious attitude throughout the xXx films.

Character Profile: Xander Cage

Xander Cage is an adrenaline junkie and reluctant hero, initially presented as a defiant individual coerced into service by the National Security Agency. He’s a master of extreme sports – snowboarding, skateboarding, and BASE jumping – skills he readily applies to his missions. Unlike traditional spies, Xander operates outside conventional protocols, relying on instinct and a network of equally unconventional allies. He’s fiercely independent, possessing a strong moral compass despite his rebellious exterior, making him a unique and captivating action protagonist.

Diesel’s Performance and Impact

Vin Diesel revitalized the xXx franchise with his charismatic portrayal of Xander Cage, injecting a blend of physicality and humor into the role. His performance resonated with audiences, contributing significantly to the film’s box office success. Diesel’s star power drew a wider demographic, and his commitment to practical stunts enhanced the action sequences’ authenticity. He embodies the anti-hero archetype, making Xander Cage a memorable and influential action figure.

Deepika Padukone’s Role

Deepika Padukone marked her Hollywood debut as Serena Unger, a skilled physicist. Her performance broadened the film’s appeal, showcasing her action capabilities and establishing her international presence.

Serena Unger: Character Details

Serena Unger is a brilliant and resourceful physicist central to the plot of xXx: Return of Xander Cage. She possesses crucial knowledge regarding the Pandora Project, a dangerous weapon capable of global disruption. Initially reluctant, Serena joins forces with Xander Cage, providing technical expertise and courageously facing perilous situations. Her character isn’t merely a damsel in distress; she’s a proactive and intelligent asset, contributing significantly to the mission’s success. Padukone portrays Serena with a compelling blend of vulnerability and strength, making her a memorable addition to the franchise.

Padukone’s Breakthrough in Hollywood

xXx: Return of Xander Cage marked Deepika Padukone’s significant debut in Hollywood cinema, catapulting her to international recognition. Prior to this, she was a leading star in Bollywood. This role showcased her action capabilities and broadened her global appeal. The film provided a platform to demonstrate her versatility, attracting further opportunities in Western productions. Padukone’s performance garnered positive attention, solidifying her position as a rising international actress and opening doors for future roles.

Plot Summary and Key Scenes

The film centers on Xander Cage retrieving the dangerous Pandora Project. Key scenes involve thrilling stunts and global chases, highlighting the threat posed by the stolen technology.

The Pandora Project and its Threat

The Pandora Project represents a devastating weapon capable of controlling global satellite systems, posing an existential threat to world security. A rogue group intends to utilize this technology for malicious purposes, prompting Xander Cage’s reactivation. The project’s potential for widespread disruption and control fuels the film’s central conflict, demanding immediate intervention to prevent catastrophic consequences. Its power lies in its ability to disable crucial infrastructure worldwide.

Action Sequences and Stunts

xXx: Return of Xander Cage delivers exhilarating action, showcasing practical stunts and CGI enhancements. Sequences include motorcycle chases across the Philippines, a daring ski-parachute jump, and intense hand-to-hand combat. Diesel and Padukone perform many stunts, adding realism. The film prioritizes spectacle, featuring large-scale destruction and innovative choreography. These sequences are designed to be over-the-top and visually stunning, embodying the franchise’s signature style.

The Cast and Crew

xXx: Return of Xander Cage stars Vin Diesel, Deepika Padukone, and Donnie Yen, guided by director D.J. Caruso. The ensemble cast delivers dynamic performances within the action-packed narrative.

Notable Supporting Actors

Beyond Vin Diesel and Deepika Padukone, xXx: Return of Xander Cage boasts a compelling supporting cast. Donnie Yen delivers impactful fight choreography as Xiang, while Kris Wu portrays a skilled hacker. Rory McCann’s portrayal of Tennyson adds a layer of tactical expertise. Tony Jaa’s presence enhances the film’s martial arts sequences, contributing to the high-octane action. These actors collectively elevate the film’s dynamic and global appeal, enriching the narrative with diverse talents and skills.

Director D.J. Caruso’s Vision

D.J. Caruso aimed to revitalize the xXx franchise with a heightened sense of spectacle and global scope. He prioritized practical stunts alongside visual effects, delivering intense action sequences. Caruso focused on amplifying the over-the-top nature of Xander Cage’s character, embracing a fast-paced, energetic style. His vision involved showcasing diverse international locations and a multicultural cast, broadening the film’s appeal and creating a visually stunning experience.

Production Details

xXx: Return of Xander Cage’s production spanned multiple global locations, including Mumbai and the Dominican Republic, utilizing extensive special effects and dynamic visuals for action.

Filming Locations Around the World

xXx: Return of Xander Cage showcased diverse international settings, significantly enhancing its visual appeal. Principal photography unfolded in vibrant Mumbai, India, offering bustling cityscapes and dynamic action sequences. The Dominican Republic provided stunning tropical backdrops, contributing to thrilling chase scenes. Further filming occurred in Toronto, Canada, doubling as various international locales, and Morocco, adding exotic flair. These locations broadened the film’s scope and global appeal, creating a visually rich experience for audiences worldwide.

Special Effects and Visuals

xXx: Return of Xander Cage heavily relied on cutting-edge special effects to deliver its high-octane action. Elaborate stunts, including motorcycle chases and gravity-defying feats, were augmented with CGI. Visual effects teams meticulously crafted realistic explosions and digitally enhanced environments. The film’s visual style prioritized a sleek, modern aesthetic, complementing the fast-paced narrative. These effects heightened the film’s excitement and contributed to its overall blockbuster appeal, immersing viewers in Xander Cage’s world.

Reception and Box Office Performance

xXx: Return of Xander Cage garnered mixed reviews, yet achieved moderate box office success globally, earning over $346 million against a $85 million budget.

Critical Reviews and Audience Response

xXx: Return of Xander Cage received generally mixed reviews from critics, often citing its over-the-top action sequences and predictable plot as drawbacks. However, many praised Vin Diesel’s charismatic performance and the film’s energetic pace. Audience reception was more positive, with viewers enjoying the spectacle and the globe-trotting adventure. Despite criticisms, the film resonated with fans of the action genre, contributing to its box office success. The association with the .xxx domain sparked some discussion, though it didn’t significantly impact critical assessment.

Worldwide Box Office Numbers

xXx: Return of Xander Cage grossed approximately $346.1 million worldwide, demonstrating solid commercial success despite mixed critical reception. The film performed particularly well in international markets, notably China, where it earned over $190 million. Domestic box office revenue reached around $97.3 million. While not a blockbuster on the scale of some action franchises, the film proved profitable for Paramount Pictures, justifying potential future installments within the xXx universe, despite the .xxx domain connection.

The .xxx Domain and its Relevance

The .xxx top-level domain, intended for adult content, created controversy due to restrictions and filtering in many countries, linking to the xXx film’s title.

History and Purpose of the .xxx TLD

The .xxx top-level domain (TLD) originated from ICM Registry’s proposal in 2005, aiming to create a dedicated space for adult content online. This segregated approach intended to offer a safer browsing experience and provide a clear identifier for adult websites. Registration initially required proof of adult content ownership or membership in adult entertainment collectives. Despite facing global resistance and filtering in numerous nations due to societal and legal concerns, the .xxx TLD persists as a specialized domain.

Controversies and Restrictions Surrounding .xxx Domains

The .xxx domain faced widespread controversy and blocking by governments and internet service providers globally, stemming from moral, religious, and legal objections to adult content. Registration requirements, initially demanding adult content verification or collective membership, added complexity. While some countries actively filter .xxx access, others permit it. Despite these restrictions, the domain continues operation, though its adoption remains limited due to ongoing stigma and accessibility challenges.

xXx in Popular Culture

xXx: Return of Xander Cage generated memes and online discussion, often referencing the film’s association with the .xxx domain and its provocative marketing strategies.

Impact on Action Film Genre

xXx: Return of Xander Cage didn’t fundamentally redefine the action genre, but it contributed to a trend of heightened, over-the-top stunts and a self-aware, playful tone. The film’s global scope and diverse cast also reflected a growing inclusivity within blockbuster action cinema. While not critically lauded as groundbreaking, it offered a distinct, commercially successful alternative to more serious action franchises, influencing subsequent films with its emphasis on spectacle and personality.

Memes and Online Presence

xXx: Return of Xander Cage generated a noticeable, though not overwhelming, online presence. References to the film, particularly involving Vin Diesel’s character, circulated on platforms like YouTube and various meme communities. Discussions surrounding the .xxx domain association fueled some online commentary, often satirical. The film’s action sequences also provided fodder for short clips and edits shared across social media, contributing to its digital footprint.

Technical Aspects of the Film

xXx: Return of Xander Cage employed dynamic cinematography and editing to enhance action sequences. The soundtrack complements the film’s global locations and high-octane energy.

Cinematography and Editing

xXx: Return of Xander Cage boasts vibrant cinematography, capturing diverse global locations from Toronto to the Philippines. Fast-paced editing amplifies the film’s energetic action sequences, creating a visually stimulating experience. The camera work emphasizes practical stunts and Diesel’s physicality; Quick cuts and dynamic angles heighten the intensity during fight choreography, mirroring the film’s overall adrenaline-fueled tone. Color grading enhances the visual appeal, contributing to a modern action aesthetic.

Soundtrack and Music

The xXx: Return of Xander Cage soundtrack blends electronic, hip-hop, and orchestral elements, mirroring the film’s global scope and high-octane action. Featuring artists like Skrillex and various international musicians, the music amplifies key scenes. The score dynamically shifts, building tension during suspenseful moments and fueling adrenaline during stunts. Sound design emphasizes impactful explosions and vehicle sequences, creating an immersive auditory experience that complements the visual spectacle.

Behind the Scenes Insights

Production faced logistical challenges filming internationally, coordinating stunts, and navigating diverse locations. The crew adapted, ensuring a seamless blend of practical effects and visual enhancements.

Production Challenges and Solutions

Filming across multiple countries – including Mumbai and the Dominican Republic – presented significant logistical hurdles. Coordinating international crews, securing permits, and managing diverse cultural landscapes demanded meticulous planning. The team utilized advanced communication technologies and local expertise to overcome these obstacles.

Stunt work, central to the xXx franchise, required extensive preparation and safety protocols. Complex action sequences were meticulously choreographed, employing skilled stunt performers and visual effects to deliver thrilling, believable moments. Adapting to varying filming environments also posed unique challenges for the stunt team.

Anecdotes from the Set

Vin Diesel, known for his playful demeanor, frequently engaged with the crew, boosting morale with impromptu dance-offs and comedic improvisations. Deepika Padukone quickly adapted to the fast-paced action environment, impressing colleagues with her dedication and willingness to learn complex stunts.

D.J. Caruso fostered a collaborative atmosphere, encouraging input from all departments. A memorable incident involved a spontaneous street performance during filming in Mumbai, captivating local residents and adding an authentic feel to the scenes.

xXx and its Connection to Adult Content

The film’s title inherently links to the .xxx top-level domain, intended for adult websites, creating a misconception despite the action-focused narrative and plotlines.

The Misconception and Association

Despite being an action film, xXx: Return of Xander Cage faced immediate association with adult content due to its title’s resemblance to the .xxx domain. This TLD, specifically designated for pornography, created a prevalent, though inaccurate, public perception. The film’s marketing struggled to overcome this initial branding, requiring consistent clarification that it wasn’t directly related to adult websites. The .xxx domain’s restrictions and controversies further fueled the connection in online discussions, despite the film’s content being unrelated.

Addressing the .xxx Domain Link

The filmmakers actively distanced xXx: Return of Xander Cage from the .xxx domain’s connotations. While acknowledging the unavoidable association, marketing focused on the film’s action sequences and star power. Discussions highlighted the domain’s specific purpose and restrictions – requiring adult content sponsorship for registration – emphasizing the film’s distinct content. Despite these efforts, online searches and memes continued to link the title to adult websites, demonstrating the enduring, albeit incorrect, connection.

Future of the xXx Franchise

Potential sequels remain open, exploring expanding the xXx universe with new agents and global threats, though concrete plans haven’t surfaced post-2017’s release.

Potential Sequels and Spin-offs

Despite Return of Xander Cage’s ending hinting at team expansion, a direct sequel hasn’t materialized. Discussions around spin-offs focusing on other xXx operatives, like Serena Unger, have circulated amongst fans. However, the franchise’s future remains uncertain, potentially dependent on audience demand and Vin Diesel’s availability. The .xxx domain’s association, while controversial, hasn’t demonstrably hindered development, but likely influences marketing considerations. Further installments could explore new technological threats and international locales, building upon the established action formula.

Expanding the xXx Universe

The xXx universe possesses untapped potential beyond Xander Cage’s exploits. Introducing new teams specializing in different threat areas – cybersecurity, biological warfare – could broaden the scope. Exploring the origins of the Pandora Project and the shadowy organizations behind it offers narrative depth. While the .xxx domain connection remains a peripheral element, it could be subtly woven into storylines involving digital espionage. A streaming series format could allow for deeper character development and interconnected narratives, enriching the franchise’s overall world-building.

xXx and International Collaboration

xXx: Return of Xander Cage showcases global filming locations and a diverse cast, reflecting international appeal and collaborative filmmaking efforts, despite the .xxx domain’s presence.

Global Appeal and Diverse Cast

xXx: Return of Xander Cage intentionally broadened its scope with international filming locations – from Poland to the Philippines – enhancing its global appeal. The cast itself mirrored this diversity, prominently featuring Deepika Padukone alongside Vin Diesel. This strategic inclusion aimed to connect with wider audiences, transcending typical Hollywood boundaries. Despite the film’s association with the .xxx domain, the focus remained on action and international collaboration, attracting viewers from various cultural backgrounds and demonstrating a commitment to inclusivity within the action genre.

Filming in Multiple Countries

xXx: Return of Xander Cage’s production spanned the globe, utilizing diverse locales to heighten its visual spectacle. Principal photography occurred in locations including Toronto, Poland, and the Dominican Republic, adding authenticity to the action sequences. The Philippines also served as a key filming destination, showcasing stunning landscapes. This international approach, while enhancing the film’s scope, existed alongside the unusual marketing tie-in with the .xxx domain, creating a unique production context.

The Use of “XXX” in Other Contexts

Beyond its association with adult content and the film’s marketing, “XXX” historically functions as a placeholder, a symbol for kisses, or denotes Roman numerals for 30.

“XXX” as a Placeholder or Symbol

Historically, “XXX” served as a common placeholder, much like “foo” or “bar” in programming, representing an unknown or unspecified value. It also gained traction as a symbolic representation of kisses, particularly in letters – a playful shorthand for affectionate closure. Furthermore, in Roman numeral notation, “XXX” unequivocally signifies the number 30, appearing in dates and numbering systems. This versatile usage predates its association with adult content, demonstrating a broader cultural history.

Historical and Cultural Significance of “XXX”

Before its modern connotations, “XXX” held diverse meanings. Roman numerals utilized it for 30, appearing on monuments and documents. In medieval times, three Xs marked documents requiring royal seals, signifying importance. Later, it became a playful symbol for kisses in correspondence, a tradition spanning centuries. The symbol’s evolution demonstrates a fascinating shift in cultural perception, from official markings to affectionate gestures, before its association with adult content emerged.

your guide to a better future

Your Guide to a Better Future: An Overview

As of December 21, 2025, navigating a complex world requires understanding global displacement, technological shifts, and evolving community dynamics – all crucial for progress.

Defining a “Better Future”

A “better future” isn’t a singular destination, but a continually evolving concept shaped by present actions and anticipated challenges. Currently, December 21, 2025, finds us grappling with 122.6 million forcibly displaced individuals globally – a stark reality demanding inclusion in any definition of progress.

It necessitates addressing not just technological advancements, as discussed in forums like Geizhals, but also the human cost of disruption. A truly improved future prioritizes sustainability, equitable resource management, and robust social cohesion. It acknowledges the shifting landscape of work and the need for lifelong learning.

Furthermore, it demands ethical considerations in technological development, ensuring innovation serves humanity, not exacerbates existing inequalities. Ultimately, a better future is one where individual wellbeing, community resilience, and global cooperation are paramount.

The Role of Technology in Future Progress

Technology is undeniably a pivotal force in shaping future progress, yet its impact isn’t inherently positive. Discussions on platforms like Geizhals highlight the constant evolution of hardware and software, driving innovation. However, as of December 21, 2025, we must consider the broader implications.

Artificial intelligence and automation, while promising increased efficiency, necessitate proactive skills development to mitigate potential job displacement. Cloud computing and data security are crucial for a connected world, but require constant vigilance against threats. Biotechnology offers healthcare breakthroughs, demanding ethical frameworks for responsible implementation.

Technology’s role isn’t simply about advancement; it’s about responsible advancement. It must be leveraged to address global challenges like climate change, resource scarcity, and displacement, fostering a future where innovation serves humanity and promotes equitable opportunities for all.

Global Challenges and Future Solutions

Addressing displacement (122.6 million forcibly displaced as of June 2024), climate change, and inequality requires collaborative, innovative solutions for a sustainable future.

Climate Change and Sustainability

The urgency of climate change demands immediate and sustained action. Transitioning to sustainable practices isn’t merely an environmental imperative, but a foundational element for a better future. This involves drastically reducing carbon emissions through renewable energy adoption and innovative technologies.

Furthermore, fostering a circular economy – minimizing waste and maximizing resource utilization – is critical. Community-level initiatives, coupled with global cooperation, are essential for effective implementation.

Beyond mitigation, adaptation strategies are vital, particularly for vulnerable populations already experiencing the impacts of a changing climate. Investing in resilient infrastructure and sustainable agriculture will be key. The Geizhals forum discussions, while focused on tech, highlight a broader societal awareness of needing change, reflecting a growing demand for sustainable solutions.

Resource Management and Scarcity

Effective resource management is paramount in securing a sustainable future. Growing populations and consumption patterns exacerbate scarcity, demanding innovative solutions beyond simply “doing less.” We must prioritize efficient resource allocation, focusing on reducing waste across all sectors – from manufacturing to individual consumption.

Technological advancements, like those discussed within tech communities (evidenced by forums like Geizhals), offer potential for optimizing resource use. This includes advancements in materials science, precision agriculture, and water management.

However, technology alone isn’t sufficient. A shift towards a circular economy, emphasizing reuse, repair, and recycling, is crucial. Furthermore, equitable access to resources must be addressed to prevent conflict and ensure global stability, fostering a more just and sustainable world for all.

Global Displacement and Refugee Crises

The staggering figure of 122.6 million forcibly displaced people (as of late June 2024) underscores a critical challenge to a better future. Conflict, persecution, and climate change are primary drivers, demanding a multifaceted response extending beyond immediate humanitarian aid.

Addressing root causes is essential – promoting peace, upholding human rights, and tackling climate change. Simultaneously, we must strengthen international cooperation to ensure equitable responsibility-sharing in hosting and supporting refugees.

Online communities, like those engaging on platforms such as Geizhals, demonstrate a global interconnectedness that can be leveraged for awareness and support. Investing in inclusive policies that facilitate integration – access to education, healthcare, and employment – is vital. A future built on empathy and inclusivity is a future worth striving for.

Economic Inequality and Future Opportunities

A widening gap in economic opportunity threatens the foundations of a stable and prosperous future. While technological advancements promise progress, their benefits aren’t automatically shared equitably. The shifting landscape of work, discussed in various online forums, necessitates proactive strategies.

Investing in skills development and lifelong learning – as highlighted by experts – is paramount. This includes fostering adaptability and critical thinking, preparing individuals for evolving job markets. Furthermore, exploring innovative economic models, such as universal basic income or expanded social safety nets, deserves consideration.

Platforms like Geizhals, focused on informed consumer choices, exemplify the power of accessible information. Promoting financial literacy and equitable access to resources are crucial steps towards building a future where economic opportunity is genuinely inclusive and available to all.

Technological Advancements Shaping the Future

AI, biotechnology, and cloud computing are rapidly evolving, demanding ethical considerations and robust data security measures, as discussed in online tech communities and Forbes analyses.

Artificial Intelligence and Automation

The rise of Artificial Intelligence (AI) and automation presents both immense opportunities and significant challenges for a better future. Discussions within online forums, like Geizhals, highlight the evolving landscape of work and the need for proactive skills development. AI’s potential to streamline processes and boost productivity is undeniable, but concerns regarding job displacement require careful consideration.

Venture capitalists, as noted by Forbes contributors, are heavily investing in AI, recognizing its transformative power across various sectors. However, responsible implementation is paramount. This includes addressing algorithmic bias, ensuring data privacy, and fostering a workforce equipped to collaborate with AI systems. The future isn’t about humans versus machines, but rather humans with machines, leveraging AI’s capabilities to solve complex problems and create a more equitable and sustainable world.

Ultimately, navigating this technological shift requires a focus on lifelong learning and adaptability, preparing individuals for the jobs of tomorrow.

Biotechnology and Healthcare Innovations

Biotechnology and healthcare innovations are poised to dramatically reshape our future, offering solutions to some of humanity’s most pressing challenges. While the provided text doesn’t directly detail these advancements, the broader context of a “better future” necessitates acknowledging their potential.

Consider the possibilities: personalized medicine tailored to individual genetic profiles, gene editing technologies to eradicate inherited diseases, and advancements in diagnostics for early disease detection. These breakthroughs promise longer, healthier lives and a reduction in suffering. However, ethical considerations are crucial. Equitable access to these innovations must be ensured, preventing further disparities in healthcare outcomes.

Furthermore, responsible development and regulation are essential to mitigate potential risks. Discussions surrounding AI, as seen in forums like Geizhals, also apply here – data privacy, algorithmic bias, and the potential for unintended consequences must be carefully addressed. A future focused on wellbeing requires harnessing the power of biotechnology responsibly and inclusively.

The Future of Work and Skills Development

The landscape of work is undergoing a significant transformation, demanding a proactive approach to skills development. While the provided snippets mention forums discussing technical aspects like mainboard searches (Geizhals), the underlying theme of adaptation is key to a better future.

Automation and artificial intelligence are reshaping job markets, necessitating a shift towards roles requiring uniquely human skills – critical thinking, creativity, emotional intelligence, and complex problem-solving. Lifelong learning will become paramount, with individuals needing to continually upskill and reskill throughout their careers.

Educational institutions and employers must collaborate to provide accessible and relevant training programs. Furthermore, fostering a culture of adaptability and embracing change will be crucial for navigating this evolving landscape. The discussions on Geizhals highlight a community actively seeking information and solutions – a model for future learning and professional development. Preparing for the future of work isn’t just about acquiring new skills; it’s about cultivating a mindset of continuous growth.

Cloud Computing and Data Security

Cloud computing is rapidly becoming the backbone of modern infrastructure, offering scalability and accessibility, yet simultaneously presenting significant data security challenges. The mentions of Geizhals forums, while focused on hardware, implicitly rely on secure data transmission and storage for their operations.

A better future hinges on robust cybersecurity measures. As we increasingly rely on cloud-based services, protecting sensitive data from breaches and cyberattacks is paramount. This requires advancements in encryption, multi-factor authentication, and proactive threat detection. Furthermore, ethical considerations surrounding data privacy and responsible data handling are crucial.

Investment in data security infrastructure and skilled cybersecurity professionals is essential. International cooperation and standardized security protocols are also needed to address the global nature of cyber threats. Building trust in cloud technologies through demonstrable security will unlock their full potential and contribute to a more secure and prosperous future.

Social and Political Trends for a Better Future

Community discussions, like those on Geizhals forums, highlight the need for accessible platforms and open dialogue to foster social cohesion and informed political engagement.

The Importance of Education and Lifelong Learning

In a rapidly evolving landscape, continuous education is no longer a privilege, but a necessity for navigating future challenges and opportunities. The discussions surrounding technological advancements – from AI to biotechnology – demand a workforce equipped with adaptable skills.

Platforms like Geizhals, while focused on product comparisons, demonstrate a community actively seeking information and engaging in learning about complex systems. This inherent curiosity reflects a broader societal need for accessible knowledge.

Lifelong learning isn’t confined to formal institutions; it encompasses self-directed study, skill development, and critical thinking. Understanding emerging trends, as evidenced by forum discussions on topics like mainboard searches and financial investments, requires a commitment to ongoing intellectual growth.

Ultimately, fostering a culture of learning empowers individuals to contribute meaningfully to a better future, adapt to change, and participate effectively in a globalized world.

Community Building and Social Cohesion

A brighter future hinges on strengthening the bonds within and between communities. The Geizhals forum, despite its technical focus, exemplifies this principle – a space where individuals connect, share knowledge, and collectively solve problems. This sense of belonging is vital in addressing global challenges.

Discussions ranging from product comparisons to financial advice demonstrate a desire for shared understanding and mutual support. As the world faces issues like displacement and inequality, fostering social cohesion becomes paramount.

Online platforms can facilitate this, but genuine community extends beyond digital spaces. It requires active participation, empathy, and a commitment to inclusivity. Building trust and bridging divides are essential for collaborative problem-solving and creating a more equitable society.

Ultimately, a cohesive society is more resilient, adaptable, and capable of navigating the complexities of the future.

Ethical Considerations in Technological Development

Rapid technological advancement demands careful ethical scrutiny. While innovations like AI and biotechnology promise progress, they also present potential risks. The discussions within forums like Geizhals, though focused on hardware, subtly highlight a broader concern: the impact of technology on individuals and society.

As venture capitalists invest in future technologies, prioritizing ethical frameworks is crucial. Considerations must extend beyond profit to encompass fairness, transparency, and accountability. Automation, for example, requires proactive planning for workforce transitions and equitable access to new skills.

Data security and privacy are paramount, demanding robust safeguards against misuse. Furthermore, the potential for bias in algorithms must be addressed to prevent perpetuating existing inequalities. A future guided by ethical principles ensures technology serves humanity, rather than exacerbating its challenges.

The Future of Governance and Global Cooperation

Addressing global challenges—like displacement affecting 122.6 million people as of June 2024—requires strengthened international cooperation. Traditional governance models may struggle to keep pace with rapidly evolving technologies and interconnected crises.

Effective solutions demand collaborative efforts, transcending national borders. Forums like Geizhals, while tech-focused, demonstrate the power of community and shared discussion – principles applicable to global governance. A shift towards more inclusive and adaptable systems is essential.

This includes fostering dialogue between governments, organizations, and citizens. Prioritizing transparency and accountability will build trust and facilitate collective action. Furthermore, anticipating future disruptions and proactively establishing frameworks for cooperation are vital for navigating an increasingly complex world and building a better future for all.

Personal Development for a Brighter Tomorrow

Cultivating adaptability and resilience, alongside prioritizing wellbeing, is key. Navigating change—like discussions on Geizhals forums—demands continuous learning and mental fortitude.

Cultivating Resilience and Adaptability

In a rapidly changing world, resilience and adaptability aren’t merely beneficial – they are essential. The constant stream of updates, reflected even in forum discussions like those on Geizhals regarding price comparisons and product searches, demonstrates a need to adjust continuously.

Developing these qualities involves embracing a growth mindset, viewing challenges as opportunities for learning rather than insurmountable obstacles. The ability to bounce back from setbacks, as seen in discussions about financial matters (Flatex Depot) or technical issues (Mainboard searches), is crucial.

Furthermore, adaptability requires a willingness to unlearn outdated information and embrace new perspectives. The evolving landscape of work, coupled with global events causing displacement (122.6 million forcibly displaced as of June 2024), necessitates a flexible approach to life and career. Prioritizing lifelong learning and staying informed about emerging trends are vital components of this process.

Prioritizing Mental and Physical Wellbeing

A truly better future isn’t solely defined by technological advancements or economic prosperity; it fundamentally relies on the wellbeing of individuals. The constant flow of information and the pressures of a changing world, as evidenced by active online forums like Geizhals, can contribute to stress and anxiety.

Prioritizing mental health involves cultivating self-awareness, practicing mindfulness, and seeking support when needed. Equally important is physical health – maintaining a balanced diet, engaging in regular exercise, and ensuring adequate sleep. These aren’t luxuries, but foundational elements for navigating challenges.

Considering the global context – with millions forcibly displaced and facing uncertainty – self-care becomes even more critical. Building strong communities and fostering social cohesion, as highlighted in discussions about the future of work, can provide a vital support network. Investing in wellbeing is investing in a more resilient and thriving future for all.

Financial Literacy and Future Planning

Securing a better future demands proactive financial planning and a strong understanding of economic landscapes. Discussions within online communities, like those found on Geizhals regarding investment platforms (Flatex Depot), demonstrate a growing need for financial knowledge.

Financial literacy isn’t just about accumulating wealth; it’s about making informed decisions, managing risk, and building long-term security. This includes understanding concepts like budgeting, saving, investing, and debt management. Considering global economic inequalities and potential disruptions, future planning is paramount.

Adapting to evolving job markets – influenced by automation and technological advancements – requires foresight and skill development. Furthermore, navigating complex financial products and potential scams necessitates critical thinking and information literacy. Empowering individuals with financial tools is essential for building a more equitable and sustainable future.

Navigating the Future Landscape

Staying informed about emerging trends, utilizing critical thinking, and embracing innovation – as seen in tech discussions – are vital for adapting to change effectively.

Understanding Emerging Trends

The digital landscape is in constant flux. Forums like Geizhals, dedicated to price comparisons and tech discussions, demonstrate a community actively tracking shifts in technology – specifically, mainboard searches and component recognition. This highlights a broader need to monitor evolving trends across various sectors.

Beyond technology, observing discussions around financial platforms like Flatex reveals concerns about data accuracy and investment strategies. This underscores the importance of information literacy and critical evaluation of sources.

Furthermore, the ongoing conversation surrounding the 25th anniversary of Geizhals itself points to the enduring value of community-driven platforms in identifying and analyzing emerging patterns. Recognizing these trends – from technological advancements to societal shifts – is paramount for proactive adaptation and informed decision-making in shaping a better future.

Critical Thinking and Information Literacy

Navigating today’s information flow demands rigorous scrutiny. The Geizhals forum, with its discussions on product details and platform accuracy (like Flatex depot issues), exemplifies the need to question presented data. Users actively identify discrepancies and seek clarification, demonstrating critical engagement.

The prevalence of online discussions – from mainboard searches to Shimano component identification – highlights the importance of verifying information from multiple sources. Relying solely on initial findings can lead to misinformed decisions.

Furthermore, understanding the context of information, such as the purpose of a forum like Geizhals (price comparison and community discussion), is crucial. Developing these skills – questioning, verifying, and contextualizing – is essential for discerning truth and building a well-informed perspective for a brighter future.

Embracing Change and Innovation

The digital landscape is in constant flux, as evidenced by ongoing discussions surrounding the Geizhals platform – from interface changes to search functionality updates. The forum’s very existence relies on adapting to evolving user needs and technological advancements.

The community’s feedback on these changes, particularly regarding the mainboard search, demonstrates a willingness to engage with innovation, even when it disrupts established workflows. This adaptability is paramount.

Similarly, the longevity of Geizhals (celebrating 25 years in 2025) underscores the importance of continuous improvement and embracing new technologies. A future-oriented mindset requires not fearing change, but actively seeking opportunities within it, fostering a culture of experimentation and learning to thrive in an uncertain world.