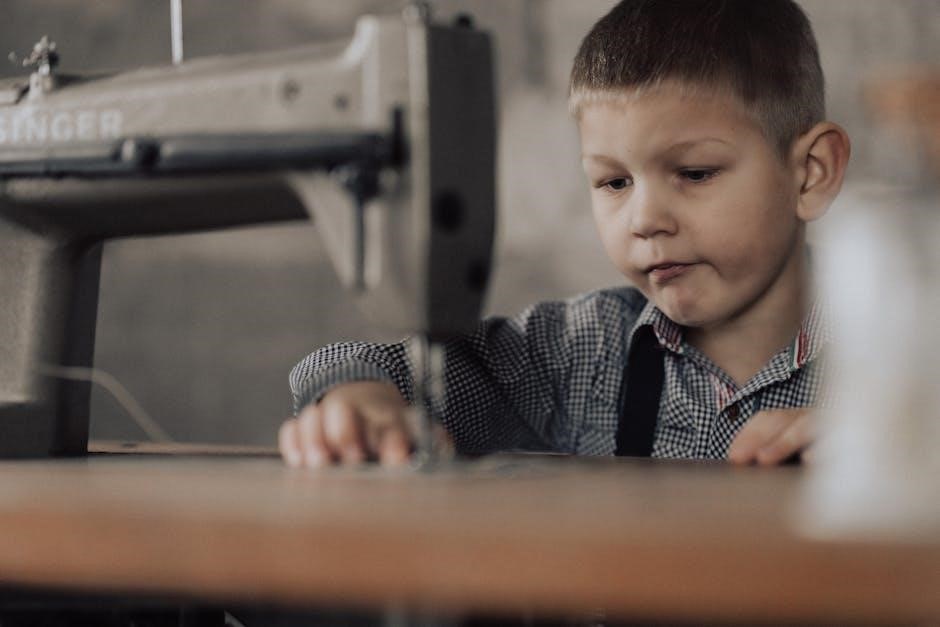
Congratulations! This manual guides you through your new home sewing machine, offering insights into its features and operation. Explore couture techniques and repair guides.
Unboxing and Initial Inspection
Carefully remove your new sewing machine from its packaging. Inspect the box for any signs of damage during shipping – document these immediately with the retailer. Once opened, verify all included accessories are present: power cord, foot pedal, various presser feet (standard, zigzag, buttonhole), bobbins, needle set, screwdriver, seam ripper, and this instruction manual.
Check the machine itself for any visible defects. Ensure all parts are securely attached and that there’s no damage to the body or moving components. Retain the packaging materials for potential returns or future transport. Familiarize yourself with the machine’s overall layout before proceeding; referencing diagrams within this manual will be beneficial. A thorough initial inspection ensures a smooth sewing experience.
Machine Components Overview
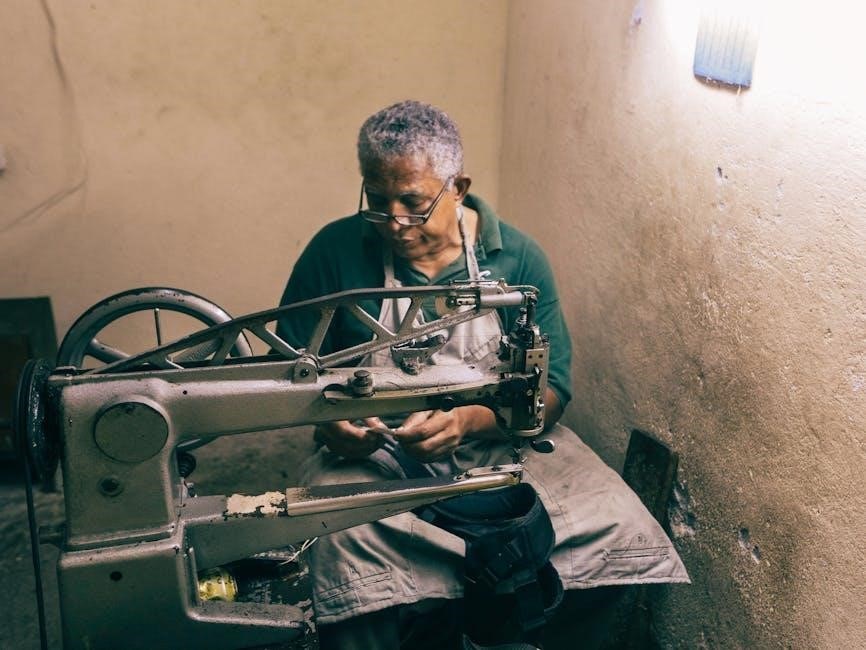
Let’s identify key components. The power switch controls operation, while the foot pedal regulates sewing speed. The bobbin winder prepares bobbins, essential for stitch formation. The needle clamp secures the needle, and the presser foot holds fabric in place.
The stitch selection dial allows choosing various stitch patterns. The tension dial adjusts thread tension for balanced stitches. Understand the stitch length and width controls for customization. The reverse lever enables backstitching for secure seams. Familiarize yourself with the handwheel for manual control and the bobbin case location. Knowing these parts is crucial for operation and maintenance, referencing diagrams for clarity.
Getting Started: Basic Setup
Prepare for sewing! Ensure a stable surface and proper lighting. This section details winding the bobbin, threading, and inserting it – foundational steps for success.
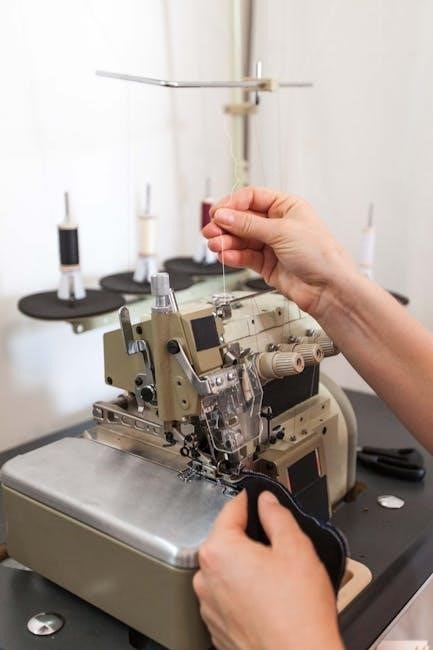
Winding the Bobbin
Begin by placing the thread spool on the spool pin, securing it with the spool cap. Guide the thread through the thread guide, then around the bobbin tension disc. Next, thread the end of the thread through a hole in the bobbin itself, ensuring it catches securely.
Place the bobbin onto the bobbin winder spindle. Gently push the spindle to the right to engage it. Depress the foot pedal to start the winding process. Monitor the bobbin as it fills, stopping when it’s nearly full to prevent overflow.
Once complete, disengage the spindle, remove the bobbin, and trim the thread end. A properly wound bobbin is crucial for consistent stitch quality and smooth sewing operation. Refer to diagrams in your machine’s manual for visual guidance, as procedures can vary slightly between models.
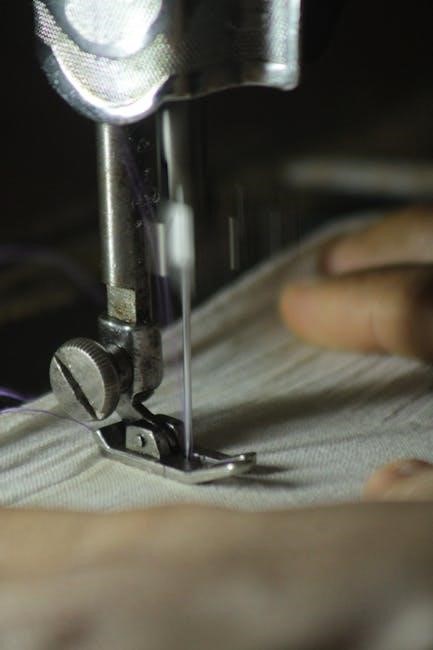
Threading the Upper Thread
Start with the machine turned off and the presser foot raised. Place the spool of thread on the spool pin, securing it with a spool cap. Guide the thread through the first thread guide, then down and around the tension discs – ensuring it seats properly between them.
Continue threading upwards, following the numbered guides indicated on your machine. Pass the thread through the take-up lever, and then down through the needle clamp. Finally, thread the needle from front to back.
Draw several inches of thread through the needle. Proper threading is vital for consistent stitch formation. Always refer to your machine’s specific threading diagram for accurate guidance, as threading paths differ between models. Double-check each step to avoid skipped stitches or tension issues.
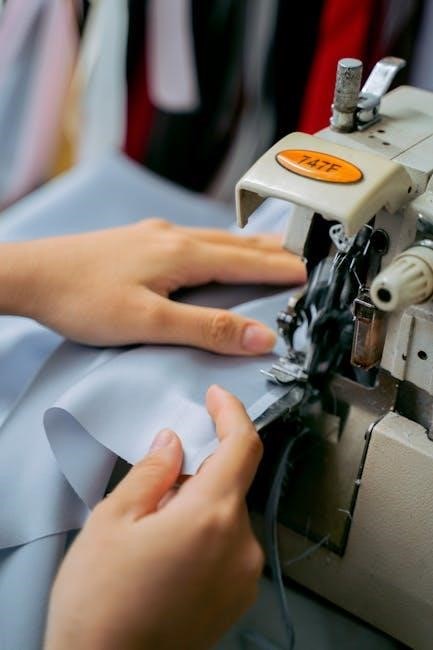
Inserting the Bobbin
Begin by ensuring your machine is turned off. Locate the bobbin winder, typically on the top or side of the machine. Wind the bobbin with thread, following the machine’s bobbin winding instructions – ensuring even distribution.
Once wound, locate the bobbin case. Depending on your machine, this may be front-loading or top-dropping. Open the bobbin compartment and insert the bobbin, ensuring the thread unwinds in the correct direction (consult your manual).
Guide the thread through the tension spring of the bobbin case. Close the bobbin compartment securely. Lift the needle to its highest position and gently pull a few inches of thread through the needle plate. Correct bobbin insertion is crucial for balanced stitches.
Understanding Stitch Types
Explore diverse stitch options! From basic straight and zigzag stitches for everyday projects to specialized buttonhole stitches, unlock your machine’s full potential.
Straight Stitch – For Everyday Sewing
The straight stitch is your workhorse, ideal for a vast array of sewing tasks. It’s the foundational stitch for constructing garments, quilting, and general repairs. Mastering this stitch is crucial for beginners, offering a clean and durable seam. Adjust stitch length for different fabric weights; shorter lengths for delicate fabrics and longer lengths for heavier materials.
Ensure consistent seam allowances by utilizing the markings on your machine’s needle plate as a guide. Practice sewing straight lines on scrap fabric before tackling your project. Uneven ease can sometimes occur, requiring careful attention to fabric distribution. Remember to always test your stitch settings on a sample piece to achieve optimal results. This simple stitch unlocks endless creative possibilities!
Zigzag Stitch – Versatility and Finishing
The zigzag stitch offers remarkable versatility beyond basic seams. It’s perfect for finishing raw edges, preventing fabric fraying, and creating decorative elements. Adjusting the stitch width and length allows for diverse effects, from narrow reinforcement to broad decorative patterns. Utilize it for stretch fabrics, as the zigzag’s give accommodates movement without breaking.
This stitch is also invaluable for appliqué, attaching elastic, and creating buttonholes (though a dedicated buttonhole foot is recommended). Skew can sometimes occur when using zigzag on collars or sleeves; ensure accurate notch alignment. Experiment with different settings to discover the stitch’s full potential. Mastering the zigzag unlocks a world of creative sewing options and professional-looking finishes!
Buttonhole Stitch – A Step-by-Step Guide
Creating buttonholes can seem daunting, but your machine simplifies the process. First, attach the buttonhole foot. Consult your machine’s manual for the correct buttonhole setting – size corresponds to button diameter. Most machines offer automatic buttonhole creation; simply place the button near the foot and lower it.
The machine will stitch around the button, creating a perfectly sized opening. Reinforce the ends by stitching forward and backward a few times. Carefully cut open the buttonhole, avoiding the stitches. Uneven ease can sometimes affect buttonhole shape; ensure proper fabric stabilization. Practice on scrap fabric before working on your garment. A well-executed buttonhole adds a professional touch!
Advanced Sewing Techniques
Unlock your machine’s potential! Explore stitch adjustments, tension control, and diverse presser feet for couture-level results and garment construction finesse.
Adjusting Stitch Length and Width
Mastering stitch customization is key to versatile sewing. Your machine offers adjustable stitch length and width, controlled by dials or digital settings. Shorter stitch lengths (e.g., 1.5mm) are ideal for delicate fabrics and intricate details, providing increased durability. Longer lengths (e.g., 3.0mm) are suited for basting or gathering.
Width adjustments impact the zigzag stitch’s breadth, enabling decorative effects or reinforcing seams. Experiment with different settings on scrap fabric to understand their impact. Uneven ease can occur if settings aren’t consistent. Remember to refer to your machine’s specific manual for detailed instructions and recommended settings for various fabrics and techniques. Precise adjustments ensure professional-looking results and prevent issues like puckering or skipped stitches.
Tension Adjustment – Achieving Perfect Stitches
Proper tension is crucial for balanced, professional stitches. Incorrect tension leads to looping, puckering, or weak seams. Upper tension controls the thread from the spool, while lower tension manages the bobbin thread. Begin by testing on scrap fabric, observing the stitch formation.
If the upper thread loops on the underside, decrease upper tension or increase lower tension. Conversely, if the bobbin thread appears on top, increase upper tension or decrease lower tension. Small adjustments are key – a slight turn of the tension dial can make a significant difference. Skewed collars or sleeves can sometimes indicate tension issues. Always re-test after each adjustment until a balanced stitch is achieved.
Using Different Presser Feet
Your sewing machine’s versatility expands with various presser feet! The standard foot is ideal for straight and zigzag stitching. A zipper foot facilitates close-to-edge stitching along zippers. A buttonhole foot automates buttonhole creation, ensuring consistent size and shape.
For quilting, a walking foot evenly feeds multiple layers of fabric, preventing shifting. A blind hem foot creates nearly invisible hems. Understanding each foot’s purpose unlocks advanced techniques. Uneven ease when sewing sleeve caps or collars can sometimes be resolved with the correct presser foot. Refer to your machine’s manual for compatibility and proper attachment. Experiment to discover how each foot enhances your sewing projects!

Troubleshooting Common Issues
Don’t panic! Common problems like thread breakage, skipped stitches, or needle breakage are often easily resolved with simple adjustments and checks.
Thread Breakage – Causes and Solutions
Frequent thread breakage can be frustrating, but is often easily addressed. Several factors contribute to this issue. Incorrect threading is a primary cause – ensure the thread path is clear and properly seated in all guides and the tension discs. Using the wrong type of thread for your fabric, or a low-quality thread, can also lead to breaks.
Needle issues are another common culprit. A dull, bent, or incorrectly sized needle can cause thread to snap. Always use a new needle appropriate for your fabric weight. Tension problems – either too tight or too loose – can strain the thread. Finally, ensure your machine is clean and lubricated, as friction can weaken the thread. Regularly inspect and replace parts as needed, referencing repair guides for assistance.
Skipped Stitches – Identifying the Problem
Skipped stitches indicate a disruption in the loop formation process. The most frequent cause is an improperly inserted or damaged needle. Verify the needle is fully inserted and facing the correct direction, and replace it if bent or dull. Incorrect needle size for the fabric is also a common issue; heavier fabrics require larger needles.
Thread problems contribute significantly. Ensure you’re using the correct thread type and that it’s properly threaded through all guides and the tension discs. Tension imbalances can also cause skipped stitches – adjust the tension settings according to your fabric. Finally, check the presser foot pressure; insufficient pressure may not feed the fabric correctly. Consult repair guides for detailed troubleshooting.
Needle Breakage – Prevention and Replacement
Needle breakage is often preventable with proper technique. Avoid sewing over pins – always remove them before the needle reaches them. Never pull or push the fabric while sewing; let the machine feed it. Using the correct needle type and size for your fabric weight is crucial; a too-small needle strains and breaks easily.
To replace a needle, always power off the machine. Loosen the needle clamp screw and gently remove the old needle. Insert the new needle with the flat side facing the back, ensuring it’s fully inserted and secure. Tighten the screw firmly. Regularly inspect needles for damage and replace them proactively. Refer to repair guides for specific model instructions.
Maintenance and Care
Regular cleaning and lubrication are vital for longevity. Protect your investment through proper storage, ensuring smooth operation and preventing unnecessary repairs.
Cleaning Your Sewing Machine
Consistent cleaning prevents lint and dust buildup, crucial for optimal performance. Always unplug the machine before starting! Use a soft brush to remove debris from the bobbin area, feed dogs, and around the needle plate. A small vacuum cleaner with a brush attachment can also be helpful.
For tougher grime, a slightly dampened (not wet!) cloth can be used. Avoid harsh chemicals or solvents, as they can damage the machine’s components. Pay attention to the needle bar area, as oil and thread fragments accumulate there. Regularly cleaning ensures smooth stitch formation and prevents skipped stitches or thread breakage. Remember to consult your machine’s specific manual for detailed cleaning instructions, as models vary.
Lubrication – Keeping it Running Smoothly
Proper lubrication is vital for a sewing machine’s longevity. However, modern machines often require minimal oiling – over-oiling can attract dust! Consult your machine’s manual; many have self-lubricating parts. If oiling is needed, use sewing machine oil specifically, never household oil.
Apply a small drop to the designated oiling points (usually indicated in the manual), such as the bobbin case and hook area, and the motor shaft. Avoid getting oil on the feed dogs or needle plate, as this can affect fabric feed. After oiling, run the machine briefly to distribute the lubricant. Regular, careful lubrication ensures smooth operation, reduces friction, and prevents wear and tear, keeping your machine running quietly and efficiently.

Long-Term Storage – Protecting Your Investment
Preparing your sewing machine for extended storage safeguards its functionality. First, thoroughly clean the machine, removing lint and dust from all areas – including the bobbin case and feed dogs. Lightly oil designated points as outlined in the lubrication section;
Cover the machine with a dust cover to prevent dust accumulation. Store it in a cool, dry place, away from direct sunlight and extreme temperatures. Avoid storing in damp basements or hot attics. Loosen the belt slightly to prevent it from cracking during inactivity. Finally, consider a protective case for added security against damage. Proper storage ensures your machine remains in excellent condition, ready for your next project.
Safety Precautions
Always prioritize safety! Keep fingers clear of the needle, disconnect power during maintenance, and avoid sewing over pins. Electrical safety is paramount.
General Safety Guidelines
Before operation, carefully read this entire manual to understand your sewing machine’s features and safety precautions. Always disconnect the power supply when threading, changing the needle, or performing any maintenance. Never sew over pins or thick fabric layers, as this can damage the needle and machine. Keep fingers away from moving parts, especially the needle and presser foot, during operation.
Ensure the machine is placed on a stable, level surface. Avoid using the machine in damp or wet environments. Supervise children closely when they are near the sewing machine. Regularly inspect the power cord for damage and replace it if necessary. Do not attempt to repair the machine yourself; contact a qualified technician for assistance. Remember, safe sewing practices contribute to enjoyable and productive crafting!
Electrical Safety
To prevent electrical shock, always ensure the sewing machine is properly grounded. Never operate the machine with a damaged power cord or plug. Do not immerse the machine, cord, or plug in water or other liquids. Avoid using extension cords unless absolutely necessary, and if used, ensure they are appropriately rated for the machine’s power consumption.
Always unplug the machine from the power outlet before cleaning, changing the needle, or performing any maintenance. Never attempt to open the machine’s casing or tamper with internal electrical components. If the machine malfunctions or emits unusual smells or sounds, immediately disconnect it from the power supply and contact a qualified technician. Prioritize electrical safety for a worry-free sewing experience.
Avoiding Needle Injuries
Needle safety is paramount! Always use the correct needle type and size for your fabric. Never sew over pins, as this can cause the needle to break and potentially cause injury. When changing the needle, ensure the presser foot is raised and the power is off. Dispose of broken or bent needles carefully, using a designated sharps container or securely wrapping them before discarding.
Never catch the fabric while hand-turning the handwheel, as this can lead to a needle stick. Keep fingers away from the needle area while the machine is in operation. If a needle breaks, stop the machine immediately and carefully remove the broken pieces. Prioritize safe practices to prevent accidental needle injuries during your sewing projects.