
Kenmore Model 417 Washer Dryer Combo Repair Manual: A Comprehensive Guide
This manual provides detailed instructions for repairing your Kenmore 417 washer/dryer combo, offering diagrams, parts lists, and troubleshooting guidance for effective repair projects;
Understanding the Kenmore 417 Combo Unit
The Kenmore 417 is a versatile all-in-one washer and dryer, designed for convenience in smaller living spaces․ This unit combines washing and drying cycles within a single appliance, eliminating the need for separate machines․ Understanding its integrated functionality is crucial for effective repair․
Commonly, the Kenmore 417 features a variety of wash cycles, temperature settings, and drying options․ It utilizes a single drum for both processes, employing a ventless drying system to conserve energy and simplify installation․ The control panel allows users to select desired settings, and error codes are displayed to indicate potential issues․
Before attempting any repair, familiarize yourself with the unit’s basic components, including the water inlet valve, drain pump, heating element, drive belt, and door latch․ Knowing how these parts interact will streamline the troubleshooting and repair process․
Locating the Repair Manual & Model Information
Finding the correct repair manual for your Kenmore 417 Washer Dryer Combo is the first step towards successful troubleshooting․ Sears Parts Direct is a valuable resource, offering downloadable manuals and part diagrams specifically for this model․ You can also often find Kenmore Service Manuals available in PDF format online․
Accurate model information is essential․ Locate the model number – often found on a sticker inside the door, on the back of the unit, or within the user manual․ Common model numbers include 417․61722510 and 417․90802991․ Having this number ensures you access the correct repair information and order compatible replacement parts․
Many appliance repair websites also offer free DIY manuals and troubleshooting guides․ Searching online using your specific model number will yield the most relevant results․
Safety Precautions Before Repair
Prioritize safety before attempting any repair on your Kenmore 417 Washer Dryer Combo․ Disconnect the appliance from the power outlet – this is crucial to prevent electrical shock․ Turn off both the water supply valves to prevent flooding during washer component repair․
Wear appropriate safety gear, including gloves and eye protection․ Be mindful of sharp edges inside the appliance․ If you are unfamiliar with electrical work, consult a qualified technician․ Improper repair can lead to injury or further damage․
Never work on a wet surface․ Ensure the area around the appliance is dry and well-lit․ Always double-check that the power is off before touching any internal components․ Following these precautions will help ensure a safe repair process․
Common Problems & Troubleshooting

Kenmore 417 combo units can experience several common issues․ A washer not starting often points to a faulty door latch – ensure it’s securely closed․ A dryer failing to heat usually indicates a problem with the heating element or thermal fuse․ Excessive vibration during the wash cycle can stem from an unbalanced load or worn shock absorbers․
Water leaks frequently occur due to damaged hoses or a faulty water inlet valve․ Before assuming major issues, check for simple causes like overloaded drums or clogged drain pumps․ Consult the error codes displayed (see section on Error Codes) for specific diagnostic clues․
Regularly inspecting these areas can prevent minor problems from escalating into costly repairs․
Washer Not Starting
If your Kenmore 417 washer isn’t starting, the most frequent culprit is a malfunctioning door latch․ Verify the door is completely closed and latched; a slightly ajar door prevents operation․ If the latch appears functional, test its continuity with a multimeter – a lack of continuity indicates a faulty latch requiring replacement․
Another potential cause is a blown thermal fuse, protecting the motor from overheating․ Check the fuse for continuity as well․ A faulty control board can also prevent the washer from initiating a cycle․ Inspect wiring connections for looseness or damage․ Finally, ensure the unit is receiving power and the outlet is functioning correctly․

Dryer Not Heating
When the Kenmore 417 dryer fails to heat, the heating element is often the primary suspect․ Use a multimeter to test the element for continuity; a break in the circuit signifies a need for replacement․ Before testing, ensure the unit is disconnected from power․ Another common issue is a faulty thermal fuse, designed to prevent overheating․ Check its continuity as well․
Inspect the gas valve (for gas models) or the control board for proper operation․ A malfunctioning gas valve won’t allow gas flow, while a faulty control board may not send power to the heating element․ Also, examine the thermal bi-metal stat, which regulates temperature; a defective stat can interrupt the heating cycle․

Excessive Vibration During Wash Cycle
Excessive vibration during the wash cycle of your Kenmore 417 often indicates an unbalanced load․ Redistribute the clothes evenly within the drum․ However, persistent shaking suggests mechanical issues․ First, check the suspension rods or springs; these absorb shock and maintain stability․ Worn or broken components need replacement․
Inspect the shock absorbers for leaks or damage, as they contribute to dampening vibrations․ A failing drive belt can also cause imbalance․ Ensure the washer is level on the floor; adjust the feet as needed․ Finally, verify the drum bearings aren’t worn, as this can lead to significant wobble and noise during operation․
Water Leaks During Operation
Water leaks in your Kenmore 417 can stem from several sources․ Begin by inspecting the water inlet hoses and drain hose connections for tightness and cracks․ Check the door boot (gasket) for tears or debris preventing a proper seal․ A damaged boot is a common leak point․
Examine the pump housing and drain pump for cracks or loose connections․ Internal leaks might indicate a failing water inlet valve or a damaged tub seal․ Inspect the tub itself for any visible cracks․ Carefully observe where the leak originates during a wash cycle to pinpoint the issue․ Addressing these areas promptly prevents further water damage and ensures efficient operation․
Essential Tools for Repair
Successfully repairing your Kenmore 417 requires a basic toolkit․ A Phillips head screwdriver is crucial for most disassembly tasks․ A flathead screwdriver assists with prying and accessing certain components․ Pliers, both standard and needle-nose, are essential for gripping and manipulating parts․
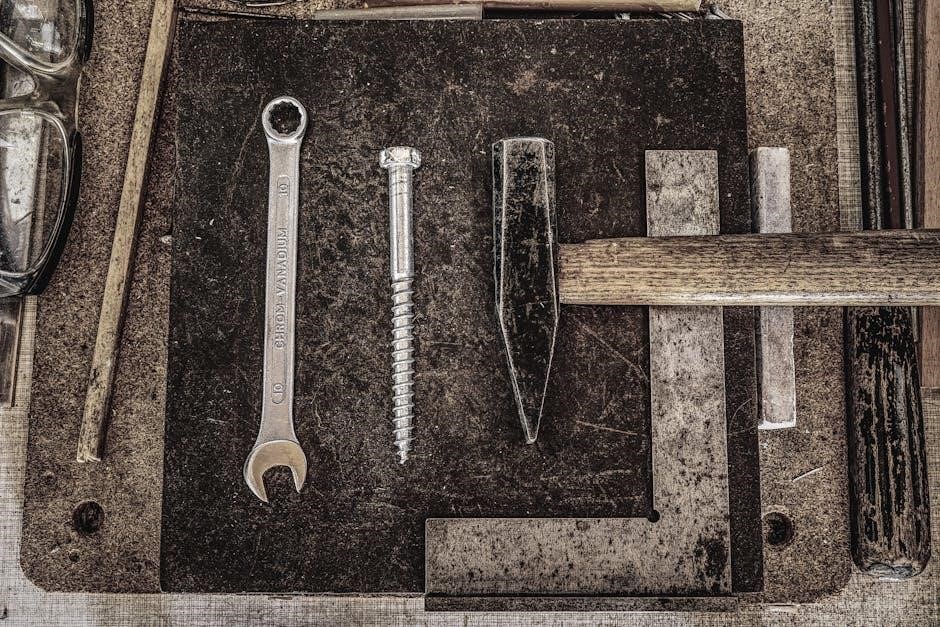
A socket wrench set with various sizes provides leverage for removing bolts and fasteners․ A multimeter is vital for testing electrical components like the heating element and continuity․ Don’t forget a rubber mallet for gently loosening stuck parts․ Safety glasses and work gloves are paramount for personal protection․ Having these tools readily available streamlines the repair process․
Replacing the Door Latch Assembly
A faulty door latch prevents the Kenmore 417 from starting․ Begin by disconnecting power․ Remove the top panel for access․ Locate the latch assembly, typically near the door frame․ Disconnect the wiring harness connected to the latch․ Unscrew the latch from the machine’s frame – usually two screws secure it․

Carefully pull the old latch assembly out․ Install the new latch, ensuring proper alignment․ Reconnect the wiring harness securely․ Replace the screws, tightening them firmly․ Test the new latch by manually closing the door and verifying it engages․ Restore power and run a test cycle to confirm proper operation․
Diagnosing and Replacing the Water Inlet Valve
Insufficient water entering the Kenmore 417 often indicates a faulty water inlet valve․ First, disconnect power․ Locate the valve – usually at the back of the machine where water hoses connect․ Check the screen filters within the valve inlets for debris; clean if necessary․
To test, use a multimeter to check for continuity across the valve’s solenoid terminals when energized․ No continuity means replacement is needed․ Disconnect the hoses and electrical connections․ Remove the old valve, noting hose and wire routing․ Install the new valve, reconnecting hoses and wires securely․ Restore power and test for proper water flow during a wash cycle․
Cleaning the Drain Pump Filter
A clogged drain pump filter is a common cause of drainage issues in the Kenmore 417․ Locate the filter – typically behind a small access panel at the front, lower part of the machine․ Before opening, place towels to absorb any residual water․
Carefully unscrew and remove the filter․ Inspect for obstructions like lint, coins, or small objects․ Thoroughly clean the filter under running water, removing all debris․ Reinstall the filter, ensuring it’s securely tightened to prevent leaks․ Run a short spin cycle to verify proper drainage․ Regular cleaning – every few months – prevents future blockages and maintains optimal performance․
Checking and Replacing the Drive Belt
A worn or broken drive belt can prevent the drum from spinning․ To access the belt, you’ll likely need to remove the back panel of the Kenmore 417․ Visually inspect the belt for cracks, fraying, or signs of wear․ If damaged, proceed with replacement․
Before removing the old belt, note its routing around the motor pulley and drum․ Carefully detach the old belt and install the new one, ensuring it’s properly seated in the grooves․ Reassemble the back panel․ Test the washer by running a cycle to confirm the drum spins correctly․ A properly functioning drive belt is crucial for the wash and spin cycles․
Testing the Heating Element (Dryer)
A faulty heating element is a common cause of the dryer not heating․ Before testing, disconnect power to the Kenmore 417․ Locate the heating element housing, typically at the rear of the dryer․ Disconnect the wires connected to the element․
Using a multimeter set to the ohms setting, test the element for continuity․ A reading of zero or a low resistance indicates a good element․ An infinite reading signifies a broken element requiring replacement․ If replacing, ensure the new element is identical to the old one․ Reconnect the wires and restore power, then test the dryer’s heating function․
Understanding Error Codes
The Kenmore 417 utilizes error codes to diagnose internal issues․ These codes, displayed on the control panel, pinpoint the source of the problem, simplifying repairs․ Common codes include F01, indicating a water level sensor malfunction, potentially requiring sensor replacement or wiring checks․ E02 signals a drain pump malfunction, often due to blockage or pump failure – inspect the drain hose and pump itself․
Refer to the complete error code list in the service manual for a comprehensive understanding․ Resetting the machine by disconnecting power for a few minutes can sometimes clear minor errors․ However, persistent codes necessitate further investigation and potential part replacement․
Error Code F01: Water Level Sensor Issue
Error code F01 on the Kenmore 417 indicates a problem with the water level sensor, preventing accurate water filling․ This can manifest as the washer failing to start, overfilling, or not filling at all․ Troubleshooting begins with inspecting the sensor’s wiring harness for loose connections or damage․ A faulty sensor itself is a common cause, requiring replacement․
To test the sensor, use a multimeter to check its resistance; consult the service manual for correct values․ Before replacing, ensure the water inlet valve isn’t obstructed․ If the wiring and sensor test normal, the main control board might be the issue, though this is less frequent․
Error Code E02: Drain Pump Malfunction
Error code E02 on your Kenmore 417 signals a malfunction within the drain pump system․ This typically means the washer isn’t effectively removing water after a wash cycle․ Initial checks should focus on the drain pump filter for obstructions like lint, coins, or small articles of clothing – a frequent cause․
If the filter is clear, test the drain pump itself for continuity using a multimeter․ A lack of continuity indicates a failed pump needing replacement․ Also, inspect the pump’s wiring and connections for damage․ A blocked drain hose can mimic this error, so verify its clear path to the drain․ Finally, a faulty control board could also trigger this code․
Sourcing Replacement Parts
Finding replacement parts for your Kenmore 417 washer dryer combo is crucial for successful repairs․ Sears Parts Direct is a primary resource, offering a comprehensive catalog specifically tailored to Kenmore appliances, including detailed parts diagrams for your model․ You can also explore appliance parts retailers online, comparing prices and availability․
When ordering, always verify the part number matches your Kenmore 417’s specific configuration․ Providing the complete model number (e․g;, 417․61722510) ensures accuracy․ Local appliance repair shops may also stock common parts or can order them for you․ Consider checking online marketplaces, but prioritize reputable sellers to guarantee part quality and authenticity․
Disassembly and Reassembly Guide
Disassembly requires careful documentation; photograph each step to aid reassembly․ Begin by disconnecting power and water supply․ Access internal components by removing the top and front panels, noting screw locations․ Gently disconnect wiring harnesses, labeling them for correct reconnection․ When removing parts like the drum or pump, observe their orientation and surrounding components․
Reassembly follows the reverse order․ Ensure all wiring is securely connected, referencing your photos․ Verify proper alignment of parts before tightening screws․ Double-check for any forgotten components or loose connections․ Before restoring power, inspect for any obstructions or potential hazards․ A methodical approach prevents damage and ensures optimal performance․
Preventative Maintenance Tips

Regular cleaning is crucial; wipe down the exterior and door seal after each use․ Monthly, clean the lint filter thoroughly to maintain dryer efficiency and prevent fire hazards․ Every six months, run a cleaning cycle with a washing machine cleaner to remove residue and odors․ Inspect the water inlet hoses for cracks or leaks, replacing them as needed․
Annually, check the drain pump filter for obstructions․ Avoid overloading the machine, as this strains components․ Level the unit to minimize vibration․ Proper ventilation is vital for the dryer; ensure the exhaust vent is clear․ Following these tips extends the lifespan of your Kenmore 417 and minimizes potential repairs․
Where to Find Additional Support & Resources
Sears Parts Direct offers a wealth of information, including manuals, parts diagrams, and replacement parts specifically for your Kenmore 417․ Online appliance repair forums and communities provide a platform to connect with experienced users and technicians for advice․ YouTube hosts numerous video tutorials demonstrating common repair procedures for similar models․
Kenmore’s official website may have downloadable service manuals and FAQs․ Consider contacting a qualified appliance repair technician for complex issues․ Websites specializing in appliance repair offer expert help and troubleshooting guides․ Remember to have your model number readily available when seeking assistance to ensure accurate information and parts compatibility․
Electrical Diagram Overview
The Kenmore 417’s electrical system integrates both washer and dryer circuits; Diagrams illustrate the power supply, motor controls, heating element circuitry, and sensor connections․ Understanding these diagrams is crucial for diagnosing electrical faults․ Key components include the main control board, timer, door interlock switches, and wiring harnesses․
Troubleshooting requires a multimeter to test continuity, voltage, and resistance․ Safety is paramount; always disconnect power before working on electrical components․ Diagrams detail the grounding system and safety features․ Identifying the correct wire colors and connector types is essential for accurate repair․ Refer to the service manual for detailed schematics and component locations․