Murray Push Mower Manual: An Overview
Murray push mower manuals are essential for maintenance, repair, and safe operation. Locating your model number is the first step to accessing the correct documentation.
Understanding Murray Mower Models
Murray manufactured a diverse range of push mowers over the years, each with unique features and specifications. These models vary significantly in engine size, deck width, drive systems (if applicable), and overall design. Recognizing these differences is crucial when seeking information or parts. Early Murray mowers often featured simpler designs, while later models incorporated more advanced technologies.
Understanding the specific characteristics of your Murray mower – whether it’s a classic push model or a self-propelled version – allows for targeted maintenance and effective troubleshooting. Knowing the model’s intended use and capabilities will also help ensure optimal performance and longevity. Identifying the correct model is paramount for accessing the appropriate manual and parts diagrams.
Importance of the Model Number
The Murray mower model number is absolutely critical for several reasons. It’s the key to unlocking the correct owner’s manual, parts lists, and repair information specific to your machine. Without it, identifying compatible parts becomes a frustrating guessing game, potentially leading to incorrect replacements and further issues.
Manufacturers use the model number to differentiate between variations in components and features. This ensures you receive the precise parts needed for a successful repair. Furthermore, retailers and parts suppliers rely on this number to accurately fulfill your requests. Always have your model number readily available when seeking assistance or ordering replacement parts for your Murray mower.

Locating the Murray Mower Model Number
Finding your Murray mower’s model number is crucial. It’s typically found on a data tag located on the mower’s deck or near the engine.
On Push Mowers
Locating the model number on Murray push mowers generally involves a careful inspection of the mower’s deck. The data tag, often a sticker or metallic plate, is usually affixed to the underside of the deck, near the engine, or on the rear of the mower housing.
You might need to carefully turn the mower on its side (after ensuring the spark plug is disconnected for safety!) to access this tag. Pre-2001 models feature a five-digit model number followed by a dash and a single digit. Newer models may have a different format, so be observant.
Take note of the entire number, as this is essential for finding the correct parts and manuals. If the tag is damaged or missing, contacting Murray’s customer support with the serial number might help them identify your specific model.
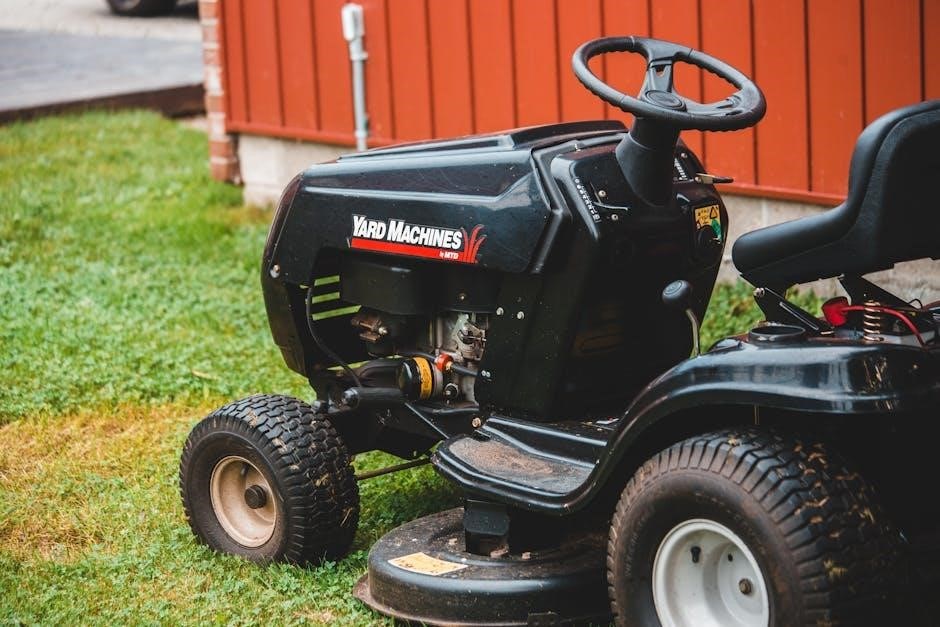
On Riding Mowers
Finding the model number on Murray riding mowers is typically more straightforward than on push models. The data tag is commonly located on the back of the mower, often near the engine or frame. Another frequent location is underneath the seat; simply lift the seat to reveal the tag affixed to the frame below.
As with push mowers, the tag can be a sticker or a metal plate. Ensure you record the complete model number accurately. This number is crucial for ordering parts, accessing specific repair manuals, and receiving appropriate customer support.
If you encounter difficulty locating the tag, a thorough inspection of the mower’s frame is recommended. Remember to consult online resources or Murray’s support if needed.
Pre-2001 Model Number Format
Murray push mowers manufactured before 2001 utilized a specific model number format. These numbers generally consist of five digits, followed by a hyphen (-) and a single additional digit. For example, a typical pre-2001 model number might appear as “12345-6”. This format is key when searching for compatible parts or relevant documentation.
Understanding this older format is vital if you own a vintage Murray mower. The five-digit portion identifies the core mower design, while the trailing digit often indicates minor variations or production runs. Accurate recording of this number is essential for successful parts lookup and repair procedures.
Keep this format in mind when consulting older manuals or online parts databases.
Where to Find the Data Tag
Locating the data tag is crucial for identifying your Murray push mower’s model and serial numbers. On most Murray push mowers, this tag is typically affixed to the mower deck, often near the rear wheel or on the underside of the deck itself. Carefully inspect these areas, looking for a small metallic or plastic label.
The tag may be riveted, screwed, or adhered to the mower’s frame. It’s important to check thoroughly, as the tag can sometimes become obscured by grass clippings or debris. Ensure good lighting and clean the area if necessary to clearly view the information.
This tag holds the key to accessing the correct manuals and parts.

Decoding the Serial Number
The serial number helps track manufacturing date and can be vital for parts identification, alongside the model number, for Murray mowers.
Serial Number Location
Pinpointing the serial number on your Murray push mower is crucial for accurate parts ordering and accessing specific service information. Typically, you’ll find this number on a data tag or sticker affixed to the mower’s frame. While the exact placement can vary slightly depending on the model year, a common location is on the mower deck, often near the rear wheel or engine.
Carefully inspect the underside of the deck and around the engine area. The data tag is usually a metallic or durable plastic label containing both the model and serial numbers. It’s important to note that older Murray mowers, particularly those manufactured before 2001, may have a different tag format. Thoroughly check all potential locations to ensure you locate the correct number for your specific mower.
Using the Serial Number for Parts
Your Murray mower’s serial number is a vital key when sourcing replacement parts. It ensures you order components specifically designed for your exact model, preventing compatibility issues. When searching for parts online or at a local dealer, always have your serial number readily available. Many parts websites feature a dedicated search function where you can input the serial number to instantly filter for compatible options.
This level of precision is particularly important for engine components, blades, and drive system parts. Utilizing the serial number minimizes the risk of ordering incorrect items, saving you time and potential frustration. Accurate parts identification, facilitated by the serial number, guarantees a proper fit and optimal performance for your Murray push mower.

Accessing Murray Mower Manuals
Murray mower manuals are available through online databases and third-party providers; however, official Murray resources may be limited due to company history.
Online Manual Databases
Several websites specialize in archiving and distributing manuals for various outdoor power equipment, including Murray mowers. These databases often require the model number to pinpoint the correct documentation. Users can typically search by entering the full model number, ensuring they receive the manual specifically tailored to their Murray push mower.
Commonly, these databases offer downloadable PDF versions of the manuals, allowing for easy access and storage. Some sites may also provide interactive manuals or exploded diagrams for parts identification. While these resources are generally helpful, verifying the manual’s accuracy against the mower’s features is always recommended. Remember to exercise caution when downloading files from unfamiliar websites and ensure your antivirus software is up-to-date.
Official Murray Resources (If Available)
Historically, Murray provided direct access to manuals through their official website; however, current availability can vary due to brand ownership changes. It’s worth checking if a dedicated support section exists on any current owner’s website, as they may host archived manuals. Searching for “Murray lawn mower support” can lead to relevant pages.
If official resources are limited, contacting customer support directly might yield assistance in locating a manual, particularly if you have the complete model number. Be prepared to provide detailed information about your mower. While direct downloads may not always be possible, support representatives might be able to email a copy or direct you to alternative sources.
Third-Party Manual Providers

Numerous websites specialize in hosting manuals for various brands, including Murray. These platforms often require the model number for a precise search, ensuring you receive the correct documentation. Popular options include ManualsLib, ManualsOnline, and others dedicated to outdoor power equipment. Be cautious and verify the manual’s accuracy by comparing it to your mower’s features.
Some retailers that sell Murray parts may also offer downloadable manuals on their websites. Forums and online communities dedicated to lawn mower repair can also be valuable resources, as users frequently share links to manuals or offer assistance in locating them. Always exercise caution when downloading files from unfamiliar sources.

Common Murray Push Mower Maintenance
Regular upkeep, like blade sharpening, oil changes, and air filter cleaning, extends your Murray mower’s life and ensures optimal cutting performance.
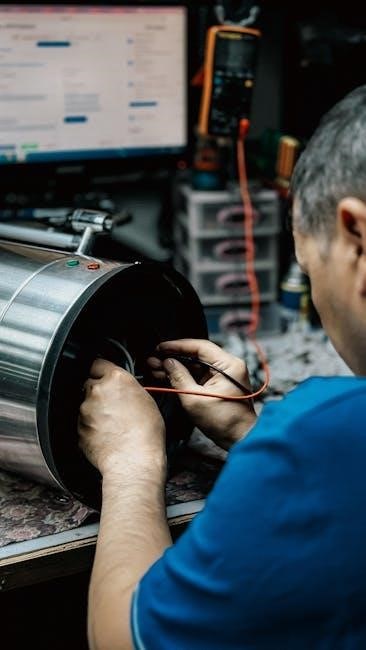
Blade Sharpening and Replacement
Maintaining a sharp blade is crucial for a clean cut and healthy lawn. Dull blades tear grass, leading to brown tips and increased disease susceptibility. Regularly inspect your Murray mower blade for damage – nicks, bends, or excessive wear. Sharpening can often be done with a metal file or a bench grinder, ensuring balanced sharpening to prevent vibration.
If the blade is severely damaged or worn, replacement is necessary. Always disconnect the spark plug before working on the blade! Securely remove the blade bolt, noting its orientation for reinstallation. When installing a new blade, ensure it’s the correct replacement for your Murray model. Tighten the blade bolt to the manufacturer’s specified torque to prevent loosening during operation. Safety glasses and gloves are highly recommended during this process.
Oil Change Procedures
Regular oil changes are vital for extending the life of your Murray push mower engine. Consult your owner’s manual for the recommended oil type and change interval – typically after every 25-50 hours of use, or annually. Begin by warming up the engine briefly, then disconnect the spark plug for safety. Locate the oil drain plug, usually on the lower part of the engine.
Position a drain pan underneath, and carefully remove the plug, allowing the old oil to drain completely. Reinstall the plug, then add the correct amount of fresh oil, checking the dipstick to ensure proper levels. Avoid overfilling! Properly dispose of the used oil at a designated recycling center. Maintaining correct oil levels ensures smooth engine operation and prevents premature wear.
Air Filter Cleaning and Replacement
A clean air filter is crucial for optimal engine performance. Check your Murray push mower’s air filter regularly – ideally before each use, or at least monthly. If the filter is slightly dirty, gently tap it to remove loose debris, or use compressed air (blowing from the inside out). For heavily soiled or damaged filters, replacement is necessary.
Locate the air filter housing, usually a plastic cover on the engine. Remove the cover and the filter. Install the new filter, ensuring a proper seal. Reattach the housing cover securely. A clean air filter prevents dirt and debris from entering the engine, protecting it from wear and maintaining efficient operation. Refer to your manual for specific filter types.
Troubleshooting Common Issues
Murray push mowers can experience starting problems, cutting height adjustments, or drive system issues; consulting the manual aids in diagnosing and resolving these concerns.
Engine Starting Problems
If your Murray push mower fails to start, several factors could be at play. First, check the fuel level and ensure fresh gasoline is being used. A clogged air filter restricts airflow, hindering ignition, so cleaning or replacing it is crucial.
Spark plugs can become fouled over time, preventing a spark; inspect and replace if necessary. Verify the spark plug wire is securely connected. Low oil levels trigger safety shutdowns on many models, so check the oil level.
Finally, examine the recoil starter mechanism for damage or binding. The Murray manual provides detailed diagrams and troubleshooting steps specific to your model, assisting in pinpointing the exact cause and solution for a non-starting engine.
Cutting Height Adjustment
Adjusting the cutting height on your Murray push mower is typically achieved through individual wheel levers or a single lever system. Consult your owner’s manual for the specific mechanism on your model. These levers control the position of the wheels, raising or lowering the deck.

Ensure all wheels are adjusted to the same height setting for an even cut. A higher setting is ideal for longer grass, while a lower setting provides a closer trim.
Regularly check the adjustment settings, as bumps or uneven terrain can sometimes dislodge them. The Murray manual illustrates the adjustment points and recommended heights for various grass types and conditions.
Drive System Issues
If your Murray push mower’s self-propelled drive isn’t functioning correctly, several factors could be at play. First, check the drive cable for damage or disconnection – this is a common issue. Inspect the drive belt for wear, cracks, or breakage; replacement may be necessary.
The drive control lever should engage smoothly. If it feels loose or doesn’t activate the drive, consult the manual for adjustment procedures. Low oil levels can also affect drive system performance, so verify the oil level.
Your Murray manual provides detailed diagrams and troubleshooting steps for these components, aiding in accurate diagnosis and repair.

Parts Lookup and Replacement
Murray mower parts are easily found using your model number. Accurate identification ensures compatibility, simplifying repairs and maintaining your mower’s performance.
Using the Model Number for Parts Search
The Murray mower model number is absolutely critical when searching for replacement parts. It acts as a unique identifier, ensuring you order components specifically designed for your machine. Online parts retailers and local dealerships rely heavily on this number to pinpoint the correct blades, belts, wheels, or engine components.
Without the model number, you risk ordering incompatible parts that won’t fit or function properly, leading to further frustration and potential damage. Inputting the number into a parts lookup tool instantly narrows down the available options, displaying only those compatible with your specific Murray push mower. This streamlines the process and minimizes errors, saving you time and money.
Identifying Compatible Parts
Once you’ve located potential replacement parts using your Murray mower’s model number, careful verification is still essential. Parts diagrams, often available online through manual databases or retailer websites, visually illustrate component placement and relationships. Cross-referencing part numbers listed in the diagram with those offered by the supplier confirms compatibility.
Pay close attention to details like engine specifications (if applicable) and blade bolt patterns. Some Murray models may share similar components, but subtle differences can exist. Reading product descriptions thoroughly and checking customer reviews can provide valuable insights. If uncertainty remains, contacting a Murray parts specialist is always recommended to avoid ordering incorrect items.
Where to Purchase Murray Mower Parts
Numerous retailers offer Murray mower parts, both online and through brick-and-mortar stores. Major home improvement centers frequently stock common replacement parts like blades, filters, and spark plugs. Online marketplaces, such as Amazon and eBay, provide a vast selection from various vendors, often at competitive prices.
Specialized lawn mower parts retailers often carry a wider range of Murray-specific components and offer expert assistance. The official Murray website (if still actively maintained) may also provide a direct parts purchasing option. Always compare prices and shipping costs before making a purchase, and verify the retailer’s return policy.

Safety Precautions
Prioritize safety by disconnecting the spark plug before maintenance. Wear appropriate safety glasses and gloves during operation and repairs of your Murray mower.
Before Operating the Mower
Before each use, a thorough inspection of the Murray push mower is crucial for safe operation. Ensure the cutting blade is securely attached and in good condition, free from cracks or excessive wear. Check the oil level and add if necessary, referencing your owner’s manual for the correct type.
Verify that all guards and shields are properly in place and functioning correctly. Clear the mowing area of any objects, such as stones, toys, or debris, that could be thrown by the blade. Always wear sturdy footwear, safety glasses, and hearing protection. Never operate the mower with missing parts or if it’s malfunctioning. Familiarize yourself with the mower’s controls and safety features before starting.
During Mower Operation
Maintain a firm grip on the handle while operating your Murray push mower, and walk at a comfortable pace. Avoid sudden turns or stops, especially on slopes. Be mindful of your surroundings and keep children and pets a safe distance away. Never place hands or feet near the rotating blade.
If the mower encounters a difficult patch or obstruction, disengage the blade and engine before attempting to clear it. Avoid mowing wet grass, as it can cause the mower to clog and increase the risk of slipping; Regularly check for debris buildup under the deck and remove it as needed. Always stop the engine before making any adjustments or repairs.
Post-Operation Safety
After each use, allow the Murray push mower engine to cool completely before storing it. Disconnect the spark plug wire to prevent accidental starting. Clean the mower deck thoroughly, removing any accumulated grass clippings and debris. Inspect the blade for damage and sharpen or replace it as needed.
Store the mower in a dry, level location, away from flammable materials. Ensure all safety guards and shields are properly in place. Never store a mower with fuel in the tank indoors or in a poorly ventilated area. Follow local regulations for proper disposal of used oil and filters. Regular maintenance extends the life of your mower and ensures safe operation.