Miele Induction Hob Instructions: A Comprehensive Guide
Miele ceramic induction cooktops require careful reading of operating and installation instructions, adhering to IEC 60335-1 standards for safe usage.
These instructions cover safety precautions, compatible cookware, and cleaning with Miele ceramic hob cleaner, ensuring optimal performance and longevity.
Miele does not assume liability for damages resulting from ignoring these instructions; retain this manual for future reference and potential customer support needs.
Understanding Your Miele Induction Cooktop
Miele induction cooktops represent a pinnacle of kitchen technology, offering precise control and efficient heating. These cooktops utilize electromagnetic energy to directly heat compatible cookware, resulting in faster boiling times and reduced energy consumption compared to traditional methods. Understanding the core principles of induction cooking is crucial for maximizing your Miele appliance’s potential.
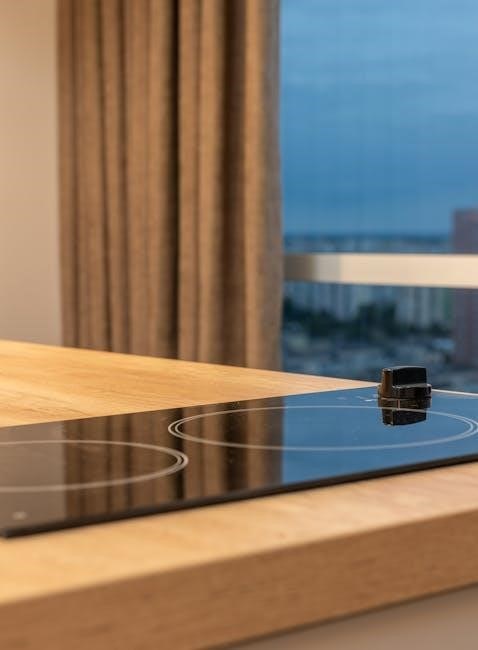
Your Miele hob isn’t simply a heating surface; it’s a sophisticated system designed for intuitive operation and lasting performance. Familiarize yourself with the layout of the control panel, noting the function of each touch sensor or dial. The cooktop’s surface remains relatively cool to the touch, enhancing safety and simplifying cleaning. However, the cookware itself becomes hot, so caution is always advised.
Miele cooktops often feature advanced functionalities like FlexInduction zones, allowing for versatile placement of pots and pans. The PowerBoost function provides an extra surge of power for rapid heating when needed. Furthermore, many models integrate seamlessly with the Miele@home system, enabling remote control and monitoring via a smartphone app. Proper understanding of these features will elevate your cooking experience.
Safety Precautions for Miele Induction Hobs
Miele induction hobs, while innovative, require strict adherence to safety guidelines. Miele explicitly emphasizes reading and following installation instructions according to IEC 60335-1 standards to prevent damage and ensure safe operation. Never operate the hob if it’s damaged or if the power cord is compromised.
Exercise extreme caution as the cookware heats up, though the hob surface remains relatively cool. Individuals with pacemakers or other implanted medical devices should maintain a safe distance, as the electromagnetic field could cause interference. Keep metallic objects, like cutlery, away from the active cooking zones.
Always supervise children when the hob is in use and activate the child lock function to prevent accidental operation. Avoid placing flammable materials near the cooktop. Regularly inspect the hob for any signs of damage and contact Miele customer support if issues arise. Ignoring these precautions could lead to injury or damage, voiding the warranty. Prioritize safety for a worry-free cooking experience.
Initial Setup and Installation
Proper initial setup and installation of your Miele induction hob are crucial for optimal performance and longevity. Adhere strictly to the instructions outlined in the accompanying documentation, particularly those referencing IEC 60335-1 compliance. Miele strongly advises professional installation to ensure adherence to safety regulations and prevent potential hazards.
Before installation, verify the electrical supply matches the hob’s requirements. Ensure the countertop is level and provides adequate ventilation. Carefully unpack the hob and inspect for any damage incurred during shipping. Follow the detailed wiring diagrams provided, connecting the power cord securely.
Once installed, perform a test run to confirm all functions operate correctly. Familiarize yourself with the control panel and basic settings. Register your appliance with Miele to activate the warranty and access customer support. Incorrect installation can compromise safety and void the warranty, so prioritize precision and adherence to guidelines.
Control Panel Overview
The Miele induction hob’s control panel is designed for intuitive operation, offering precise control over your cooking experience. Typically, it features touch-sensitive controls or rotary dials for selecting cooking zones and adjusting power levels. Understanding the layout is key to maximizing functionality.
Common elements include power buttons, zone selection indicators, and +/- buttons for temperature or power adjustments. Dedicated buttons may activate features like PowerBoost or the timer. Some models integrate a digital display showing selected settings and remaining cooking time. Icons clearly represent different functions, enhancing usability.
Explore the panel to locate the child lock activation button, ensuring safety in households with young children. Familiarize yourself with the sensor cooking options, if available, for automated cooking programs. Refer to the instructions manual for a detailed explanation of each button and its corresponding function, unlocking the full potential of your Miele hob.
Understanding Induction Cooking Principles
Induction cooking, utilized in your Miele hob, differs significantly from traditional methods. It generates heat directly within the cookware itself, rather than heating the hob surface. This is achieved through an electromagnetic field created by a coil beneath the ceramic glass.

For induction to work, your cookware must be ferromagnetic – meaning a magnet will strongly adhere to its base. Stainless steel, cast iron, and some enameled steel pans are suitable, while aluminum, copper, and glass are not, unless specifically designed for induction.
This direct heating results in faster boiling times, improved energy efficiency, and enhanced safety as the hob surface remains relatively cool. The Miele system intelligently detects the presence of cookware, activating the heating element only when a suitable pan is placed on the zone. This innovative technology provides precise temperature control and responsive cooking.
Compatible Cookware for Miele Induction
Ensuring you use the correct cookware is crucial for optimal performance with your Miele induction hob. The fundamental principle relies on ferromagnetic properties – a magnet must firmly attach to the base of the pan for it to work.
Generally, high-quality stainless steel and cast iron cookware are excellent choices. Many enameled steel pans are also compatible, but always test with a magnet to confirm. If the magnet doesn’t hold securely, the pan won’t function on the induction hob.
Aluminum, copper, and glass cookware will not work unless specifically manufactured with a ferromagnetic base layer designed for induction. Look for markings indicating induction compatibility on the packaging. The base of the cookware should be smooth and flat to ensure optimal contact with the hob surface for efficient heat transfer and consistent cooking results.
Using the Basic Cooking Functions
Miele induction hobs offer intuitive basic cooking functions. Typically, you’ll select a cooking zone using the touch controls, then choose a power level – often ranging from 1 to 9, or utilizing pre-set levels like low, medium, and high. Lower numbers provide gentler heat, ideal for simmering, while higher numbers deliver rapid heating for boiling or searing.
Many models feature a ‘sensor’ function for precise temperature control (detailed elsewhere). For standard cooking, simply select the desired power level and allow the hob to heat the cookware. The hob surface itself remains relatively cool, heating only the pan directly.
Remember to match the pan size to the zone selected for maximum efficiency. Avoid using zones without cookware present, as this wastes energy. Familiarize yourself with the specific symbols and controls on your Miele model, as slight variations may exist between different series.
Temperature Control and Settings
Miele induction hobs provide precise temperature control beyond simple power levels. Many models incorporate temperature settings, allowing you to specify a target temperature in degrees Celsius or Fahrenheit. The hob will then automatically adjust the power to maintain that temperature, ideal for delicate sauces or chocolate work.
Sensor cooking features, when available, further enhance temperature accuracy. These utilize sensors within the hob to monitor the cookware temperature directly, preventing overheating and ensuring consistent results. Some Miele hobs also offer ‘keeping warm’ functions, maintaining a low temperature for extended periods.
Understanding the relationship between power levels and temperature is crucial. Higher power settings deliver faster heating, but require careful monitoring to avoid burning. Lower settings provide gentler, more controlled heating. Experiment with different settings to find what works best for your cooking style and recipes.
Timer Functions and Programming
Miele induction hobs offer versatile timer functions, extending beyond simple countdown timers. You can set a timer for a single zone, or program multiple zones with independent timers. This is incredibly useful when preparing complex meals with varying cooking times.
Many models feature a stop-and-signal timer, which automatically switches off the cooking zone when the timer reaches zero, accompanied by an audible signal. Alternatively, a signal-only timer will alert you when the time is up, allowing you to manually turn off the zone. Programming is typically done through the intuitive control panel, often involving selecting the zone, entering the desired time, and choosing the timer type.
Some advanced Miele hobs allow for pre-programming of cooking sequences, combining timer settings with specific power levels. This enables automated cooking processes, freeing you from constant monitoring. Refer to your specific model’s manual for detailed instructions on utilizing these advanced programming features.
Sensor Cooking Features
Miele induction hobs often incorporate sophisticated sensor cooking features designed to enhance precision and convenience. These sensors monitor the temperature of the cookware directly, rather than relying on pre-set power levels or time estimations. This ensures food is cooked to your exact preference, preventing overcooking or undercooking.

A common sensor function is automatic frying, which maintains a consistent oil temperature for perfect frying results. The hob intelligently adjusts the power to prevent smoking or burning. Similarly, sensor-based simmering functions maintain a gentle, even heat for delicate sauces or long-cooking stews.
To utilize these features, select the appropriate sensor program on the control panel, and the hob will automatically manage the cooking process. It’s crucial to use compatible cookware with a ferromagnetic base for optimal sensor performance. Always consult your model’s manual for specific sensor cooking options and recommended settings.
Cleaning and Maintenance
Maintaining your Miele induction hob is crucial for optimal performance and longevity. After each use, allow the surface to cool completely before cleaning. Regular cleaning prevents food residue from burning onto the glass ceramic surface, making future cleaning easier.
For light soiling, a damp cloth with a mild detergent is usually sufficient. Avoid abrasive cleaners, scouring pads, or harsh chemicals, as these can scratch the surface. Stubborn stains or burnt-on food can be removed using a Miele ceramic and stainless steel hob cleaner, applied with kitchen paper or a clean cloth.
Always follow the instructions on the cleaner packaging. Rinse thoroughly with clean water and dry with a soft cloth. Regularly inspect the hob for any damage, such as cracks or chips, and contact Miele customer support if necessary. Proper cleaning ensures your hob remains hygienic and visually appealing for years to come.
Recommended Cleaning Products (Miele Hob Cleaner)
Miele strongly recommends using its specifically formulated ceramic and stainless steel hob cleaner for optimal cleaning and protection of your induction cooktop. This cleaner is designed to effectively remove stubborn food residue, grease, and limescale without scratching the delicate glass ceramic surface.
Unlike many generic cleaners, the Miele hob cleaner contains mild abrasives that gently lift dirt without causing damage. It also leaves a protective layer that helps prevent future staining and makes subsequent cleaning easier. Always follow the instructions on the product packaging for best results.
Apply a small amount of cleaner to a damp kitchen paper or a clean, soft cloth. Gently rub the affected areas, avoiding excessive pressure. Rinse thoroughly with clean water and dry with a separate soft cloth. Using Miele’s recommended cleaner ensures your hob remains in pristine condition and maintains its warranty validity.
Troubleshooting Common Issues
If your Miele induction hob isn’t functioning as expected, several common issues can be easily addressed. Firstly, ensure the cookware is compatible – a magnet should stick firmly to the base. If the hob doesn’t recognize the pan, check for a clean, dry base and try a different pan.
If an error code appears, consult the error code section of this guide for specific explanations and solutions. Power fluctuations can sometimes cause issues; ensure the hob is connected to a stable power supply. For unresponsive controls, try resetting the hob by briefly switching off the power at the circuit breaker.
If cleaning is ineffective, or the surface is damaged, contact the Miele Customer Contact Centre for assistance. Do not attempt to repair the hob yourself, as this could void the warranty and pose a safety risk. Always prioritize safety and refer to the manual before attempting any troubleshooting steps.
Error Codes and Their Meanings
Miele induction hobs utilize error codes to communicate specific issues, aiding in quick diagnosis and resolution. A flashing “E” followed by a number indicates an error. For example, “E01” might signal a communication error within the hob’s system, requiring a power cycle – switching off at the breaker for a few minutes.
“E02” could indicate an overheating issue, prompting you to allow the hob to cool down. Other codes relate to sensor malfunctions or problems with the internal electronics. A persistent error code, despite troubleshooting, necessitates contacting the Miele Customer Contact Centre for professional assistance.
Refer to your specific model’s manual for a comprehensive list of error codes and their corresponding meanings. Ignoring error codes can lead to further damage or compromise safety. Miele’s support team can provide detailed guidance and arrange for a qualified technician if required, ensuring your hob operates safely and efficiently.
Child Lock Function Activation
Miele induction hobs feature a child lock function, preventing accidental activation and ensuring safety, particularly in households with young children. Activation typically involves pressing and holding a specific combination of control panel buttons – often the key lock symbol alongside another button – for a few seconds. The display will usually indicate activation with a lit key symbol.
Once activated, all hob controls are disabled, rendering the hob unusable until deactivated. Deactivation follows a similar process: pressing and holding the same button combination again. This prevents unintended operation, safeguarding against burns or other hazards.
Consult your model’s specific instruction manual for the precise button sequence, as it may vary slightly. Regularly check the lock status, especially after cleaning or power outages. The child lock is a crucial safety feature, providing peace of mind and protecting vulnerable individuals from potential harm while using the Miele induction hob.
PowerBoost Function Explained
Miele induction hobs incorporate a PowerBoost function, designed to deliver an extra surge of power to a single cooking zone. This dramatically reduces heating time, allowing for rapid boiling or searing. Activation is typically achieved by selecting the desired cooking zone and then pressing the PowerBoost symbol on the control panel. A visual indicator, such as a flashing ‘P’ or increased power level display, confirms activation.

PowerBoost temporarily diverts power from other zones, maximizing output to the selected area. It’s ideal for quickly bringing large volumes of liquid to a boil or achieving high-heat cooking. However, remember that other zones will experience a temporary reduction in power during PowerBoost operation.
The duration of PowerBoost is usually limited to a set timeframe to prevent overheating. Once the time elapses, the zone automatically reverts to its previously selected power level. Always consult your specific model’s manual for details on PowerBoost duration and limitations. Utilizing this function efficiently enhances cooking speed and convenience.
FlexInduction Zone Usage
Miele’s FlexInduction technology offers exceptional cooking flexibility by combining multiple individual cooking zones into one large, adaptable surface. This allows you to use irregularly shaped cookware, such as griddles or large roasting pans, that wouldn’t fit on standard zones. The system automatically detects the size and shape of the cookware placed on the FlexInduction area.
To utilize FlexInduction, simply place your cookware on the designated area. The hob intelligently adjusts the power distribution to match the pan’s dimensions, ensuring efficient heating. Control is managed through the hob’s interface, allowing you to set the desired power level for the entire FlexInduction zone.

Some Miele models allow for independent control within the FlexInduction zone, enabling you to set different temperatures for various parts of the cooking surface. Refer to your specific model’s manual for detailed instructions on activating and customizing FlexInduction functionality. This feature maximizes cooking versatility and convenience.
Connecting to the Miele@home System
Integrating your Miele induction hob into the Miele@home system unlocks a world of smart cooking possibilities. This connectivity allows for remote control and monitoring of your hob via the Miele app on your smartphone or tablet, offering convenience and peace of mind. Before connecting, ensure your hob is Wi-Fi enabled and that you have a stable internet connection.
The connection process typically involves downloading the Miele@home app and following the on-screen instructions. The app will guide you through adding your hob to your home network. Once connected, you can remotely start or stop cooking, adjust temperature settings, and receive notifications about the cooking process.
Furthermore, Miele@home integration enables access to exclusive features like automatic software updates, remote diagnostics, and integration with other smart home devices. Explore the app’s functionalities to discover how to optimize your cooking experience and streamline kitchen management. Refer to the Miele website or app documentation for detailed setup guides.
Warranty Information and Customer Support
Miele induction hobs are renowned for their durability and quality, backed by a comprehensive warranty to ensure customer satisfaction. The standard warranty period typically covers manufacturing defects in materials and workmanship for a specified duration from the date of purchase. Please retain your proof of purchase for warranty claims.
To initiate a warranty claim, contact Miele’s dedicated customer support team. They can be reached via phone, email, or through the Miele website. Be prepared to provide your hob’s model number, serial number, and a detailed description of the issue. Miele may arrange for an authorized technician to inspect and repair the appliance.
Beyond the warranty period, Miele continues to offer exceptional customer support, including access to spare parts, repair services, and expert advice. The Miele Customer Contact Centre provides assistance with troubleshooting, installation queries, and general product information. Visit the Miele website for contact details and service locations.
Optional Accessories for Your Miele Hob
Enhance your Miele induction hob experience with a range of thoughtfully designed optional accessories. The Miele ceramic and stainless steel hob cleaner is essential for maintaining a pristine cooking surface, effectively removing stubborn stains and preserving the hob’s appearance. Application with kitchen paper or a clean cloth is recommended.
Consider purchasing a Miele hob scraper for tackling particularly difficult residue, ensuring a scratch-free cleaning process. Protective cookware, specifically designed for induction hobs, can also maximize efficiency and prevent damage. Additionally, Miele offers specialized cleaning cloths optimized for ceramic surfaces.
For those integrating their hob into a smart home ecosystem, explore compatibility with Miele@home system components. These accessories allow for remote control and monitoring of your hob, adding convenience and flexibility to your cooking routine. Explore the Miele website or authorized retailers for the complete accessory catalog and detailed product information.
IEC 60335-1 Compliance and Installation Instructions
Miele induction hobs are designed and manufactured in strict compliance with IEC 60335-1 safety standards, ensuring user protection and reliable performance. Proper installation is paramount to maintaining this compliance and preventing potential hazards. Miele expressly and strongly advises meticulous adherence to the installation chapter within the provided documentation.
Installation should only be performed by a qualified and certified technician, familiar with electrical regulations and safety protocols. Ensure the electrical supply voltage matches the hob’s specifications. Correct grounding is crucial for preventing electric shock. The hob must be installed on a stable, level surface, with adequate ventilation to prevent overheating.
Follow all local building codes and regulations during installation. Do not attempt to modify the appliance in any way, as this could compromise safety and void the warranty. Refer to the detailed installation guide for specific instructions regarding cabinet cutouts, electrical connections, and securing the hob. Ignoring these instructions may lead to damage or injury.
Long-Term Care and Preservation
To ensure the longevity and optimal performance of your Miele induction hob, consistent long-term care is essential. Regular cleaning, using Miele-approved ceramic and stainless steel hob cleaner, prevents buildup and maintains the surface’s pristine condition. Avoid abrasive cleaners or scouring pads, as these can cause scratches and damage.
Promptly address any spills or food residue to prevent them from burning onto the surface. Inspect the hob periodically for any signs of wear or damage, such as cracks or chipped glass. If any issues are detected, contact Miele customer support for assistance.
Proper usage of the control panel and features, as outlined in the instructions, minimizes strain on the appliance; Avoid excessive weight or impact on the glass surface. Store this manual for future reference, and retain proof of purchase for warranty claims. Following these guidelines will preserve your Miele hob for years to come.