warminster train schedule pdf

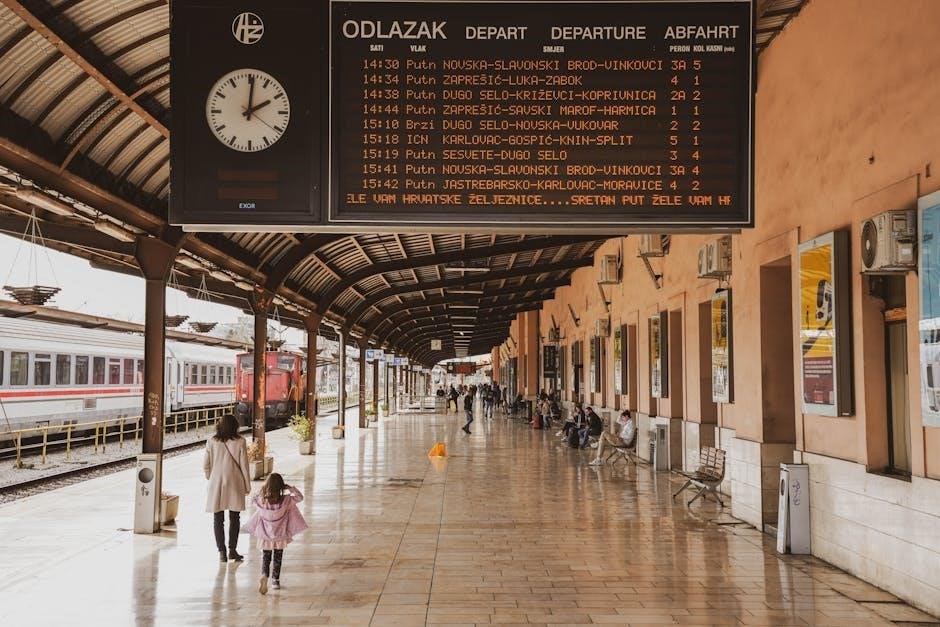
Warminster Train Schedule: A Comprehensive Guide (Updated 12/21/2025)

Accessing the Warminster Train Schedule in PDF format proves challenging currently; however, historical data is available via the Internet Archive,
specifically a
Warminster Line Schedule from SEPTA, added on January 6th, 2024.

Warminster enjoys rail connections primarily through Great Western Railway (GWR), offering routes to major destinations like London, Cardiff, and Salisbury. Navigating these services requires understanding available resources for schedules and real-time updates. While a dedicated, readily available Warminster Train Schedule PDF isn’t currently prominent on the GWR website, passengers can access comprehensive journey information through GWR’s JourneyCheck platform.

JourneyCheck provides live data on train times, potential delays, and disruptions, crucial for planning travel. Furthermore, historical schedules can be found via the Internet Archive, specifically a SEPTA document dated January 6th, 2024, offering a glimpse into past service patterns. However, for the most up-to-date information, relying on real-time tools like JourneyCheck and third-party platforms such as Trainline is highly recommended. Understanding connecting stations like Westbury and Salisbury is also key to efficient travel planning.

Understanding Great Western Railway (GWR) JourneyCheck

Great Western Railway’s (GWR) JourneyCheck is the primary tool for accessing current Warminster train information, functioning as a dynamic alternative to a static Warminster Train Schedule PDF. This online platform delivers live updates regarding train times and, critically, real-time delay/cancellation/disruption notifications. Users can specify ‘From’ and ‘To’ stations to refine searches, displaying only relevant services.

JourneyCheck’s functionality allows passengers to view arrival information for services calling at a specified station before reaching their destination. Currently, it highlights a service alteration: the 14:23 Portsmouth Harbour to Cardiff Central train now originates at Westbury, bypassing several stations including Warminster due to a train shortage. While a downloadable PDF isn’t the focus, JourneyCheck’s interactive nature provides more immediate and accurate data. Remember to regularly check JourneyCheck before and during travel for the latest updates.

Accessing the Warminster Train Schedule PDF

Currently, obtaining a readily available, up-to-date Warminster Train Schedule PDF directly from Great Western Railway (GWR) proves difficult. GWR prioritizes its dynamic JourneyCheck service for real-time information, rendering static PDF schedules less common. However, historical schedule data is accessible through the Internet Archive. A Warminster Line Schedule from SEPTA was archived on January 6th, 2024, offering a glimpse into past timetables.

This archived document, identified as warminster-line-schedule, is a scanned resource with a fixed PPI of 300, processed using Tesseract OCR. While not a current schedule, it provides valuable context. Users seeking the most accurate and current information should rely on GWR’s JourneyCheck, as it reflects real-time alterations, like the recent Portsmouth Harbour to Cardiff Central route change impacting Warminster station.

Real-Time Delay and Disruption Information

For the most current status of Warminster train services, including delays, cancellations, and disruptions, Great Western Railway’s (GWR) JourneyCheck is the definitive resource. Unlike static PDF schedules, JourneyCheck provides live updates crucial for informed travel planning. As of today, December 21st, 2025, at 00:45:33, a significant alteration impacts the Portsmouth Harbour to Cardiff Central route.

Specifically, the 14:23 service will now originate from Westbury, bypassing stations including Portsmouth Harbour, Southsea, Fareham, and Salisbury – directly affecting passengers traveling to and from Warminster. JourneyCheck allows users to specify ‘From’ and ‘To’ stations to filter information relevant to their journey. Always consult JourneyCheck before traveling, as unforeseen issues can arise, and relying on outdated PDFs could lead to significant inconvenience.

From Station Specific Departure Times

Obtaining precise, up-to-the-minute departure times from specific stations requires utilizing real-time resources, as static PDF schedules quickly become outdated. Great Western Railway’s (GWR) JourneyCheck is the recommended tool. The system allows users to input a ‘From’ station to view all departing trains, filtering for services that subsequently call at their desired destination.

Currently, JourneyCheck indicates a 19:33 departure from Salisbury destined for Warminster, listed as ‘On Time’. While historical Warminster Line Schedules are archived (added January 6th, 2024), these are not reflective of current operational timings. Remember that a service originating from Portsmouth Harbour has been rerouted, starting at Westbury, and no longer serves stations like Salisbury. Therefore, relying solely on older PDF documents is strongly discouraged; always verify times via JourneyCheck.

To Station Specific Arrival Times

Determining accurate arrival times at Warminster necessitates using live data sources, as static PDF schedules are prone to inaccuracies. Great Western Railway’s (GWR) JourneyCheck is the primary resource. Inputting a ‘To’ station, in this case Warminster, displays all services scheduled to arrive, alongside real-time delay or cancellation information.

As of today, December 21st, 2025, a 14:23 service from Portsmouth Harbour to Cardiff Central was scheduled to arrive at Warminster at 17:49. However, this service now originates at Westbury and bypasses Warminster entirely. The 19:33 service from Salisbury is currently ‘On Time’ for arrival at Warminster. While archived Warminster Line Schedules (dated January 6th, 2024) exist, they should not be used for current planning. Always confirm arrival times via JourneyCheck to account for potential disruptions and route changes; relying on outdated PDF versions is unreliable.

Recent Service Alterations (as of 12/21/2025)

Significant changes to services calling at Warminster have been implemented, rendering older PDF schedules obsolete. As of today, December 21st, 2025, the 14:23 Portsmouth Harbour to Cardiff Central service no longer stops at Warminster. This is due to a reported shortage of trains, causing the service to originate at Westbury instead.

Affected stations include Portsmouth & Southsea, Fratton, Cosham, Fareham, Southampton Central, Romsey, Salisbury, and, crucially, Warminster. Passengers previously relying on this service to or from Warminster must seek alternative routes. While historical Warminster Line Schedules are available via the Internet Archive (dated January 6th, 2024), these are demonstrably inaccurate. Great Western Railway’s (GWR) JourneyCheck is the only reliable source for up-to-date information; do not depend on static PDF documents for current travel planning.

Portsmouth Harbour to Cardiff Central Route Changes

The alterations to the Portsmouth Harbour to Cardiff Central route directly impact passengers intending to utilize this service for travel to or from Warminster. As of December 21st, 2025, the 14:23 departure no longer includes Warminster station on its itinerary. Consequently, any Warminster train schedule PDF referencing this service will be inaccurate and unreliable.

The service now commences at Westbury, bypassing key stations such as Portsmouth & Southsea, Fratton, Cosham, Fareham, Southampton Central, Romsey, and Salisbury, in addition to Warminster. Travelers should disregard any previously downloaded or printed PDF versions of the timetable. Great Western Railway (GWR) advises utilizing their JourneyCheck service for real-time updates. The availability of older SEPTA schedules via the Internet Archive does not reflect these recent changes; relying on them could lead to missed connections and travel disruptions.

Typical Journey Times from London to Warminster

When planning travel from London to Warminster, consulting a current Warminster train schedule PDF is crucial, though availability is limited. Generally, the journey takes approximately 1 hour and 56 minutes. However, faster services can complete the trip in just 1 hour and 53 minutes. These times are averages, and actual durations can vary based on connections and potential delays.

Currently, there are around 4 trains per day operating this route. Therefore, a PDF schedule, if found, will likely show limited options. Trainline offers a convenient platform for comparing times and purchasing tickets, providing more up-to-date information than static PDF documents. Remember to verify the schedule close to your travel date, as alterations can occur. Historical SEPTA schedules, accessible via the Internet Archive, won’t reflect current London-Warminster services.

Average Travel Duration

Determining the precise average travel duration requires referencing a current Warminster train schedule PDF, which is presently difficult to obtain directly. However, data indicates that, on average, a train journey from London to Warminster takes around 1 hour and 56 minutes. This is a general estimate, and the fastest available services can complete the trip in approximately 1 hour and 53 minutes.

It’s important to note that these durations are subject to change. Factors like connecting trains, scheduled stops, and unforeseen delays can all impact the overall travel time. While historical SEPTA schedules, found on the Internet Archive, exist, they won’t provide accurate information for London departures. Utilizing online tools like Trainline is recommended for real-time updates and a more precise understanding of current average travel times, surpassing the limitations of a static PDF.

Frequency of Services

Pinpointing the exact frequency of train services to Warminster necessitates a current Warminster train schedule PDF, which is currently unavailable for direct access. However, information suggests there are approximately 4 trains per day operating directly from London to Warminster. This indicates a relatively limited service compared to more frequently served destinations.

It’s crucial to understand that this number is an average and can fluctuate based on the day of the week, seasonal changes, and potential disruptions. Historical SEPTA schedules, archived online, won’t reflect the London service frequency. For up-to-date details regarding service frequency, consulting real-time resources like Trainline or the Great Western Railway (GWR) JourneyCheck is highly recommended. These platforms provide the most accurate and current information, surpassing the limitations of a static PDF document.

Warminster Line Schedule ‒ SEPTA Information

While a dedicated, current Warminster train schedule PDF from Great Western Railway remains elusive, historical data pertaining to the Warminster Line Schedule is accessible through the Internet Archive, specifically via SEPTA records. This archived schedule was added on January 6th, 2024, and is available for download, borrowing, or streaming.

However, it’s vital to recognize that this SEPTA information pertains to a different rail network and may not accurately reflect the current Great Western Railway (GWR) services serving Warminster. The archived document, identified with Identifier-ark ark:/13960/s2hr1t48bph, utilizes OCR technology (Tesseract 5.3.0-6-g76ae) and is fixed at 300 PPI. Therefore, while a valuable historical resource, it shouldn’t be relied upon for current travel planning. Always cross-reference with GWR’s JourneyCheck for real-time updates.

Historical Schedule Data (Internet Archive)

Despite the absence of a readily available, current Warminster train schedule PDF directly from Great Western Railway, valuable historical timetable information can be found on the Internet Archive. A Warminster Line Schedule, originating from SEPTA, was archived on January 6th, 2024, offering a glimpse into past service patterns.

This archived resource, identified by Identifier “warminster-line-schedule” and Identifier-ark “ark:/13960/s2hr1t48bph”, was processed using Tesseract 5.3.0-6-g76ae OCR technology at a fixed resolution of 300 PPI. It’s crucial to understand that this data represents a historical record and may not reflect present-day services or timetables. Users seeking current information should prioritize GWR’s JourneyCheck for accurate, real-time departure and arrival times. The archive serves as a supplementary resource for historical research, not current travel planning.

Using Online Tools for Schedule Access

While a dedicated Warminster train schedule PDF isn’t easily accessible, several online tools facilitate schedule access and ticket purchasing. Trainline stands out as a comprehensive platform for comparing train times and fares to Warminster. It indicates an average journey time of approximately 1 hour and 56 minutes from London, with the fastest services completing the trip in 1 hour and 53 minutes.

Trainline currently lists 4 trains per day on this route, though journey times can vary. For real-time information, Great Western Railway’s JourneyCheck remains the most reliable source. This tool allows users to specify ‘From’ and ‘To’ stations to view live departure and arrival details, including potential delays or disruptions. Remember to utilize these dynamic resources instead of relying on potentially outdated PDF schedules.

Trainline for Comparing Times and Tickets

Trainline emerges as a valuable resource when a readily available Warminster train schedule PDF proves elusive. The platform excels at comparing times and ticket prices for journeys to and from Warminster, offering a user-friendly interface. Currently, Trainline displays an average travel duration of around 1 hour and 56 minutes from London, with the quickest services reaching Warminster in just 1 hour and 53 minutes.

Users can find approximately 4 trains daily operating on this route, but it’s crucial to remember that schedules are subject to change. Trainline doesn’t provide a static PDF; instead, it dynamically updates with the latest information from rail operators. For the most current details, including real-time disruptions, cross-reference with Great Western Railway’s JourneyCheck alongside utilizing Trainline for booking convenience.

Key Stations Serving Warminster

While a comprehensive Warminster train schedule PDF isn’t easily accessible, understanding key connecting stations is vital for planning journeys. Westbury and Salisbury function as crucial interchange points for services reaching Warminster. Recent updates, as of December 21st, 2025, indicate route alterations impacting services. Specifically, the 14:23 Portsmouth Harbour to Cardiff Central train now originates from Westbury, bypassing several stations including Warminster itself.

Therefore, relying solely on older PDF schedules is unreliable. Passengers traveling to Warminster should verify their route via Great Western Railway’s JourneyCheck. Conversely, those departing from Warminster should confirm their connection at either Westbury or Salisbury. Checking live departure boards at these stations is essential, as the Warminster Line Schedule (available through the Internet Archive) may not reflect current operational changes.

Westbury as a Connecting Station

Westbury emerges as a pivotal connecting station when navigating the Warminster train schedule, particularly given the recent alterations as of December 21st, 2025. The 14:23 Portsmouth Harbour to Cardiff Central service now commences at Westbury, meaning passengers previously relying on connections at stations like Warminster must adjust their plans. Accessing a current Warminster train schedule PDF is proving difficult, reinforcing the need for real-time information.

Therefore, Westbury becomes the primary point for joining this route. Passengers should consult Great Western Railway’s JourneyCheck for up-to-date departure times from Westbury. While historical Warminster Line Schedules (found on the Internet Archive) offer some context, they won’t reflect these recent changes. Planning a journey via Westbury necessitates checking onward connections to ensure a smooth transfer, as services may be subject to delays or disruptions.

Salisbury as a Connecting Station

Salisbury functions as a crucial connecting station for passengers utilizing the Warminster train schedule, especially considering the recent service modifications announced on December 21st, 2025. The altered Portsmouth Harbour to Cardiff Central route no longer calls at Salisbury, impacting travel plans and highlighting the importance of current information. Locating a readily available Warminster train schedule PDF remains a challenge, emphasizing the need for dynamic resources.

Previously, Salisbury offered direct connections to Warminster on this route. Now, passengers must explore alternative options, potentially involving changes at Westbury or other stations. Utilizing Great Western Railway’s JourneyCheck is vital for confirming departure times and potential disruptions. While archived Warminster Line Schedules (available via the Internet Archive) provide historical data, they won’t reflect these recent route changes. Careful planning and real-time checks are essential when connecting through Salisbury;

Understanding On-Time Performance

Assessing on-time performance for Warminster train services requires utilizing real-time information sources, as a static Warminster train schedule PDF cannot account for dynamic delays or disruptions. Great Western Railway’s JourneyCheck is the primary tool for monitoring live train running data. As of December 21st, 2025, services are subject to alterations, particularly impacting the Portsmouth Harbour to Cardiff Central route.

Reports indicate a 19:33 service from Salisbury to Warminster is currently “On Time,” but this status is subject to change. Accessing historical performance data is difficult without a current, official schedule. The Internet Archive offers older SEPTA Warminster Line Schedules, but these lack real-time accuracy. Tools like Trainline offer comparisons, but rely on GWR’s data feed. Proactive monitoring via JourneyCheck is crucial for a smooth journey, given potential disruptions and the lack of a consistently updated PDF schedule.

Potential Disruptions and How to Stay Informed

While a Warminster train schedule PDF provides a baseline, travelers must acknowledge potential disruptions. Current information (12/21/2025) highlights significant alterations to the Portsmouth Harbour to Cardiff Central route, with services no longer calling at several stations, including Warminster. A reported train shortage is the cause.

Staying informed necessitates utilizing live resources. Great Western Railway’s JourneyCheck is paramount for real-time delay and cancellation updates. The absence of a readily available, current PDF schedule emphasizes the need for dynamic information. Trainline can also provide updates, drawing from GWR’s data. Monitor for announcements regarding station alterations and service changes. Historical SEPTA schedules on the Internet Archive are insufficient for current disruption awareness. Proactive checking of JourneyCheck before and during travel is vital for mitigating potential issues.

Resources for Further Information

Despite the limited availability of a current Warminster train schedule PDF, several resources offer valuable assistance. Great Western Railway (GWR) is the primary source; their website and JourneyCheck platform provide real-time updates and detailed journey planning tools. For historical context, the Internet Archive hosts a SEPTA Warminster Line Schedule, dated January 6th, 2024, though its relevance is limited.

Trainline serves as a useful comparison tool for times and tickets, aggregating information from GWR. Direct contact with GWR is possible via their customer service channels (details provided elsewhere in this guide). Remember that relying solely on archived PDFs is insufficient due to potential service alterations, as evidenced by the recent changes to the Portsmouth Harbour to Cardiff Central route. Prioritize live data sources for accurate and up-to-date travel information.

Contacting Great Western Railway

While a readily available Warminster train schedule PDF is currently scarce, direct communication with Great Western Railway (GWR) is crucial for specific inquiries. GWR’s customer service can provide the most current information regarding timetables, disruptions, and ticket purchases. Unfortunately, specific contact details aren’t provided in the available data, but their website is the best starting point.

Given recent service alterations – notably the Portsmouth Harbour to Cardiff Central route changes impacting Warminster – contacting GWR directly is highly recommended. Don’t rely solely on potentially outdated information from sources like the archived SEPTA schedule on the Internet Archive. Confirm details via GWR before travel. Utilize their online platforms or phone support to address any concerns regarding journey planning or real-time updates, ensuring a smoother travel experience.

lindora diet plan pdf

Lindora Diet Plan: A Comprehensive Guide

Discover a structured weight-loss journey with the Lindora plan, often found as a Lindora diet plan PDF, emphasizing personalized support and phased nutritional approaches․

Overview of the Lindora Diet

The Lindora Diet is a commercially structured weight-loss program, frequently accessed through a Lindora diet plan PDF, that centers around a phased approach to eating and lifestyle modification․ It’s not a one-size-fits-all diet; instead, it emphasizes individualized counseling and support, often provided by healthcare professionals within the Lindora network․ The program typically involves a very low-calorie intake initially, progressing to a more sustainable eating pattern as weight loss occurs․

A key component is the use of meal replacements, particularly in the initial phases, alongside whole foods․ The Lindora diet plan PDF resources detail specific food lists and portion sizes․ The program aims to break plateaus, often incorporating ketogenic principles, and focuses on long-term maintenance through continued support and education․ It’s designed to help individuals develop healthier eating habits and achieve sustainable weight management․

Core Principles of the Lindora Program

The Lindora Program, detailed in a typical Lindora diet plan PDF, revolves around several core principles․ Firstly, personalized guidance is paramount, with individual consultations shaping each participant’s plan․ Secondly, a phased approach to weight loss is central, starting with very low-calorie intake and gradually increasing it․ Thirdly, the program emphasizes the importance of protein intake for satiety and muscle preservation․

Furthermore, the Lindora diet plan PDF highlights the role of structured meal timing to regulate energy levels and prevent overeating․ The program also incorporates elements of ketogenic dieting, particularly in the initial phases, to promote fat burning․ Finally, long-term success is fostered through ongoing support, education, and the development of sustainable healthy habits, moving beyond just a temporary diet․

The Lindora Approach to Calorie Control

A Lindora diet plan PDF reveals a highly structured approach to calorie control, differing from many standard diets․ Initially, calorie intake is significantly restricted, often utilizing 100-calorie meal replacements, as seen in sample meal plans․ This phase aims for rapid initial weight loss․ As individuals progress through the phases, calorie levels are gradually increased, preventing metabolic slowdown and promoting sustainability․

The program doesn’t simply focus on reducing calories, but on optimizing what those calories consist of․ High-protein foods are prioritized, alongside non-starchy vegetables, to maximize satiety․ The Lindora diet plan PDF emphasizes portion control and mindful eating․ This controlled calorie intake, combined with personalized support, aims to create a calorie deficit while maintaining energy levels and nutritional adequacy․

Phase 1: Initial Weight Loss

Phase one, detailed in a Lindora diet plan PDF, prioritizes rapid weight reduction through a very low-calorie intake and structured meal replacements․

Understanding the Initial Phase Meal Plan

The initial phase, thoroughly outlined in a comprehensive Lindora diet plan PDF, centers around a highly structured eating regimen designed to kickstart weight loss․ This phase typically involves consuming a limited daily calorie intake, often around 1,000-1,200 calories, primarily through Lindora-approved meal replacements․

These replacements, such as shakes, soups, and bars, are formulated to be low in carbohydrates and high in protein, promoting satiety and preserving lean muscle mass․ Alongside these replacements, individuals are usually permitted a small portion of non-starchy vegetables․ The Lindora diet plan PDF emphasizes strict adherence to the meal plan, eliminating processed foods, sugary drinks, and unhealthy fats․

The goal is to create a significant caloric deficit, encouraging the body to tap into stored fat for energy․ Detailed guidance within the PDF clarifies portion sizes, acceptable food choices, and strategies for managing hunger during this restrictive phase․

Sample Breakfast Options (Phase 1)

According to the Lindora diet plan PDF, breakfast during the initial phase focuses on quick, convenient, and calorie-controlled options; A common choice is a Vanilla 100-calorie Meal Replacement shake, providing essential nutrients while keeping calorie intake minimal․ Alternatively, a Chocolate 100-calorie Meal Replacement shake offers a different flavor profile․

The Lindora diet plan PDF also suggests incorporating a small serving of approved vegetables alongside the shake, such as spinach or a few slices of cucumber, to add volume and nutrients․ Some plans may allow for a protein-enriched oatmeal prepared with water, but portion control is crucial․

It’s vital to strictly adhere to the serving sizes detailed in the Lindora diet plan PDF to ensure optimal results․ These breakfasts are designed to suppress appetite and provide sustained energy until the mid-morning snack․

Sample Lunch and Dinner Options (Phase 1)

As detailed in the Lindora diet plan PDF, Phase 1 lunch and dinner options prioritize lean protein and non-starchy vegetables․ Chicken or tuna are frequently featured, often prepared in simple ways to minimize added fats․ A popular choice is Chicken or Tuna Pepper Boats, utilizing bell peppers as a low-calorie vessel for the protein․

The Lindora diet plan PDF also highlights Chicken Salad, prepared with light mayonnaise or a yogurt-based dressing, and served with lettuce wraps instead of bread․ Chicken Italiano, featuring lean chicken breast and Italian seasonings, is another recommended option․

Dinner often mirrors lunch in its focus on protein and vegetables․ Portion sizes, as outlined in the Lindora diet plan PDF, are strictly controlled․ These meals are designed to be satisfying yet low in calories, supporting rapid weight loss during the initial phase․

Phase 2: Transition and Stabilization

The Lindora diet plan PDF details Phase 2, focusing on gradually reintroducing foods while maintaining weight loss through balanced nutrition and activity․

Adjusting the Meal Plan for Phase 2

Phase 2 of the Lindora program, as outlined in the Lindora diet plan PDF, marks a crucial shift from rapid weight loss to sustainable lifestyle changes․ This phase involves a carefully calibrated adjustment to your meal plan, expanding food choices beyond the initial restrictive guidelines․ The goal isn’t simply to add calories, but to strategically incorporate more variety while maintaining control․

Expect to see the gradual reintroduction of healthy carbohydrates and fats, always prioritizing lean proteins and non-starchy vegetables․ The PDF emphasizes mindful portion control and continued reliance on Lindora-approved meal replacements, though potentially less frequently than in Phase 1․ It’s a period of experimentation, learning how your body responds to different foods, and fine-tuning your diet to meet your individual needs and preferences․ Successful transition requires consistent monitoring and adherence to the program’s core principles․

Incorporating More Variety in Phase 2

Phase 2, detailed within the Lindora diet plan PDF, encourages expanding your palate beyond the initial, more limited food selections․ This isn’t a free-for-all; variety is introduced strategically, focusing on nutrient-dense options․ The PDF suggests exploring different lean protein sources – fish, turkey, and varied cuts of chicken – alongside a wider range of non-starchy vegetables․

Healthy fats, like avocado and olive oil, are gradually incorporated, and limited amounts of complex carbohydrates, such as quinoa or sweet potatoes, may be added․ The key is to experiment with new recipes and flavors while remaining mindful of portion sizes and overall calorie intake․ The Lindora diet plan PDF stresses logging food intake to track progress and identify potential trigger foods․ This phase is about building a sustainable, enjoyable eating pattern, not deprivation․

The Role of Physical Activity

The Lindora diet plan PDF emphasizes that exercise isn’t merely an add-on, but a crucial component of successful weight management and overall health․ Regular physical activity complements the dietary changes, accelerating progress and boosting metabolism․ The PDF recommends a combination of aerobic exercises – like brisk walking, jogging, or cycling – to burn calories and improve cardiovascular health․

Strength training, utilizing weights or bodyweight exercises, is also encouraged to build lean muscle mass, further enhancing metabolic rate․ The Lindora diet plan PDF suggests aiming for at least 30 minutes of moderate-intensity exercise most days of the week․ It’s about finding activities you enjoy to ensure long-term adherence, making fitness a sustainable lifestyle habit, not a temporary chore․

Lindora Diet Recipes

Explore a variety of delicious and satisfying recipes, often detailed within a Lindora diet plan PDF, featuring lean proteins and fresh vegetables for optimal results․

Chicken-Based Recipes

Chicken is a cornerstone protein source within the Lindora diet, frequently highlighted in Lindora diet plan PDF resources due to its versatility and lean profile․ Recipes often emphasize simple preparations to maintain calorie control and nutritional integrity․

Popular options include Chicken Stew, a hearty and warming dish, and Chicken Salad, perfect for a light lunch․ Chicken or Tuna Pepper Boats offer a colorful and satisfying meal, while Chicken Italiano and Chicken Dijon provide flavorful variety․ Asian Salad with chicken delivers a fresh, vibrant option, and California Chicken dishes are also commonly featured․

These recipes typically prioritize grilling, baking, or poaching methods over frying, and incorporate plenty of non-starchy vegetables․ A Lindora diet plan PDF will often provide specific portion sizes and ingredient lists to ensure adherence to the program’s guidelines, supporting effective weight management․

Salad and Dressing Options

Salads form a crucial component of the Lindora diet, frequently detailed within a Lindora diet plan PDF, providing essential nutrients and fiber while remaining low in calories․ Emphasis is placed on generous portions of non-starchy vegetables like lettuce, spinach, and cucumbers․

Dressing choices are carefully considered, as they can quickly add hidden calories․ The Orange-Ginger Dressing is a popular, flavorful option that aligns with the program’s principles․ Many Lindora diet plan PDF guides recommend using dressings sparingly or opting for vinegar-based alternatives․

Recipes often suggest incorporating lean protein sources, such as grilled chicken or fish, into salads to enhance satiety․ Avoiding high-fat toppings like cheese and croutons is also advised․ A well-constructed Lindora salad contributes significantly to feeling full and satisfied, supporting weight loss goals․

Sample Meal Timing Schedule

A structured eating schedule, often outlined in a comprehensive Lindora diet plan PDF, is vital for success․ Proper meal timing helps regulate energy levels and prevents overeating, supporting consistent weight loss․ A typical schedule includes several small meals throughout the day․

Breakfast, a high-protein option with vegetables or fruit, is consumed shortly after waking․ A mid-morning snack, like a 100-calorie meal replacement, bridges the gap to lunch․ Lunch and Dinner focus on lean protein and non-starchy vegetables․

The Lindora diet plan PDF often recommends avoiding late-night eating to optimize metabolism․ Consistent timing reinforces healthy habits and minimizes cravings․ This disciplined approach, combined with mindful portion control, maximizes the program’s effectiveness․

Ketogenic Aspects of the Lindora Diet

Lindora incorporates “The Plateau Breaker,” a ketogenic approach detailed in the Lindora diet plan PDF, shifting the body to burn fat for sustained energy․

The Plateau Breaker and Ketosis

The “Plateau Breaker” is a crucial component of the Lindora program, specifically designed to overcome weight-loss stalls, as outlined in the comprehensive Lindora diet plan PDF․ This phase intentionally shifts the body into a state of ketosis – a metabolic process where fat becomes the primary energy source instead of carbohydrates․

Achieving ketosis requires significantly reducing carbohydrate intake while maintaining adequate protein and healthy fat consumption․ The Lindora diet plan PDF provides detailed guidance on macronutrient ratios and approved food lists to facilitate this transition․ By entering ketosis, the body efficiently burns stored fat, leading to continued weight loss even when traditional calorie restriction plateaus․

This approach isn’t simply about deprivation; it’s a strategic metabolic shift supported by Lindora’s counseling and meal replacement options, all detailed within the downloadable Lindora diet plan PDF, ensuring a safe and effective experience․

Macronutrient Breakdown in the Lindora Plan

The Lindora diet, as detailed in the Lindora diet plan PDF, emphasizes a carefully balanced macronutrient approach, differing across its phases․ Initially, Phase 1 focuses on a higher protein intake – typically around 30-40% of daily calories – to preserve muscle mass during rapid weight loss․ Carbohydrates are significantly restricted, often falling below 50 grams per day, to encourage fat burning․

Healthy fats comprise the remaining caloric percentage, around 20-30%, providing essential fatty acids and satiety․ As individuals transition to Phase 2, outlined in the Lindora diet plan PDF, carbohydrate intake is gradually increased, while protein remains a priority․

The precise ratios are personalized based on individual needs and goals, as guided by Lindora counselors and clearly presented within the Lindora diet plan PDF, ensuring optimal metabolic function and sustainable weight management․

Resources and Support

Access the Lindora diet plan PDF and materials online, join supportive communities, and utilize long-term maintenance strategies for sustained success․

Finding Lindora Diet PDFs and Materials

Locating official Lindora diet plan PDFs and supplementary materials can be a crucial step for individuals embarking on this weight-loss program․ While Lindora’s official website is the primary source, various online platforms may host downloadable resources․ Searching specifically for “Lindora diet plan PDF” will yield results, but verifying the source’s legitimacy is paramount to ensure accuracy and safety․

Be cautious of unofficial websites offering downloadable content, as information may be outdated or inaccurate․ Lindora centers often provide printed materials and access to digital resources for their clients․ Exploring online forums and support groups dedicated to the Lindora diet may also uncover shared documents and helpful links, though always cross-reference information with official sources․ Remember that the program emphasizes personalized guidance, so a PDF should complement, not replace, professional advice․

Online Communities and Support Groups

Engaging with online communities and support groups can significantly enhance the Lindora diet experience․ Numerous platforms host discussions among individuals following the plan, offering a space to share experiences, recipes, and motivation․ Searching for “Lindora diet plan” on social media sites and dedicated health forums will reveal active groups․ These communities often share tips, address challenges, and provide encouragement, fostering a sense of accountability․

While these groups can be invaluable, remember that advice shared is often anecdotal and should not replace professional guidance from a Lindora specialist․ Be discerning about information received and prioritize official resources, like a verified Lindora diet plan PDF, for accurate details․ Online support can supplement the program, but personalized coaching remains central to success․

Long-Term Maintenance Strategies

Sustaining weight loss requires transitioning beyond the structured phases of the Lindora diet․ A key strategy involves gradually reintroducing a wider variety of foods while maintaining portion control and mindful eating habits․ Regularly reviewing a Lindora diet plan PDF can reinforce foundational principles․ Continued focus on protein intake and limiting processed foods is crucial․

Regular physical activity, established during Phase 2, should become a consistent lifestyle component․ Monitoring weight and adjusting caloric intake proactively prevents regain․ The Lindora program emphasizes ongoing support; utilizing available resources and potentially continuing with occasional coaching sessions can provide accountability․ Long-term success hinges on viewing the Lindora approach not as a temporary diet, but as a sustainable lifestyle change․

chicago town pizza cooking instructions

Chicago Town Pizza: A Comprehensive Cooking Guide (Updated December 21, 2025)

Welcome to the ultimate guide for perfectly cooked Chicago Town pizzas! This resource provides detailed instructions, ensuring a delightful experience every time, updated today, December 21, 2025.

We’ll cover oven, microwave, and grill methods, alongside crucial safety and troubleshooting tips, guaranteeing a consistently delicious takeaway-style pizza at home.

Remember to always cook from frozen and follow the recommended temperatures and times for optimal results, achieving that authentic Chicago Town flavor you crave.

Chicago Town has become a household name, synonymous with convenient and tasty frozen pizza, offering a little slice of takeaway enjoyment in the comfort of your home. Their range caters to diverse preferences, from classic takeaway styles to deep-dish delights and convenient mini portions.

Understanding the nuances of cooking these pizzas is key to unlocking their full potential. While seemingly simple, achieving that perfect balance – a crispy base, melted cheese, and flavorful toppings – requires attention to detail. This guide aims to demystify the process, providing clear and concise instructions for various cooking methods.

Whether you prefer the speed of a microwave, the even heat of an oven, or the char of a grill, we’ll equip you with the knowledge to consistently deliver a satisfying pizza experience. Remember, these are guidelines; oven variances may require slight adjustments to cooking times.

Understanding Different Chicago Town Pizza Varieties

Chicago Town offers a diverse range of pizza options, each requiring slightly adjusted cooking approaches for optimal results. The ‘Takeaway’ range aims to replicate a classic delivery experience, benefiting from a longer oven cook to ensure a crispy base and fully melted toppings.

‘Mini Pizzas’ are designed for quick snacking and generally require shorter cooking times, particularly in the oven or microwave. The ‘Deep Dish’ variety, with its thicker crust and generous filling, demands a more extended cooking period to heat through completely.

It’s crucial to identify your specific pizza type before commencing cooking. Packaging clearly indicates the variety, and referencing the corresponding instructions within this guide will guarantee a perfectly cooked pizza, tailored to its unique characteristics. Always check for specific instructions on the packaging itself.

Essential Pre-Cooking Steps

Prior preparation is key to achieving pizza perfection with Chicago Town. Begin by ensuring your chosen cooking appliance – oven, microwave, or grill – is clean and ready for use. Crucially, keep the pizza frozen until the moment you’re ready to cook; this maintains its structure and prevents a soggy base;

Remove all packaging completely before cooking, including any cardboard supports or plastic films. Placing the pizza directly onto the middle shelf of a preheated oven, or a microwave-safe dish, is essential for even cooking. Never attempt to cook the pizza with the packaging still attached.

Finally, be mindful of the hot filling; caution is advised when handling the pizza, especially immediately after cooking. These simple steps will set you up for a delicious and hassle-free pizza experience.

Oven Cooking: The Recommended Method

Oven cooking delivers the best results for Chicago Town Pizza, ensuring a crispy base and perfectly melted toppings, mirroring a takeaway experience at home!

Preheating Your Oven: Temperature Guidelines

Achieving the correct oven temperature is paramount for a perfectly cooked Chicago Town Pizza. Always preheat your oven before placing the pizza inside, ensuring even heat distribution and optimal cooking. Temperature requirements vary based on your oven type.

Proper preheating guarantees a crispy crust and thoroughly melted cheese. Ignoring this step can lead to a soggy base or unevenly cooked toppings. Allow sufficient time for your oven to reach the desired temperature – typically around 10-15 minutes.

Below are specific guidelines for different oven types, referencing recommended temperatures from Chicago Town instructions: fan, conventional, and gas ovens, ensuring a consistently delicious outcome every time you cook.

Fan Oven Temperature Settings

For fan-assisted ovens, a lower temperature is generally recommended due to the enhanced heat circulation. Chicago Town advises preheating your fan oven to 180°C (375°F). Some newer models may require a slightly adjusted setting, so always consult your oven’s manual for precise calibration.

Fan ovens cook food more quickly and evenly, reducing cooking times compared to conventional ovens. This efficient heating means your pizza will achieve a golden-brown crust and melted toppings in less time. Ensure the fan is operating correctly before starting.

Cooking times typically range from 18-23 minutes, but monitor closely. Adjustments may be needed based on your specific oven’s performance. Consistent temperature is key for a perfect Chicago Town experience.

Conventional Oven Temperature Settings

When using a conventional oven, a higher temperature is necessary to achieve optimal cooking results. Chicago Town recommends preheating your conventional oven to 200°C (400°F) for the best outcome. This ensures the pizza base becomes crispy and the toppings are thoroughly heated.

Conventional ovens heat more slowly and may have uneven heat distribution, so rotating the pizza halfway through the cooking process is advisable. This guarantees even browning and prevents hotspots. Monitor closely to avoid burning.

Expect a cooking time of approximately 20-25 minutes. Always check for doneness before serving. Consistent heat is vital for a delicious Chicago Town pizza experience, so avoid opening the oven door frequently.

Gas Oven Temperature Settings

For those utilizing a gas oven, Chicago Town advises setting your oven to Gas Mark 6 for optimal pizza cooking. This corresponds to approximately 200°C (400°F), providing sufficient heat for a crispy base and melted toppings.

Gas ovens can vary in temperature accuracy, so it’s crucial to monitor the pizza closely during cooking. Check for consistent browning and bubbling of the cheese. Rotating the pizza halfway through the 22-minute cooking time is recommended to ensure even heat distribution.

Remember that gas ovens retain heat differently than electric ovens. Adjust cooking time slightly if needed, always prioritizing a fully cooked and golden-brown pizza. Careful observation is key to a perfect result!

Oven Cooking Time: A Detailed Breakdown

Achieving the perfect cook with your Chicago Town pizza hinges on precise timing. The standard oven cooking time is 22-25 minutes, but this can fluctuate based on your oven type and individual unit variations. Always begin checking for doneness around the 22-minute mark.

Consistent monitoring is vital. Look for a golden-brown crust, bubbling cheese, and heated-through toppings. Remember, cooking times are guidelines; adjustments may be necessary. For fan-assisted ovens, a shorter cooking time of 18-23 minutes is generally sufficient, while conventional ovens may require the full 25 minutes.

Prioritize visual cues over strict adherence to the timer. A thoroughly cooked pizza is the ultimate goal, ensuring a delightful and satisfying experience!

Standard Oven Cooking Time (22-25 minutes)

For most conventional ovens, a cooking time of 22 to 25 minutes delivers optimal results for your Chicago Town pizza. This timeframe assumes a preheated oven set to 200°C (400°F) or Gas Mark 6. However, remember that oven performance varies, so consider this a starting point.

Begin checking the pizza for doneness at the 22-minute mark. Look for a beautifully golden-brown base, fully melted and bubbling cheese, and heated-through toppings. If the base isn’t crisp enough, or the cheese isn’t sufficiently bubbly, continue cooking in 1-2 minute increments.

Consistent visual assessment is key to achieving pizza perfection. Don’t solely rely on the timer; trust your eyes and enjoy the process!

Adjusting Cooking Time Based on Oven Type

Achieving the perfect Chicago Town pizza requires slight adjustments based on your oven type. Fan ovens generally cook faster; reduce the cooking time to approximately 18-23 minutes at 180°C (375°F). Conventional ovens, needing longer, require 20-25 minutes at 200°C (400°F) or Gas Mark 6.

Gas ovens also necessitate a 22-minute cook time at Gas Mark 6, but monitor closely as gas oven temperatures can fluctuate. Always preheat thoroughly before placing your pizza directly onto the middle shelf.

These are guidelines; observe your pizza! If unsure, start with the longer time and check frequently. Remember, visual cues – a golden base and bubbling cheese – are more reliable than time alone.

Checking for Doneness: Visual Cues

Don’t rely solely on the timer! Visual cues are your best friend when determining if your Chicago Town pizza is perfectly cooked. First, observe the pizza base – it should be golden brown and delightfully crisp. A pale or soggy base indicates it needs more time.

Next, examine the cheese. It should be fully melted, bubbly, and slightly browned in spots. If the cheese is still matte and unmelted, continue cooking for a few more minutes. Finally, ensure the filling is heated through; a gentle press should reveal a warm interior.

Remember, ovens vary, so these are guidelines. Trust your eyes and adjust cooking time accordingly for a consistently delicious result!

Specific Chicago Town Pizza Product Instructions

Each Chicago Town pizza variety requires tailored cooking instructions for optimal enjoyment. We’ll detail specific guidance for Takeaway, Mini, and Deep Dish pizzas, ensuring perfect results.

Chicago Town Takeaway Pizza Cooking Instructions

For the classic Chicago Town Takeaway experience, preheating is key! Utilize these guidelines for consistently delicious results. Fan ovens should be set to 180°C (Gas Mark 4) and cook for approximately 18-23 minutes.

Conventional ovens require 200°C/400°F (Gas Mark 6) for roughly 20-25 minutes. Gas ovens should be set to Gas Mark 6, with a cooking time of around 22 minutes.

Always place the frozen pizza directly onto the middle shelf of your preheated oven, ensuring even cooking. Remove all packaging before cooking. These times are guidelines; adjust based on your oven’s performance. Ensure the base is golden and the cheese is bubbly and melted for optimal enjoyment. Caution: the filling will be hot!

Chicago Town Mini Pizza Cooking Instructions

Perfect for snacking or quick meals, Chicago Town Mini Pizzas require slightly adjusted cooking times. For fan ovens, set the temperature to 200°C and cook for 13-15 minutes. This ensures a crispy base and melted cheese without overcooking.

Conventional ovens should be preheated to 220°C/425°F, also with a cooking time of 13-15 minutes. These mini pizzas cook quickly, so close monitoring is recommended. Remember to place them directly on the middle oven rack.

These are general guidelines; oven variances may require slight adjustments. Check for a golden-brown base and bubbling cheese. Always remove all packaging before cooking. Caution: the filling will be hot after cooking – allow to cool slightly before enjoying!

Chicago Town Deep Dish Pizza Cooking Instructions

For the ultimate Chicago Town experience, the Deep Dish Pizza requires careful attention to cooking times. Preheat your fan oven to 190°C (375°F, Gas Mark 5) and cook for approximately 22-25 minutes. This ensures the deep filling is heated through and the crust is golden brown.

Conventional ovens should be set to 200°C/400°F, with a similar cooking time of 20-25 minutes. Gas ovens should be set to Gas Mark 6, also for around 22 minutes. Due to the pizza’s thickness, a longer cooking time is essential.

Always cook from frozen and remove all packaging before placing directly onto the middle oven shelf. Exercise caution as the filling will be very hot. These are guidelines; adjust time based on your oven.

Alternative Cooking Methods (With Caution)

While oven cooking is best, microwaves and grills offer alternatives. Use these with caution, as results may vary, and careful monitoring is essential for quality.

Microwave Cooking: A Quick Option

Microwave cooking offers a speedy solution when time is limited, but compromises on achieving the ideal crispy base and fully melted toppings. Due to the significant variance in microwave power, precise cooking times are difficult to prescribe; adjustments are almost always necessary.

Generally, begin with a cooking time of around 3 minutes, but closely observe the pizza during the process. Rotate the pizza halfway through for more even heating. Be aware that the base may become soft, and the filling can get extremely hot.

Potential Issues with Microwave Cooking include uneven heating, a soggy crust, and a risk of scalding from the hot filling. These are merely guidelines; always prioritize safety and adjust cooking times accordingly. This method is best suited for a quick snack rather than replicating the full oven-baked experience.

Microwave Cooking Time Guidelines

For a single Chicago Town Mini Pizza, a starting point of 2-3 minutes on high power is recommended. However, this is heavily dependent on your microwave’s wattage. Always check for doneness after the initial 2 minutes, adding 30-second intervals as needed.

For larger Chicago Town Takeaway or Deep Dish pizzas, begin with 3-4 minutes on high, again monitoring closely. Rotating the pizza halfway through is crucial for even heating. Remember, these are only guidelines; microwave variances are significant.

Always allow a standing time of 30 seconds after microwaving to allow the heat to distribute evenly and avoid potential burns from the hot filling. Exercise caution, as the filling can reach very high temperatures quickly; Adjust times based on your microwave and desired level of heat.

Potential Issues with Microwave Cooking

Microwaving Chicago Town pizza can lead to an unevenly cooked base, often resulting in a soggy texture. Unlike oven cooking, microwaves primarily heat from the inside out, struggling to achieve a crispy crust. This is a common drawback when opting for speed over quality.

The filling can become excessively hot, posing a burn risk, while the cheese may not melt uniformly. Due to microwave variances, pinpointing the perfect cooking time is challenging, requiring frequent checks.

To mitigate these issues, consider placing the pizza on a microwave-safe crisping plate or using the microwave’s convection setting if available. Remember, microwave cooking is best suited for a quick, convenient option, not for replicating the oven-baked experience.

Grill Cooking: For a Crispy Base

Grilling Chicago Town pizza offers a unique path to a delightfully crispy base, mimicking a wood-fired oven experience. However, it demands careful attention to prevent burning. This method is best suited for those comfortable with grill temperature control.

Preheat your grill to a medium heat – approximately 200°C (425°F) – and ensure the grill rack is clean. Place the frozen pizza directly onto the rack, avoiding direct flame contact. Monitor closely, as grilling times vary significantly based on grill type and heat intensity.

Expect a cooking time of around 8-12 minutes, rotating the pizza halfway through for even cooking. Vigilance is key; burnt toppings are a common issue. Grill cooking delivers a satisfying crunch but requires constant supervision.

Grill Cooking Time and Temperature

Achieving optimal results when grilling Chicago Town pizza hinges on precise temperature and timing. Begin by preheating your grill to a medium heat, ideally around 200°C (425°F). Direct, intense heat will likely burn the base before the toppings cook through, so avoid high temperatures.

A typical grilling time ranges from 8 to 12 minutes, but this is highly dependent on your grill’s specific heat distribution. Rotate the pizza halfway through the cooking process to ensure even heating and prevent uneven browning.

Constant monitoring is crucial. Check the base frequently for desired crispness and the toppings for bubbling and golden-brown color. Adjust grilling time accordingly, and be prepared to move the pizza to a cooler part of the grill if it’s browning too quickly.

Monitoring to Prevent Burning

Vigilance is key when grill-cooking Chicago Town pizza to avoid a burnt offering! Due to the direct heat, pizzas can quickly go from perfectly cooked to charred. Begin checking the pizza after just 6 minutes, lifting a corner to assess the base’s color.

Pay close attention to the toppings. If the cheese is bubbling rapidly and starting to brown excessively, or if the pepperoni edges are curling and blackening, it’s time to intervene.

Reduce heat or move the pizza to a cooler section of the grill immediately if burning is detected. Frequent turning – every 2-3 minutes – promotes even cooking and minimizes hot spots. Remember, a slightly undercooked pizza is preferable to a burnt one!

Important Safety & Quality Considerations

Prioritize safety and quality! Always handle frozen pizzas with care, remove all packaging before cooking, and be mindful of hot filling temperatures for a perfect experience.

Handling Frozen Pizza: Best Practices

Maintaining optimal quality begins with proper handling. Keep your Chicago Town pizza consistently frozen until you are ready to begin the cooking process; this is paramount for achieving the best texture and flavor. Avoid partial thawing, as it can compromise the structural integrity of the pizza and affect cooking times.

When transferring the frozen pizza, handle it with clean hands or utensils to prevent contamination. Do not leave the pizza at room temperature for extended periods. If the pizza has been accidentally thawed, it should not be refrozen; cook it immediately to ensure food safety. Proper handling ensures a delicious and safe pizza experience.

Remember, a frozen pizza is designed to be cooked from a frozen state, so resist the urge to thaw it beforehand!

Removing Packaging Before Cooking

Prior to heating, complete removal of all packaging is absolutely essential. This includes the cardboard base, the plastic wrapping, and any inner liners or separators. Failure to remove all packaging materials will result in a severely compromised cooking experience and potentially a fire hazard.

Ensure no remnants of packaging are clinging to the underside of the pizza. Place the pizza directly onto the middle shelf of your preheated oven, or onto a suitable baking tray if preferred. Do not attempt to cook the pizza while still encased in any form of packaging – it’s a crucial safety step!

Always double-check for any stray pieces of cardboard or plastic before initiating the cooking process for a safe and enjoyable meal.

Caution: Hot Filling Temperatures

Please exercise extreme caution when consuming Chicago Town pizza, as the filling can reach exceptionally high temperatures. The molten cheese and sauce within the pizza retain significant heat even after the base appears cooked through.

Allow the pizza to cool for a few minutes after removing it from the oven before attempting to cut or serve. Be particularly mindful when offering pizza to children or individuals sensitive to heat. A momentary pause before the first bite is highly recommended.

The intense heat of the filling is a characteristic of the product, delivering a satisfyingly gooey experience, but requires careful handling to prevent accidental burns. Enjoy responsibly!

Storage Instructions for Leftover Pizza

Proper storage is key to maintaining the quality and safety of leftover Chicago Town pizza. Allow any remaining pizza to cool completely before transferring it to an airtight container or wrapping it tightly in plastic wrap or aluminum foil.

Refrigerate leftover pizza promptly, ideally within two hours of cooking. Stored correctly, leftover pizza will generally remain safe to eat for up to three days. However, quality may diminish over time.

For longer storage, consider freezing individual slices. When ready to enjoy, reheat thoroughly to ensure it’s piping hot. Always discard any pizza that shows signs of spoilage, such as mold or an off odor.

Troubleshooting Common Cooking Issues

Encountering problems? We’ll address common issues like uncooked centers, soggy bases, or burnt toppings, providing solutions for a perfect Chicago Town pizza experience, every time!

Pizza Not Cooked Through

If your Chicago Town pizza isn’t fully cooked, several factors could be at play. First, ensure your oven is reaching the correct temperature – use an oven thermometer for accuracy. Lower temperatures or inconsistent heating can lead to undercooking.

Secondly, verify you’re following the recommended cooking time for your oven type (fan, conventional, or gas). Extending the cooking time by a few minutes, while closely monitoring, can often resolve this issue.

Avoid opening the oven door frequently during cooking, as this releases heat and prolongs the cooking process. Finally, remember that thicker pizzas, like the Deep Dish variety, naturally require longer cooking times to ensure the center is heated through. Always check for doneness!

Pizza Base is Soggy

A soggy pizza base is a common concern, but easily addressed! Ensuring sufficient heat is crucial; verify your oven is preheated to the correct temperature – 190°C (375°F) for gas mark 5 is a good starting point. Using a higher temperature, within safe limits, can help crisp the base.

Avoid placing the pizza directly on a baking tray; instead, use a pizza stone or baking paper to promote airflow underneath. Don’t overload the oven with multiple pizzas simultaneously, as this can lower the temperature and increase moisture.

If using a microwave, be aware that this method often results in a softer base. For a crispier result, always opt for oven cooking and consider a brief grill finish at the end.

Pizza Toppings are Burnt

Burnt toppings indicate excessive heat or prolonged cooking time. Immediately check your oven temperature; ensure it aligns with the recommended settings – 180°C for fan ovens, 200°C/400°F for conventional, or gas mark 6. Reducing the temperature slightly can prevent future burning.

Monitor the pizza closely during the final minutes of cooking, especially if using a grill. If toppings are browning too quickly, lower the oven rack or briefly cover the pizza with foil.

Remember that microwave cooking can cause uneven heating and potential burning, so oven cooking is preferred. Adjust cooking times based on your oven type and always visually inspect for doneness before serving.

Finding the Chicago Town Contact Information

Need to reach out to Chicago Town directly? They offer several avenues for contact regarding product inquiries, cooking concerns, or general feedback. For UK residents, you can reach them at Chicago Town, 20 Marathon Place, Leyland, PR26 7QN.

Alternatively, for those in the Republic of Ireland, their address is Chicago Town, Unit 13, Block E, Calmount Park, Ballymount, Dublin 12. While a direct phone number isn’t widely publicized, contacting them via post at either of these addresses is a reliable method.

Checking their official website or social media channels may also provide updated contact details or a dedicated customer service portal for quicker assistance with your pizza-related questions.

the monkey’s paw questions and answers pdf

The Monkey’s Paw: Comprehensive Questions and Answers

Exploring the narrative through a study guide reveals 34 insightful questions, offering a deep dive into W.W. Jacobs’ tale. PDF resources enhance comprehension,
examining themes and character motivations.

W.W. Jacobs, born in 1863, was a celebrated English short story writer, renowned for his masterful blend of realism and the supernatural. His tales often feature ordinary people confronting extraordinary circumstances, imbued with a distinctly British sensibility and a touch of dark humor. Jacobs’ writing frequently explores the perils of interfering with fate and the unintended consequences of even the most well-intentioned desires.

“The Monkey’s Paw,” published in 1902, remains his most enduring work. The story quickly gained popularity, appearing in various collections and anthologies. It’s a chilling exploration of wish fulfillment gone awry, serving as a cautionary tale about the dangers of tampering with destiny. The narrative’s enduring appeal lies in its suspenseful atmosphere and the unsettling ambiguity surrounding the paw’s power.

Numerous study guides, often available as PDF documents, delve into the story’s complexities, offering detailed questions and answers to aid comprehension. These resources typically examine Jacobs’ life, the historical context of the story, and the symbolic significance of key elements like the paw itself. They provide valuable tools for students and readers seeking a deeper understanding of this classic work of horror and suspense.

The Story’s Setting and Initial Atmosphere

“The Monkey’s Paw” unfolds in a remote, isolated English home – Laburnam Villa – creating an immediate sense of vulnerability and confinement. The bleak, stormy weather mirrors the unsettling events to come, establishing a foreboding atmosphere from the outset. This deliberate setting isn’t merely a backdrop; it actively contributes to the story’s mounting tension and sense of dread.

The initial atmosphere is one of cozy domesticity, disrupted by the arrival of Sergeant-Major Morris and his unsettling tales. The White family – Mr. and Mrs. White, and their son Herbert – are presented as ordinary, working-class individuals, making the intrusion of the supernatural all the more jarring. The comfortable setting lulls the reader into a false sense of security, heightening the impact of the subsequent horrors.

Study guides and PDF resources often highlight the importance of this initial contrast; Questions frequently focus on how Jacobs uses descriptive language to build suspense and foreshadow the tragic events. Analyzing the setting and atmosphere is crucial to understanding the story’s overall message about the dangers of unchecked desire and the fragility of happiness.

Sergeant-Major Morris and the Paw’s Origins

Sergeant-Major Morris, a veteran of the British Army who served in India, introduces the monkey’s paw and its sinister history to the White family. He vehemently warns against using it, recounting his own terrifying experiences and the tragic fate of its previous owner. Morris’s reluctance and grim warnings immediately establish the paw as an object of immense danger and supernatural power.

The paw itself originates from a fakir, a holy man, who sought to teach people that fate should not be tampered with. The fakir placed a spell on the paw to grant three wishes, but with a cruel twist: each wish comes with a terrible price, a consequence that outweighs the desired benefit. Morris obtained the paw during his service in India and attempted to destroy it, recognizing its inherent evil.

Study guides and PDF materials often include questions about Morris’s character and his role as a cautionary figure. Understanding the paw’s origins – the fakir’s intent and Morris’s failed attempts at destruction – is vital for grasping the story’s central themes. Analyzing his motivations reveals the story’s core message about accepting fate.

The Rules of the Paw: A Detailed Examination

The monkey’s paw operates under a deceptively simple, yet profoundly dangerous, set of rules. It grants three wishes to three different people. However, these wishes are never fulfilled in a straightforward or benevolent manner; instead, they are granted with a dark, ironic twist, resulting in unforeseen and tragic consequences.

A crucial rule is that the paw manipulates fate, rather than creating something new. It doesn’t bestow blessings, but rather rearranges existing circumstances to fulfill the wish, often at a terrible cost. Sergeant-Major Morris emphasizes that the paw doesn’t offer happiness, only the fulfillment of desires, regardless of the suffering it causes. This is a key element explored in study guides and PDF resources.

Questions surrounding the paw’s rules often focus on the ambiguity of its power. The story deliberately avoids explicitly stating how the paw works, leaving room for interpretation and enhancing the sense of dread. The paw’s power seems to exploit vulnerabilities and desires, twisting them into nightmares. Understanding these rules is essential for analyzing the story’s themes of fate and consequence.

Mr. White’s First Wish and its Consequences

Driven by curiosity and a desire for a bit of extra money, Mr. White impulsively makes his first wish for two hundred pounds. This seemingly harmless request initiates the paw’s grim process. The fulfillment arrives with devastating news: Herbert, their son, has been killed in a horrific machinery accident at work, and the company is offering the Whites £200 in compensation.

This tragic outcome immediately demonstrates the paw’s cruel irony. The money is granted, but at the ultimate price – Herbert’s life. Study guides and PDF resources highlight this as a pivotal moment, showcasing the story’s central theme of unintended consequences. Questions often explore Mr. White’s initial reaction, his disbelief, and the dawning horror as he connects the wish to his son’s death.

The consequence isn’t simply the loss of Herbert, but the agonizing realization that their desire for wealth directly caused his demise. This event fundamentally alters the family dynamic and sets the stage for the desperate and ultimately tragic events that follow. The first wish serves as a stark warning about tampering with fate.

The Significance of Herbert’s Death

Herbert’s death is the catalyst for the story’s escalating tragedy and serves as the most potent demonstration of the paw’s dangerous power. It’s not merely a plot device, but a deeply symbolic event that underscores the story’s themes of fate, desire, and the perils of interfering with the natural order.

Study guides and PDF materials emphasize that Herbert represents youth, vitality, and the future. His loss shatters the family’s sense of security and plunges them into profound grief. The gruesome details of his accident – crushed and mangled by machinery – highlight the brutal and indiscriminate nature of fate when manipulated. Questions frequently focus on the irony of Herbert’s skepticism towards the paw, contrasted with the horrific reality of its power.

Furthermore, Herbert’s death fuels Mrs. White’s desperate desire to undo the consequences of the first wish, driving the narrative towards its chilling climax. His absence becomes the central motivation for the second wish, showcasing how grief can cloud judgment and lead to further tragedy. The significance lies in the irreversible nature of the loss and the devastating impact on the remaining family members.

Mrs. White’s Grief and Determination

Mrs. White’s reaction to Herbert’s death is portrayed as overwhelming and consuming, evolving from initial shock to a desperate, almost frantic determination. Study guides and accompanying PDF resources highlight her grief as a driving force behind the story’s tragic progression. Questions often explore the psychological impact of her loss and how it shapes her subsequent actions.

Initially, she attempts to maintain composure, but the reality of Herbert’s fate quickly unravels her. Her grief isn’t passive; it manifests as a fierce resolve to bring him back, regardless of the potential consequences. This determination is fueled by a mother’s love and a refusal to accept the finality of death. She actively pressures Mr. White to make a second wish, demonstrating a strength born of desperation.

PDF analyses often point to Mrs. White’s character as a cautionary tale – a representation of how grief can override reason and lead to disastrous choices. Her unwavering belief in the possibility of resurrection, despite Sergeant-Major Morris’s warnings, underscores the dangerous allure of defying fate. Her actions ultimately contribute to the story’s horrifying climax.

The Second Wish: A Desperate Attempt

Driven by unimaginable grief and fueled by a mother’s unwavering love, Mrs. White relentlessly persuades Mr. White to utilize the second wish. Study guides, often available as PDF downloads, emphasize this moment as a pivotal turning point, showcasing the destructive power of unchecked desire. Questions frequently focus on the ethical implications of tampering with fate and the consequences of prioritizing personal longing over reason.

Mr. White, initially resistant and haunted by the first wish’s outcome, eventually succumbs to his wife’s pleas. He understands the potential horror, yet the thought of restoring Herbert proves too compelling to ignore. The second wish, therefore, isn’t made out of hope, but out of a desperate attempt to alleviate unbearable pain.

PDF analyses highlight the ambiguity surrounding the wish itself. Mrs. White specifically requests Herbert’s return to life, but the paw’s nature ensures a twisted fulfillment. The ensuing suspense, meticulously crafted by W.W. Jacobs, builds anticipation for the terrifying consequences of this desperate act. The wish represents a gamble with fate, a dangerous pursuit of a seemingly impossible outcome.

The Arrival at the Door: Building Suspense

Following the second wish, a relentless and terrifying knocking commences at the front door, masterfully constructing an atmosphere of dread. Study guides, often found as PDF resources, dissect this sequence as a prime example of W.W. Jacobs’ skill in building suspense. Questions frequently explore the psychological impact of the unknown and the mounting fear experienced by the White family.

The pacing slows dramatically, each creak and groan amplified, heightening the tension. Mr. White, recognizing the horrifying implications of his wish, frantically searches for the paw, desperate to formulate a third and final plea. The knocking grows more insistent, mirroring the escalating panic within the house.

PDF analyses emphasize the symbolic weight of the door – a barrier between the known and the terrifyingly unknown. The narrative deliberately avoids revealing what lies beyond, allowing the reader’s imagination to conjure the most dreadful possibilities. This ambiguity is crucial to the story’s effectiveness, leaving the ultimate horror to linger in the reader’s mind. The suspense is almost unbearable, a testament to Jacobs’ storytelling prowess.

Analyzing the Ambiguity of the Knocking

The incessant knocking at the door represents the core ambiguity of “The Monkey’s Paw,” prompting extensive analysis in study guides and PDF resources. Questions surrounding the knocker’s identity are central to understanding the story’s tragic power. Is it Herbert, returned from the grave in a monstrous form, as Mrs. White desperately hopes? Or is it something far more sinister, a consequence of tampering with fate?

Jacobs intentionally leaves this unanswered, fostering a chilling uncertainty. PDF analyses highlight how this ambiguity forces readers to confront their own fears and contemplate the true cost of wishes. The knocking isn’t merely a plot device; it’s a symbol of the unpredictable and often horrifying consequences of defying natural order.

Study materials often explore the psychological impact on Mr. White, who understands the potential horror awaiting him. His desperate third wish is a direct response to the ambiguous threat at the door. The lack of resolution regarding the knocker’s identity amplifies the story’s lasting impact, ensuring it remains a haunting exploration of desire and its perilous repercussions.

Mr. White’s Third Wish: A Tragic Resolution

The culmination of the story, Mr. White’s third wish, provides a tragically definitive, yet unsettling, resolution. Study guides and PDF analyses emphasize the desperation driving this final act, born from the horrifying realization of what awaits beyond the door. Questions frequently arise regarding the precise wording of the wish and its implications.

Facing the potential return of a mutilated Herbert, Mr. White utters his final wish, presumably to undo the second wish and return to the state before Herbert’s resurrection. PDF resources detail how this act, while seemingly offering relief, underscores the futility of attempting to control fate. The sudden silence following the knocking confirms the wish’s fulfillment, but at a profound cost.

Study materials explore the ambiguity of whether Herbert truly returned at all, or if the knocking represented something else entirely. Regardless, the tragic outcome highlights the story’s central theme: interfering with destiny inevitably leads to devastating consequences. The final scene leaves readers contemplating the enduring power of fate and the dangers of unchecked desire, as explored in numerous critical questions.

Foreshadowing in “The Monkey’s Paw”

W.W. Jacobs masterfully employs foreshadowing throughout “The Monkey’s Paw,” subtly hinting at the tragic consequences awaiting the White family. Study guides and PDF resources dedicated to the story consistently highlight this technique as crucial to understanding the narrative’s impact. Questions often focus on identifying these early clues and their significance.

Sergeant-Major Morris’s warnings, coupled with his attempts to destroy the paw, serve as a primary example. His somber demeanor and explicit cautions about the paw’s dangerous power foreshadow the misfortune to come. The story’s bleak and isolated setting also contributes to the ominous atmosphere, preparing readers for a grim outcome. PDF analyses detail how the initial descriptions of the paw itself – its shrunken, monkey’s paw appearance – are unsettling and symbolic.

Further foreshadowing appears in the tale of the fakir who placed the spell, establishing a history of tragedy associated with the paw. Study materials emphasize that recognizing these early hints enhances the reader’s understanding of the story’s inevitable, and devastating, conclusion, prompting deeper reflection on the themes explored within the text and raising critical questions.

Themes of Fate, Desire, and Consequences

“The Monkey’s Paw” profoundly explores the intertwined themes of fate, desire, and the devastating consequences of interfering with destiny. Study guides and PDF resources consistently identify these as central to the story’s meaning, often posing questions designed to unpack their complexities. The narrative suggests a predetermined fate, highlighting the futility of attempting to alter it through supernatural means.

The Whites’ desires – for money, and ultimately, for Herbert’s return – drive the plot, yet each wish unleashes unforeseen and horrific repercussions. This underscores the story’s cautionary message about the dangers of unchecked ambition and the importance of accepting life’s natural course. PDF analyses emphasize that the paw doesn’t grant wishes, but rather reveals the terrible price associated with fulfilling them.

Questions frequently address the idea that the consequences are not merely unfortunate accidents, but rather the inevitable result of tampering with fate. The story serves as a stark warning against prioritizing selfish desires over the natural order, prompting readers to contemplate the ethical implications of seeking to control their destiny. The tragic outcome reinforces the theme that some things are best left undisturbed.

Character Analysis: The White Family

Analyzing the White family – Mr. White, Mrs. White, and Herbert – is crucial to understanding the tragic arc of “The Monkey’s Paw.” Study guides and PDF resources often include questions focused on their individual motivations and how they contribute to the story’s themes. Mr. White, initially skeptical, embodies impulsive desire and ultimately, desperate regret.

Mrs. White represents overwhelming grief and a mother’s unwavering love, driving her to demand the resurrection of her son despite the obvious warnings. Herbert, portrayed as affectionate and loyal, serves as the catalyst for the tragedy, his death highlighting the devastating consequences of the paw’s power. PDF analyses often note Herbert’s initial lightheartedness contrasts sharply with the ensuing darkness.

Questions frequently explore the family’s dynamic and how their individual flaws amplify the story’s tragic outcome. Their initial complacency and willingness to entertain the supernatural contribute to their downfall. The family’s reactions to each wish reveal their evolving understanding of the paw’s true nature and the futility of attempting to control fate. Ultimately, they represent ordinary people overwhelmed by extraordinary circumstances.

Common Questions About the Paw’s Power

Frequently asked questions surrounding the monkey’s paw center on the source and limitations of its power. Study guides and PDF resources dedicate sections to dissecting these inquiries. A primary question concerns the fakir’s intent – why place a spell designed to bring misery? Was it a lesson, a curse, or simply a demonstration of power?

Another common inquiry explores the paw’s rules: are there specific limitations to the number of wishes, or the type of wishes granted? The story implies a twisted logic where every benefit is balanced by an equal, often greater, misfortune. PDF analyses highlight the ambiguity, suggesting the paw doesn’t grant wishes, but rather manipulates fate to fulfill them in the most horrific way possible.

Questions also arise regarding why the paw affected the White family specifically. Was it their vulnerability, their curiosity, or simply random chance? The story doesn’t offer a definitive answer, contributing to its unsettling atmosphere. Ultimately, the paw’s power serves as a cautionary tale about interfering with fate and the dangers of unchecked desire, prompting ongoing debate and analysis.

Resources for Further Study: PDF Guides and Study Materials

Numerous online resources supplement the study of W.W. Jacobs’ “The Monkey’s Paw,” with PDF guides and comprehensive study materials readily available. These resources often include detailed character analyses, explorations of key themes like fate and consequence, and in-depth examinations of the story’s symbolism.

PDF documents frequently offer sets of comprehension questions, designed to test understanding of plot points, character motivations, and literary devices such as foreshadowing. Some guides provide answer keys for self-assessment, while others encourage critical thinking through open-ended discussion questions. Websites like Quizlet host flashcards to aid memorization of key terms and concepts.

Study companions often include essays analyzing the story’s historical context and Jacobs’ writing style. Accessing these PDF resources can significantly enhance a student’s understanding and appreciation of this classic tale. They provide a structured approach to analyzing the narrative’s complexities and exploring its enduring relevance. Further exploration can unlock deeper layers of meaning within the story’s chilling narrative.

nesco gardenmaster food dehydrator manual

Nesco Gardenmaster Food Dehydrator Manual: A Comprehensive Guide

This comprehensive guide details the Nesco Gardenmaster, offering manuals and recipes in PDF format. Explore dehydrator operation, from initial setup to cleaning and troubleshooting, ensuring optimal performance.

Discover how to access Nesco support and warranty information, alongside vital safety precautions for successful food preservation. Diagrams and images are available in the original PDF.

The Nesco Gardenmaster Food Dehydrator represents a cornerstone in home food preservation, offering a reliable and efficient method for extending the shelf life of your favorite fruits, vegetables, meats, and herbs. This appliance empowers you to create healthy, convenient snacks and ingredients, free from artificial preservatives. Understanding its capabilities is the first step towards unlocking a world of culinary possibilities.

This manual serves as your complete guide, walking you through every aspect of the Nesco Gardenmaster, from initial setup and operation to advanced techniques like jerky making and fruit leather creation. Whether you’re a seasoned dehydrator enthusiast or a complete beginner, this resource will provide the knowledge and confidence to achieve exceptional results. The Nesco brand is synonymous with quality and innovation in food dehydration, and the Gardenmaster model embodies these principles.

Accessing the PDF version of this manual provides detailed diagrams and illustrations, enhancing your understanding of the dehydrator’s components and functions. Explore a wealth of recipes designed specifically for the Nesco Gardenmaster, inspiring you to experiment with flavors and textures. Prepare to embark on a journey of delicious and nutritious food preservation!

Understanding the Dehydrator Components

The Nesco Gardenmaster consists of several key components working in harmony to achieve optimal dehydration. These include the base unit housing the heating element and fan, responsible for circulating warm air. Above this sit the stacking trays, typically made of BPA-free plastic, providing ample surface area for food placement. A flexible food-grade liner, often included, prevents smaller items from falling through the trays.

The top of the unit features a fan cover, directing airflow downwards. Understanding the function of each part is crucial for efficient operation and maintenance. Refer to the manual’s diagrams, available in PDF format, for a visual breakdown of each component. Proper assembly and alignment of the trays ensure even dehydration across all levels.

Familiarize yourself with the temperature control settings, allowing you to customize the drying process for different food types. The Nesco Gardenmaster is designed for ease of use, but a thorough understanding of its parts, as detailed in the manual, will maximize its performance and longevity. Explore the recipes and utilize these components effectively!

Initial Setup and Preparation

Before your first use of the Nesco Gardenmaster, thorough preparation is essential. Begin by unpacking all components and verifying their presence against the parts list in the manual – readily available as a PDF download. Wash all removable parts, including trays and liners, with warm, soapy water, ensuring they are completely dry before assembly.

Place the base unit on a stable, level surface, allowing for adequate ventilation around the intake and exhaust vents. Assemble the stacking trays, ensuring they are securely positioned on the base. Familiarize yourself with the power cord and ensure it’s undamaged. Before loading food, it’s recommended to run the dehydrator empty for a short period to eliminate any manufacturing odors.

Consult the manual for specific food preparation guidelines. Proper slicing and arrangement of food on the trays are vital for even dehydration. Remember to download the PDF for detailed diagrams and recipes to kickstart your preservation journey. A clean and properly assembled unit guarantees optimal performance.

Operating Instructions: Basic Dehydration

To begin basic dehydration with your Nesco Gardenmaster, first, prepare your food according to recommended guidelines – detailed in the downloadable PDF manual and accompanying recipes. Arrange food in a single layer on the dehydrator trays, ensuring adequate space between pieces for proper air circulation.

Once loaded, place the tray stack onto the base unit. Connect the power cord to a grounded outlet. Set the desired temperature using the control knob, referencing the manual’s temperature guide for specific food types. The dehydrator will begin operation immediately.

Dehydration times vary depending on the food and desired consistency. Regularly check the food’s progress, rotating trays if necessary for even drying. Refer to the manual for estimated drying times. Once dehydrated to your liking, power off the unit and allow the food to cool completely before storing in airtight containers. Remember to consult the PDF for detailed instructions.

Temperature Control and Settings

The Nesco Gardenmaster features adjustable temperature control, crucial for optimal dehydration. The manual’s temperature guide provides recommended settings for various foods, ranging from low temperatures for preserving enzymes in fruits and vegetables to higher temperatures for safely drying meats like jerky.

Typically, temperatures between 95°F and 135°F (35°C ⎼ 57°C) are used for most fruits and vegetables. Meat dehydration requires higher temperatures, often between 160°F and 180°F (71°C ⸺ 82°C), to ensure food safety. Always consult the PDF manual for precise temperature recommendations.

The control knob allows for precise adjustments. Lower temperatures preserve flavor and nutrients, while higher temperatures accelerate drying. Consistent temperature is vital; avoid frequent adjustments. The manual details potential issues related to incorrect temperature settings. Proper temperature control, as outlined in the Nesco documentation, guarantees safe and effective food preservation.

Dehydrating Fruits: A Step-by-Step Guide

Dehydrating fruits with your Nesco Gardenmaster is simple! First, wash and prepare your fruit – slice evenly for consistent drying, referencing recipes in the manual for ideal thickness. Pre-treatment, like dipping in lemon juice, prevents browning, especially for lighter fruits.

Arrange fruit slices in a single layer on the dehydrator trays, ensuring air circulation. Avoid overlapping. Set the temperature between 135°F and 175°F (57°C ⸺ 79°C), consulting the PDF manual for specific fruit recommendations.

Drying time varies – typically 6 to 24 hours – depending on fruit type and thickness. Check for pliability; fruits should be leathery but not brittle. Rotate trays midway for even drying. The Nesco guide provides detailed instructions and recipes. Properly dehydrated fruit, as detailed in the manual, will store for extended periods.

Dehydrating Vegetables: Best Practices

Dehydrating vegetables using your Nesco Gardenmaster requires specific techniques for optimal results. Begin by thoroughly washing and preparing your chosen vegetables – slicing uniformly ensures even drying, as detailed in the manual. Blanching is crucial for most vegetables; this stops enzyme action, preserving color and nutrients.

Arrange vegetable pieces in a single layer on the dehydrator trays, avoiding overlap to promote airflow. Temperature settings typically range from 125°F to 175°F (52°C ⎼ 79°C), consult the Nesco PDF manual for specific vegetable guidelines.

Drying times vary considerably, from 4 to 12+ hours, depending on the vegetable and slice thickness. Check for crispness; vegetables should snap easily. Rotate trays periodically for consistent drying. Refer to Nesco recipes for flavor enhancements. Properly dehydrated vegetables, following the manual’s guidance, offer long-term storage.

Making Jerky: Meat Preparation and Drying

Making jerky with your Nesco Gardenmaster demands careful meat preparation and adherence to safety guidelines outlined in the manual. Select lean cuts of meat – flank steak, round steak, or venison work well. Partially freeze the meat for easier slicing into ¼-inch thick strips, ensuring uniformity for even drying.

Marinate the meat for at least 4-24 hours, utilizing your favorite Nesco recipes or a custom blend. This enhances flavor and acts as a tenderizer. Pat the marinated meat dry before arranging it in a single layer on the dehydrator trays, avoiding overlap.

Set the dehydrator temperature between 160°F and 175°F (71°C ⸺ 79°C) – crucial for safe drying. Drying times range from 4 to 8 hours, depending on meat thickness and desired texture. Jerky is done when it bends without breaking. Consult the PDF manual for detailed instructions and safety information.

Fruit Leather Creation: Recipes and Techniques

Fruit leather, a delicious and healthy snack, is easily created using your Nesco Gardenmaster. Begin by selecting ripe fruits – apples, berries, mangoes, or peaches are excellent choices. Puree the fruit until smooth, adding a touch of lemon juice to prevent browning, as detailed in Nesco recipes found in the manual.

For enhanced flavor, incorporate spices like cinnamon or nutmeg. Spread the puree thinly and evenly – approximately ⅛ to ¼ inch thick – onto Nesco’s non-stick sheets or parchment paper placed directly on the dehydrator trays. Ensure a consistent layer for uniform drying.

Set the dehydrator to 135°F (57°C) and dry for 6-12 hours, or until the leather is pliable but not sticky. Drying time varies based on fruit type and puree thickness. Refer to the PDF manual for specific guidance and safety precautions. Once cooled, roll up and enjoy!

Dehydrating Herbs: Preserving Flavor

Dehydrating herbs with your Nesco Gardenmaster is a fantastic way to capture peak flavor for year-round use. Begin with freshly harvested herbs, ensuring they are clean and dry. Remove leaves from stems, as detailed in your Nesco product manual. Spread the herb leaves in a single layer on the dehydrator trays, avoiding overcrowding for optimal air circulation.

A low temperature is crucial for preserving essential oils and flavor. Set your Nesco to 95-115°F (35-46°C). Drying time typically ranges from 2-4 hours, depending on the herb and humidity levels. Regularly check for crispness; herbs should crumble easily when dry.

Once dehydrated, store herbs in airtight containers in a cool, dark place. Consult the PDF manual for detailed instructions and recipes utilizing your preserved herbs. Proper storage maintains potency and aroma, enhancing your culinary creations.

Nesco Gardenmaster Recipes

Unlock a world of culinary possibilities with your Nesco Gardenmaster! The included manual and supplemental PDF resources offer a diverse range of recipes, extending beyond simple fruit and vegetable dehydration. Explore savory options like beef jerky, utilizing meat preparation techniques detailed within the guide.

Delight in sweet treats such as homemade fruit leather, with recipes for various flavor combinations. Discover how to perfectly dehydrate herbs, preserving their vibrant flavors for seasoning blends. The Nesco manual also provides guidance on creating healthy snacks like fruit chips and vegetable crisps.

Beyond the basics, experiment with dehydrating soups and creating unique spice rubs. Access additional recipes online through Nesco’s support resources. Remember to always follow safety guidelines and temperature recommendations outlined in your manual for optimal results and delicious, homemade creations.

Cleaning and Maintenance

Maintaining your Nesco Gardenmaster is crucial for longevity and food safety. The manual emphasizes regular cleaning after each use to prevent bacteria buildup. Begin by disconnecting the unit from the power source. Remove the trays and wash them with warm, soapy water; they are often dishwasher safe, but verify in your manual.

The base unit requires gentle cleaning with a damp cloth – avoid immersion in water. Stubborn food residue can be removed with a mild detergent. Thoroughly dry all components before reassembly. Periodically inspect the power cord for damage, as detailed in the manual’s safety section.

For deeper cleaning, consult the PDF version of the manual for specific instructions. Proper maintenance, as outlined in the guide, ensures optimal performance and extends the life of your Nesco dehydrator. Regular care prevents malfunctions and guarantees consistently high-quality dehydrated foods.

Troubleshooting Common Issues

The Nesco Gardenmaster Food Dehydrator Manual addresses frequent problems. If the unit doesn’t power on, check the power cord and outlet. Uneven drying often results from overcrowding trays – ensure proper air circulation. Refer to the manual’s section on tray arrangement for optimal results.

If food isn’t drying quickly enough, verify the temperature setting and ensure the thermostat is functioning correctly. The PDF version of the manual provides detailed diagrams for component location. A burning smell usually indicates food residue on the heating element; immediately disconnect and clean the base unit.

For persistent issues, consult the manual’s troubleshooting guide or contact Nesco support. Remember to have your model number and purchase date available. Following the manual’s advice can resolve many common problems, ensuring continued enjoyment of your dehydrator. Always prioritize safety and disconnect the unit before any inspection or repair;

Safety Precautions

Prioritize safety when operating your Nesco Gardenmaster. Always unplug the dehydrator before cleaning or performing maintenance, as detailed in the manual. Never immerse the base in water or other liquids to prevent electrical shock. Ensure the unit is placed on a stable, heat-resistant surface away from flammable materials.

Supervise children when the dehydrator is in use. The exterior surfaces can become hot during operation, posing a burn risk. Avoid using extension cords if possible; if necessary, use a heavy-duty cord rated for the appliance’s wattage. Do not operate the dehydrator with a damaged cord or plug.

Refer to the Nesco Gardenmaster Food Dehydrator Manual’s section on safe food handling practices to prevent foodborne illness. Properly prepare food before dehydration, and follow recommended drying times. The PDF version of the manual contains comprehensive safety guidelines for optimal and secure operation.

Accessing the Nesco Manual PDF

Finding your Nesco Gardenmaster Food Dehydrator Manual in PDF format is straightforward. The official Nesco website provides a dedicated section for downloading manuals for various products, including the Gardenmaster series. Simply navigate to the Nesco support or downloads page and locate your specific model number.

Alternatively, a quick online search using terms like “Nesco Gardenmaster manual PDF” will yield direct links to downloadable files. Many retailers who sell Nesco dehydrators also offer manuals for download on their websites. Ensure the PDF source is reputable to avoid downloading potentially harmful files.

The manual contains vital information regarding operation, safety, recipes, cleaning, and troubleshooting. Diagrams and detailed instructions are included within the PDF document, offering a comprehensive guide to maximizing your Nesco dehydrator’s performance. Download and save the PDF for future reference.

Warranty Information and Support

Nesco stands behind the quality of its Gardenmaster Food Dehydrators with a limited manufacturer’s warranty. Typically, this covers defects in materials and workmanship for a specified period, often one year from the date of original purchase. Retain your proof of purchase for warranty claims.

To initiate a warranty claim, contact Nesco customer support directly through their official website or by phone. Be prepared to provide your model number, purchase date, and a detailed description of the issue. Nesco will guide you through the process, which may involve returning the unit for inspection or repair.

Beyond warranty support, Nesco offers extensive customer assistance. Their website features a comprehensive FAQ section, recipes, and manuals. You can also find helpful resources and a vibrant community of Nesco users online. For personalized assistance, their customer support team is readily available to address your questions and concerns.

brother hl 3170cdw manual

Brother HL-3170CDW Manual: A Comprehensive Guide

This comprehensive guide details the Brother HL-3170CDW color laser printer‚ offering online instructions‚ troubleshooting‚ and FAQs. Download the user manual in PDF format‚ or view it online for free. Access Brother support resources‚ service centers‚ and warranty information. Find drivers‚ instructions‚ and consumables for your HL-3170CDW printer.

The Brother HL-3170CDW is a color laser printer designed for efficient and high-quality printing in both home and office environments. This guide serves as a complete resource for understanding and utilizing all the features of your printer. It covers everything from initial setup and basic printing tasks to advanced functionalities like mobile printing and duplexing.

This printer boasts impressive specifications‚ including a print speed of 22 pages per minute‚ a maximum resolution of 2400 x 600 dpi‚ and built-in wireless and Ethernet connectivity. The HL-3170CDW supports AirPrint and Brother’s iPrint&Scan mobile printing solutions‚ offering versatile printing options. This manual provides detailed instructions‚ troubleshooting tips‚ and information on compatible consumables to ensure optimal performance and longevity of your Brother HL-3170CDW printer.

Key Features and Specifications

The Brother HL-3170CDW excels with its vibrant color laser printing capabilities‚ delivering professional-quality documents and graphics. Key features include automatic duplex (two-sided) printing‚ reducing paper consumption and costs. Connectivity options are extensive‚ encompassing built-in Wi-Fi‚ Ethernet‚ and USB 2.0 interfaces‚ alongside AirPrint compatibility for seamless Apple device integration.

Specifications highlight a print speed of up to 22 pages per minute‚ a maximum print resolution of 2400 x 600 dpi‚ and a monthly print volume of up to 2‚000 pages. It features 128MB of memory and supports various media types and sizes. The printer’s compact design and user-friendly control panel contribute to its practicality. This model‚ alongside HL-3150CDW and HL-3140CW‚ offers versatile printing solutions.

Setting Up Your Printer

Initial setup involves unboxing‚ toner installation‚ and connecting to power and your network—either wirelessly via Wi-Fi or directly through a USB connection.

Unboxing and Initial Inspection

Carefully unpack your Brother HL-3170CDW printer from the box‚ ensuring all packing materials are removed. Inspect the printer for any visible damage that may have occurred during shipping. This includes checking the exterior casing‚ the control panel‚ and the paper tray. Verify that all included accessories are present‚ such as the power cord‚ USB cable (if included)‚ toner cartridges‚ and the quick setup guide.

Retain the original packaging for potential future transportation or warranty claims. Remove all protective tapes and plastic coverings from both the exterior and interior of the printer. Confirm the printer model number (HL-3170CDW) matches the one on the box and the printer itself. If any damage or missing components are discovered‚ immediately contact Brother support or the retailer where you purchased the printer.

Installing the Toner Cartridges

Open the top cover of the Brother HL-3170CDW to access the toner cartridge compartment. Remove the protective cover from each toner cartridge – typically involving pulling a tab to release the sealing tape. Carefully slide each toner cartridge into its corresponding color slot (Cyan‚ Magenta‚ Yellow‚ and Black)‚ ensuring it clicks securely into place.

Avoid touching the drum on the toner cartridge‚ as this can affect print quality. Close the top cover firmly until you hear a click. The printer will automatically initialize and recognize the new toner cartridges. Check the printer’s display to confirm that all colors are detected correctly. If any errors occur‚ re-seat the cartridges and restart the printer. Proper installation ensures optimal printing performance.

Connecting to Power and Network

Connect the power cord to the printer and a grounded electrical outlet. Ensure the power switch is in the ‘ON’ position. For network connectivity‚ connect an Ethernet cable from the printer to your router or network switch. Alternatively‚ for wireless setup‚ proceed to the Wi-Fi configuration section.

Verify network connection by checking the printer’s LCD display for a valid IP address. If using Ethernet‚ the printer should automatically obtain an IP address. For Wi-Fi‚ you’ll need to select your network and enter the password via the control panel. Confirm successful connection by printing a network configuration page from the printer’s menu. A stable network connection is crucial for printing and accessing printer features.

Wireless Network Setup (Wi-Fi)

Access the Wi-Fi setup through the printer’s LCD control panel. Navigate to the network settings and select ‘WLAN’. The printer will scan for available wireless networks. Choose your network from the list displayed on the screen.

Enter your network password carefully using the keypad. Ensure the password is case-sensitive. Once entered‚ the printer will attempt to connect to the network. Verify the connection by checking the LCD display for a ‘Connected’ status and a valid IP address; You can also print a network configuration page to confirm settings. Download the Brother iPrint&Scan app for mobile printing after successful Wi-Fi setup.

Connecting via USB

Locate the USB port on the rear panel of the Brother HL-3170CDW printer. Connect the USB cable securely to both the printer and your computer. The printer will automatically begin the installation process‚ or you may need to launch the driver installation from the downloaded software package.

Follow the on-screen prompts to complete the installation. The system will detect the printer and install the necessary drivers. Verify the connection by checking your computer’s device manager to ensure the printer is recognized. Once installed‚ you can print a test page to confirm functionality. USB connection provides a stable and direct link for printing without relying on a network.

Understanding the Control Panel

The HL-3170CDW’s control panel features an LCD display and buttons for easy navigation. Learn button functions and how to access printer settings for optimal use.

LCD Display Overview

The Brother HL-3170CDW’s LCD display serves as the central hub for monitoring printer status and navigating menu options. This intuitive interface provides clear visual feedback regarding the printer’s operational state‚ including toner levels‚ paper supply‚ and any error messages encountered during operation.

Users can easily view the number of pages printed‚ network connection status (Wi-Fi or Ethernet)‚ and selected print settings directly on the display. The LCD screen also facilitates access to various printer functions‚ such as copying‚ scanning (if applicable)‚ and configuring network settings. Navigating the menu is straightforward‚ utilizing the control panel buttons to scroll through options and make selections. Understanding the icons and messages displayed on the LCD is crucial for efficient printer operation and troubleshooting.

The display’s brightness and contrast are automatically adjusted for optimal visibility in different lighting conditions‚ ensuring a clear and readable experience. Regularly checking the LCD display allows users to proactively address potential issues and maintain peak printer performance.

Button Functions and Navigation

The control panel buttons on the Brother HL-3170CDW facilitate seamless printer operation and menu navigation. The ‘OK’ button confirms selections and initiates actions‚ while the ‘Cancel’ or ‘Stop’ button halts current processes like printing or copying. Arrow buttons (up‚ down‚ left‚ right) allow users to scroll through menu options and adjust settings.

The ‘Menu’ button accesses the main printer settings‚ providing options for network configuration‚ print quality adjustments‚ and maintenance routines. The ‘Start’ button initiates print or copy jobs. Navigating the menu involves using the arrow keys to highlight desired options and pressing ‘OK’ to select them.

Understanding the button layout and their corresponding functions is essential for efficient printer control. Refer to the LCD display for on-screen prompts and guidance during navigation. Experimenting with the buttons will quickly familiarize users with the printer’s interface and unlock its full potential.

Printing Basics

Initiate print jobs by loading paper correctly and utilizing print quality settings. Duplex printing (two-sided) is supported‚ enhancing paper efficiency and reducing waste.

Loading Paper Correctly

Proper paper loading is crucial for optimal printing performance with your Brother HL-3170CDW. Begin by locating the paper tray and extending it fully. Adjust the paper guides to snugly fit the paper width‚ preventing skewing during printing. Ensure the paper stack is neatly aligned and below the maximum fill line indicated on the tray.

Supported paper types include plain paper‚ glossy paper‚ and envelopes‚ each requiring specific settings within the printer’s control panel. Fan the paper stack before loading to separate the sheets and reduce the risk of multiple sheets feeding at once. Always load paper with the correct side facing up‚ as indicated by the printer’s documentation. Incorrect paper loading can lead to paper jams or poor print quality. Regularly check the paper tray for any obstructions or debris.

Initiating a Print Job

Starting a print job with your Brother HL-3170CDW is straightforward. First‚ ensure the printer is powered on and connected to your computer or network. Open the document you wish to print from your application of choice. Navigate to the “File” menu and select “Print.”

In the print dialog box‚ select “Brother HL-3170CDW” as your printer. Configure your desired print settings‚ such as paper size‚ print quality‚ and color mode. You can also access advanced settings for duplex printing or specific paper types. Once settings are confirmed‚ click the “Print” button to send the job to the printer. The printer’s LCD display will indicate when the job is processing and completed. Monitor the output tray for your printed document.

Print Quality Settings

Adjusting print quality on your Brother HL-3170CDW allows for optimized results based on your needs. Access these settings through the printer driver on your computer. Within the print dialog box‚ locate the “Quality” or “Print Quality” options. Typically‚ you’ll find choices like “Draft‚” “Normal‚” “Fine‚” and “Best.”

“Draft” is ideal for internal documents where speed is prioritized over appearance. “Normal” provides a good balance for everyday printing. “Fine” enhances detail for presentations or images‚ while “Best” delivers the highest resolution for critical documents. Experiment with these settings to achieve your desired output. Consider paper type; heavier paper often benefits from higher quality settings. Remember to save your preferred settings for future use.

Duplex Printing (Two-Sided Printing)

The Brother HL-3170CDW offers convenient automatic duplex printing‚ saving paper and reducing costs. To enable this feature‚ access the print settings through your computer’s printer driver. Locate the “Duplex” option‚ usually found under “Layout” or “Finishing.” Select “Two-Sided Printing” or a similar designation.

You’ll typically have choices for binding edge – either “Long Edge” (for documents bound on the long side‚ like a book) or “Short Edge” (for documents bound on the short side‚ like a notepad). Ensure your paper is suitable for duplex printing; avoid using wrinkled or damaged sheets. The printer will automatically flip the paper to print on both sides. Verify the preview to confirm the correct orientation before printing.

Advanced Printing Features

Explore mobile printing with iPrint&Scan‚ alongside AirPrint compatibility‚ and direct printing capabilities from a USB drive for versatile document handling.

Mobile Printing (iPrint&Scan)

Brother’s iPrint&Scan application unlocks convenient mobile printing and scanning directly from your smartphone or tablet. This feature allows users to print documents‚ photos‚ and web pages wirelessly‚ without the need for a computer connection. Download the application from the Brother Solutions Center to access a range of functionalities.

iPrint&Scan supports various file formats‚ ensuring compatibility with your existing documents. You can easily select files from cloud storage services‚ such as Dropbox‚ Google Drive‚ and OneDrive‚ for seamless printing. Furthermore‚ the app provides scanning capabilities‚ allowing you to digitize documents and save them directly to your mobile device or cloud storage.

Setup is straightforward‚ utilizing your existing Wi-Fi network. The application offers a user-friendly interface‚ making it easy to manage print jobs and customize settings. It’s a powerful tool for enhancing productivity and convenience.

AirPrint Compatibility

The Brother HL-3170CDW boasts full compatibility with Apple’s AirPrint technology‚ enabling effortless wireless printing directly from your iPhone‚ iPad‚ or Mac. This eliminates the need for installing drivers or configuring software‚ simplifying the printing process for Apple users. AirPrint automatically detects your printer on the same Wi-Fi network.

Printing is intuitive; simply select the print option from within your Apple application‚ and your document will be sent to the HL-3170CDW. AirPrint supports a wide range of document types‚ including text‚ images‚ and web pages. It also automatically adjusts the print settings to match your paper size and orientation.

This feature provides a seamless and convenient printing experience‚ making it ideal for quick print jobs and on-the-go productivity. No additional software or configuration is required‚ offering a truly plug-and-play solution.

Printing from a USB Drive

The Brother HL-3170CDW offers the convenient functionality of direct printing from a USB flash drive. This allows you to print documents‚ images‚ and other files without needing a computer connection. Simply insert a USB drive containing supported file formats – such as PDF‚ JPEG‚ and TIFF – into the printer’s USB port.

Using the control panel‚ navigate to the “USB” or “Direct Print” option within the printer’s menu. The printer will then display a list of files on the USB drive. Select the desired file and confirm your print settings‚ such as paper size and print quality.

This feature is particularly useful when you need to print on the go or when a computer isn’t readily available. It provides a quick and easy way to produce hard copies of your important files directly from your portable storage device.

Maintenance and Troubleshooting

Resolve issues like paper jams‚ print quality problems‚ and error codes with this section. Learn to clean the printer and monitor toner levels effectively.

Cleaning the Printer

Regular cleaning maintains optimal print quality and extends the life of your Brother HL-3170CDW. Always power off the printer and disconnect it from the power source before beginning any cleaning procedure. Begin by carefully opening the front cover and gently wiping the interior with a soft‚ lint-free cloth to remove any loose toner or paper dust.

Avoid using abrasive cleaners or solvents‚ as these can damage the printer’s components. For stubborn toner residue‚ a slightly damp cloth can be used‚ ensuring it is not dripping wet. Clean the corona wire carefully‚ following the instructions in the full user manual to prevent damage. Inspect the paper path for any obstructions or accumulated debris and remove them. Finally‚ wipe down the exterior of the printer with a clean‚ dry cloth.

Resolving Paper Jams

Paper jams can occur for several reasons‚ but are usually easily resolved. First‚ power off and unplug the Brother HL-3170CDW. Carefully open the rear access cover and remove any jammed paper‚ pulling it gently in the direction of the paper path – avoid ripping. Check the front access cover and remove any visible paper.

Inspect the paper tray to ensure it’s correctly loaded and the paper guides are adjusted properly. Also‚ verify the paper type is supported by the printer. If paper fragments remain‚ use tweezers to carefully extract them. Restart the printer and test with a new sheet of paper. Refer to the detailed diagrams in the user manual for specific jam locations and removal instructions. Avoid using excessive force when removing jammed paper.

Troubleshooting Common Print Quality Issues

Poor print quality can stem from several factors. First‚ check the toner levels; low toner often causes faded prints. Run a cleaning cycle from the printer’s control panel to remove any toner buildup. Ensure you’re using compatible toner cartridges recommended by Brother. Inspect the printed page for specific issues – streaks‚ smudges‚ or missing colors.

Adjust print quality settings within the printer driver for optimal results. Verify the paper type selected in the driver matches the paper loaded in the tray. If streaks persist‚ clean the drum unit. For color inconsistencies‚ run a color calibration. Consult the Brother support website or user manual for detailed troubleshooting steps and diagrams addressing specific print quality problems.

Toner Level Monitoring and Replacement

Monitoring toner levels is crucial for consistent print quality. The Brother HL-3170CDW provides several ways to check toner status. Utilize the printer’s LCD display‚ which indicates approximate toner remaining for each color. Alternatively‚ access toner levels through the Brother Printer Utility on your computer. The utility offers more detailed information and predictive alerts.

When toner is low‚ the printer will prompt replacement. Replacing toner cartridges is straightforward; open the front cover‚ remove the old cartridge‚ and install the new one‚ ensuring a secure fit. Always use compatible toner cartridges to avoid damage and maintain print quality. Dispose of used cartridges responsibly‚ following local regulations;

Error Codes and Their Meanings

The Brother HL-3170CDW utilizes error codes to diagnose issues. Understanding these codes simplifies troubleshooting. Common errors include “Toner Low” or “Replace Toner‚” indicating the need for a new cartridge. A “Paper Jam” error requires checking paper paths and removing any obstructions. “No Paper” signals an empty paper tray or incorrect paper loading.

More complex codes‚ displayed on the LCD‚ may require consulting the printer manual or Brother support resources. The manual provides a comprehensive list of error codes and corresponding solutions. Online FAQs and troubleshooting guides offer further assistance. Addressing error codes promptly prevents further complications and ensures optimal printer performance. Ignoring codes can lead to more significant hardware issues.

Driver Installation and Software

Download and install the latest drivers from the Brother website for optimal functionality. Utilize the Brother Printer Utility for managing printer settings and monitoring status.

Downloading and Installing Drivers

To ensure seamless operation of your Brother HL-3170CDW‚ downloading and installing the correct drivers is crucial. Visit the official Brother Solutions Center website to locate the most up-to-date drivers specifically designed for your operating system – Windows or macOS. The website provides a user-friendly interface for driver selection.

Carefully choose the driver package matching your computer’s OS version (32-bit or 64-bit). Download the file and double-click it to initiate the installation wizard. Follow the on-screen prompts‚ accepting the license agreement and choosing your preferred installation settings. The installation process may take several minutes.

After completion‚ it’s recommended to restart your computer to fully integrate the drivers. Verify the successful installation by checking Device Manager. A properly installed driver will appear without any error indicators. Regularly check for driver updates to maintain optimal performance and compatibility.

Using the Brother Printer Utility

The Brother Printer Utility is a powerful software suite accompanying your HL-3170CDW‚ offering enhanced control and monitoring capabilities. Accessible through your computer’s applications menu‚ this utility provides a centralized interface for managing various printer settings. You can monitor toner levels‚ check printer status‚ and configure network settings with ease.

Utilize the utility to run maintenance tasks‚ such as cleaning the printer head and performing paper jam diagnostics. It also allows you to customize print quality settings‚ adjust color profiles‚ and manage advanced features like duplex printing. The utility provides detailed reports on printer usage and error logs.

Furthermore‚ the Brother Printer Utility facilitates firmware updates‚ ensuring your printer remains secure and compatible with the latest features. Regularly checking for updates through the utility is recommended for optimal performance and reliability.

Consumables and Support

Find compatible toner cartridges and access comprehensive Brother support resources‚ including drivers‚ manuals‚ and troubleshooting assistance for your HL-3170CDW printer.

Compatible Toner Cartridges

Ensuring optimal print quality and longevity for your Brother HL-3170CDW relies on using compatible toner cartridges. Brother offers a range of options designed specifically for this model‚ guaranteeing seamless performance and vibrant color reproduction. Standard yield toner cartridges (TN-315) are ideal for moderate printing volumes‚ providing a balance between cost and page yield. For higher demand environments‚ high yield cartridges (TN-315XL) offer a significantly increased page output‚ reducing replacement frequency and overall costs.

Genuine Brother toner is formulated to work in harmony with the HL-3170CDW‚ minimizing the risk of printer damage and ensuring consistent results. While third-party alternatives exist‚ they may compromise print quality or void your printer’s warranty. Always verify compatibility before purchasing‚ and consider the environmental impact of cartridge recycling programs offered by Brother. Regularly checking toner levels through the printer’s control panel or Brother Printer Utility helps prevent unexpected interruptions.

Finding Brother Support Resources

Brother provides extensive support for the HL-3170CDW‚ ensuring users have access to assistance when needed. The official Brother Solutions Center website is a primary resource‚ offering downloadable drivers‚ FAQs‚ troubleshooting guides‚ and the complete user manual in PDF format. You can search for solutions by model number or keyword‚ quickly addressing common issues. Online chat support is available for immediate assistance from a Brother representative‚ providing real-time guidance.

For more complex problems‚ Brother maintains a network of authorized service centers. Their website features a service locator tool to find the nearest center for repairs or maintenance. Additionally‚ the Brother Support app (iPrint&Scan) offers mobile access to support resources and troubleshooting tips. Explore the online knowledge base and community forums for peer-to-peer support and shared solutions. Don’t hesitate to utilize these resources to maximize your HL-3170CDW experience.

haroun and sea of stories pdf

Haroun and the Sea of Stories PDF: A Comprehensive Guide (Updated December 21, 2025)

Discover a detailed exploration of accessing Salman Rushdie’s Haroun and the Sea of Stories in PDF format, covering purchase options,
free availability, and authenticity checks as of today, December 21, 2025.

Published in 1990, Haroun and the Sea of Stories emerges as a vibrant and allegorical novel by Salman Rushdie, deeply influenced by the 1989 fatwa issued against him following The Satanic Verses. This fantastical tale, aimed at a younger audience yet resonating with adults, explores themes of storytelling, censorship, and the power of imagination.

The narrative follows young Haroun al-Rashid on a quest to restore the poisoned Sea of Stories – the source of all narratives – and rescue his father, a renowned storyteller. Rushdie masterfully blends magical realism with political commentary, creating a richly layered work. Finding a reliable PDF version allows readers convenient access to this significant piece of literature, offering opportunities for study and enjoyment, especially given its enduring relevance in discussions of freedom of expression.

The Significance of the “Sea of Stories” Concept

Central to Rushdie’s Haroun and the Sea of Stories is the eponymous Sea, representing the boundless realm of human imagination and narrative. This isn’t merely a setting; it is the source of all tales, constantly replenished by storytellers like Haroun’s father. Its poisoning symbolizes the suppression of free speech and the dangers of censorship, mirroring the context of the fatwa against Rushdie himself.

Accessing the novel in PDF format allows for focused study of this core concept. The Sea’s health directly correlates to the vibrancy of the world, highlighting storytelling’s vital role. A readily available PDF facilitates deeper analysis of how Rushdie uses this metaphor to explore themes of political oppression and the importance of preserving cultural narratives.

Understanding the PDF Format and Accessibility

PDF (Portable Document Format) offers a consistent reading experience for Haroun and the Sea of Stories, preserving formatting across devices. Its accessibility features are crucial; PDFs can be read with screen readers, and text size adjusted for visual comfort. However, PDF quality varies.

Downloading a PDF requires Adobe Acrobat Reader or a compatible program, widely available for free. File size impacts download speed and storage. Optimized PDFs balance quality and size. Consider device compatibility – some older devices may struggle with complex PDFs. Ensuring a legitimate source (discussed later) guarantees a readable, accessible version of Rushdie’s novel.

Finding and Downloading the Haroun PDF

Locate authorized retailers and explore online platforms for purchasing the Haroun and the Sea of Stories PDF, while being mindful of potential risks.

Legitimate Sources for Purchasing the PDF

Secure your digital copy of Haroun and the Sea of Stories through reputable online bookstores like Amazon Kindle, Google Play Books, and Kobo. These platforms guarantee authentic, high-quality PDF versions, ensuring a legitimate reading experience.

Additionally, consider visiting the publisher’s official website or affiliated distributors for direct purchase options. Purchasing from authorized sources supports the author and ensures you receive a legally obtained copy, free from malware or corrupted files.

Remember to compare prices and check for any available discounts or promotional offers before finalizing your purchase. Prioritize trusted vendors to safeguard your digital investment and enjoy the novel without concerns.

Free Online PDF Availability and Associated Risks

While numerous websites offer free PDF downloads of Haroun and the Sea of Stories, exercising extreme caution is crucial. These sources often violate copyright laws and pose significant security risks to your devices.

Downloading from unofficial platforms exposes you to potential malware, viruses, and compromised personal information. Illegally obtained PDFs may contain corrupted files, rendering them unreadable or damaging your system.

Furthermore, supporting piracy undermines the author’s rights and the publishing industry. Opting for legitimate purchase options ensures a safe, legal, and high-quality reading experience, respecting intellectual property rights.

Checking PDF Authenticity and Avoiding Piracy

To verify the authenticity of a Haroun and the Sea of Stories PDF, compare its file size and page count with details from legitimate retailers. Look for watermarks or digital rights management (DRM) indicating a legally purchased copy.

Be wary of PDFs offered at drastically reduced prices or from unfamiliar websites. Check the website’s security certificate (HTTPS) before downloading. A reputable seller will clearly display copyright information.

Supporting authors by purchasing legally is vital. Piracy harms the creative process and discourages future works. Choose authorized platforms to enjoy Rushdie’s masterpiece ethically and securely.

Exploring the Narrative and Themes

Delve into Haroun’s fantastical quest, the conflict between vibrant and dull narratives, and the power of imagination—central themes within the PDF’s pages.

Haroun’s Journey: A Hero’s Quest

Embark on a captivating exploration of Haroun’s transformative journey, meticulously detailed within the Haroun and the Sea of Stories PDF. This quest, born from his father’s silenced storytelling, propels him into a realm brimming with magical realism and allegorical significance.

The PDF reveals how Haroun navigates treacherous landscapes and encounters extraordinary characters, all while striving to restore the flow of stories to the world. His courage and determination are tested as he confronts the forces threatening the Sea of Stories, embodying the universal archetype of the hero.

Analyzing the PDF allows readers to trace Haroun’s development, understanding his growth from a boy seeking his father’s affection to a courageous champion of imagination and free expression.

The Battle Between Pure Stories and Dull Stories

Delve into the central conflict of Haroun and the Sea of Stories, vividly portrayed within the accessible PDF version. The narrative hinges on the epic struggle between the vibrant, imaginative “Pure Stories” and the oppressive, lifeless “Dull Stories.”

The PDF illuminates how Khattam-Shud, the embodiment of dullness, seeks to silence the Sea of Stories, representing censorship and the suppression of creativity. Haroun’s journey becomes a defense of the power of narrative and the importance of diverse voices.

Through detailed analysis within the PDF, readers can understand this battle as an allegory for the fight against ideological control and the preservation of artistic freedom.

The Role of Imagination and Storytelling in the Novel

Explore how the Haroun and the Sea of Stories PDF emphasizes imagination as the novel’s lifeblood. Rushdie champions storytelling not merely as entertainment, but as a fundamental force shaping reality and resisting tyranny.

The PDF reveals how Haroun’s ability to weave tales and his father’s profession as a “Shahrazad” – a storyteller – are crucial to combating the forces of dullness. The Sea of Stories itself embodies the boundless potential of the human imagination.

Analyzing the PDF highlights how the novel argues for the necessity of embracing fantastical narratives to challenge oppressive regimes and preserve cultural identity.

Key Characters and Their Symbolism

Uncover the symbolic weight of Haroun, Rashid, and Soraya within the Haroun and the Sea of Stories PDF, revealing their roles in the narrative’s core themes.

Haroun al-Rashid: The Protagonist’s Journey

Delve into Haroun’s transformative quest, meticulously detailed within the Haroun and the Sea of Stories PDF. He embodies youthful innocence thrust into a complex world threatened by silence and “Dullness.” The PDF illuminates his evolution from a boy seeking his father’s approval to a courageous hero defending the power of imagination.

Explore how Haroun’s journey mirrors a classic hero’s arc, facing trials and tribulations across the fantastical landscapes of the Sea of Stories. The PDF highlights his developing agency, his ability to discern truth from falsehood, and his ultimate commitment to restoring balance. His story, as presented in the PDF, is a potent allegory for the importance of free expression and the fight against censorship.

Rashid Khalifa: The Storyteller and His Loss

Uncover the pivotal role of Rashid Khalifa, Haroun’s father, as detailed within the Haroun and the Sea of Stories PDF. He represents the power and responsibility of storytelling, a gifted Shahrazad-like figure whose voice is tragically stolen. The PDF meticulously charts his descent into silence, a consequence of political machinations and the suppression of imaginative narratives.

Analyze how the PDF portrays Rashid’s loss as a catalyst for Haroun’s journey, fueling his son’s determination to restore his father’s voice and the vibrancy of the Sea of Stories. His character embodies the vulnerability of artists facing censorship, a theme powerfully explored throughout the novel and readily accessible within the PDF’s comprehensive analysis.

Soraya: The Mother and Her Silent Strength

Explore Soraya’s character as presented in the Haroun and the Sea of Stories PDF, a figure defined by quiet resilience and understated strength. Though physically absent for much of the narrative, her influence permeates Haroun’s world and motivates his quest. The PDF highlights her symbolic representation of enduring love and unwavering support, even in the face of adversity.

Delve into how the PDF analyzes Soraya’s silence not as weakness, but as a deliberate act of self-preservation and a subtle form of resistance. Her presence, though often felt rather than seen, is crucial to understanding the novel’s themes of family, loss, and the enduring power of the human spirit, all richly detailed within the PDF’s textual analysis.

Analyzing Literary Devices and Style

Uncover how the Haroun and the Sea of Stories PDF dissects Rushdie’s masterful use of magical realism, wordplay, and allegory, enriching the narrative’s depth.

Rushdie’s Use of Magical Realism

Explore how the Haroun and the Sea of Stories PDF illuminates Rushdie’s signature style: magical realism. This technique seamlessly blends fantastical elements—flying carpets, talking birds, and diminishing cities—with a grounded, realistic setting. The PDF highlights how these surreal occurrences aren’t presented as extraordinary, but rather as integral parts of Haroun’s world, mirroring the fluidity of storytelling itself.

Discover analyses within the PDF detailing how this stylistic choice amplifies the novel’s themes of imagination, censorship, and the power of narratives. Rushdie employs magical realism to represent the boundless potential of stories and the dangers of suppressing creative expression, making the fantastical a potent tool for political and social commentary. The PDF provides examples of how this is achieved throughout the narrative.

The Importance of Wordplay and Linguistic Creativity

Delve into how the Haroun and the Sea of Stories PDF showcases Rushdie’s masterful use of wordplay and linguistic creativity. The novel is brimming with puns, neologisms, and intricate linguistic structures, enhancing the reading experience and mirroring the novel’s central theme of storytelling. The PDF provides detailed examples of these techniques, demonstrating how they contribute to the narrative’s richness and complexity.

Uncover analyses within the PDF that explain how Rushdie’s linguistic inventiveness isn’t merely stylistic; it’s integral to the story’s meaning. The playful manipulation of language reflects the boundless possibilities of imagination and the power of words to shape reality, a key element in Haroun’s quest. The PDF illuminates this connection, offering a deeper understanding of Rushdie’s artistry.

Allegory and Political Commentary within the Narrative

Explore how the Haroun and the Sea of Stories PDF reveals the novel’s layered allegorical structure and potent political commentary. Written in the shadow of the fatwa issued against Salman Rushdie in 1989, the story functions as a powerful response to censorship and oppression, themes thoroughly examined within the PDF’s analyses.

Discover interpretations within the PDF that connect the novel’s fantastical elements – the Sea of Stories, the Land of Dullness – to real-world political struggles. The PDF highlights how Rushdie uses allegory to critique authoritarianism and champion freedom of expression, offering a nuanced understanding of the novel’s socio-political context and its enduring relevance.

The Historical and Political Context

Uncover how the Haroun and the Sea of Stories PDF illuminates the crucial historical backdrop – the 1989 fatwa – profoundly impacting Rushdie’s writing and themes.

The Fatwa and Its Influence on Rushdie’s Writing

Examine the profound impact of Ayatollah Khomeini’s 1989 fatwa against Salman Rushdie, issued in response to The Satanic Verses. This decree, deeming his work blasphemous, dramatically altered Rushdie’s life and literary trajectory.

Haroun and the Sea of Stories, conceived and written under the shadow of this threat, reflects anxieties surrounding censorship, freedom of expression, and the power of storytelling. The novel’s themes of silencing voices and battling against oppressive forces are directly linked to Rushdie’s personal experience.

Accessing the PDF allows readers to analyze how Rushdie subtly incorporates these political realities into a fantastical narrative, creating a powerful allegory for his own situation and the broader struggle for artistic liberty. The PDF format facilitates close textual study of these nuanced connections.

Postcolonial Themes and Cultural Identity

Delve into the rich postcolonial tapestry woven throughout Haroun and the Sea of Stories. The novel explores the complexities of cultural identity, particularly within the context of a world shaped by colonialism and its lasting effects. Rushdie critiques power dynamics and challenges dominant narratives.

The PDF version of the text enables focused analysis of how characters navigate hybrid identities and grapple with the legacies of empire. The “Sea of Stories” itself can be interpreted as a metaphor for the diverse and often contested narratives of postcolonial societies.

Studying the PDF allows for a deeper understanding of how Rushdie uses magical realism to represent the fluidity and fragmentation of cultural experience, offering a compelling commentary on belonging and displacement.

The Novel as a Response to Censorship and Oppression

Examine Haroun and the Sea of Stories as a powerful literary response to censorship, directly influenced by the 1989 fatwa against Salman Rushdie following the publication of The Satanic Verses. The PDF format facilitates close reading of the novel’s allegorical defense of free speech and imaginative expression.

The story’s central conflict – the silencing of stories and the rise of “Dullness” – mirrors the real-world attempts to suppress Rushdie’s voice. Accessing the PDF allows focused study of how Rushdie champions the importance of storytelling as a form of resistance.

Analyzing the text within the PDF reveals a profound meditation on the dangers of authoritarianism and the necessity of protecting artistic freedom.

Educational Resources and Study Guides

Explore readily available online analyses and discussion questions, enhancing comprehension of the Haroun and the Sea of Stories PDF for academic and book club use.

Using the PDF in Academic Settings

Integrating the Haroun and the Sea of Stories PDF into coursework offers unique pedagogical opportunities. Students can benefit from digital annotation tools, facilitating close reading and textual analysis. The PDF format allows for easy sharing of excerpts and passages during class discussions, promoting collaborative learning.

Furthermore, the searchable nature of the PDF streamlines research, enabling students to quickly locate specific themes, motifs, or literary devices. Educators can utilize the PDF to create interactive assignments, such as character mapping or thematic tracing exercises.

When employing the PDF, ensure compliance with copyright regulations and promote responsible digital citizenship among students. Properly citing the source and respecting intellectual property are crucial academic practices.

Available Online Study Guides and Analyses

Numerous online resources complement the Haroun and the Sea of Stories PDF, aiding deeper comprehension. Websites like SparkNotes and CliffsNotes offer chapter summaries, character analyses, and explorations of key themes – though critical evaluation is advised. University course websites often host student essays and professor-led discussions, providing diverse perspectives.

Academic databases, accessible through libraries, contain scholarly articles dissecting Rushdie’s narrative techniques and postcolonial influences. YouTube channels dedicated to literary analysis present video essays exploring the novel’s symbolism and allegorical layers.

Remember to cross-reference information and prioritize sources from reputable academic institutions for reliable insights.

Discussion Questions for Book Clubs and Classrooms

Engage with Haroun and the Sea of Stories through thought-provoking discussions! Consider: How does Rushdie portray the power of storytelling and imagination? What does the “Sea of Stories” symbolize, and why is its preservation crucial? Explore the allegorical connections to censorship and political oppression, particularly considering the historical context of the fatwa.

Analyze Haroun’s journey as a hero’s quest – what trials does he face, and what does he learn? Discuss the contrasting forces of Pure Stories and Dull Stories; what message does Rushdie convey through this dichotomy?

Finally, examine the roles of Rashid and Soraya, and their impact on Haroun’s development.

Technical Aspects of the Haroun PDF

Examine PDF file size, compatibility across devices, and troubleshooting common issues like display errors or slow loading times for optimal reading experiences.

PDF File Size and Compatibility

Understanding the Haroun and the Sea of Stories PDF’s file size is crucial for download speeds and storage space. Generally, digitally distributed novels range from 2MB to 8MB, depending on image content and formatting. Compatibility is typically broad; PDFs are universally readable across Windows, macOS, Android, and iOS devices.

However, older devices or PDF readers might struggle with newer PDF versions. Ensure your software is updated for optimal viewing. Larger files may load slowly on mobile data. Consider downloading on Wi-Fi. Accessibility features, like text resizing and screen reader compatibility, are standard in most modern PDF viewers, enhancing the reading experience for all users.

Optimizing the PDF for Reading on Different Devices

To enhance your reading experience of the Haroun and the Sea of Stories PDF, consider device-specific optimizations. On tablets and smartphones, utilize portrait or landscape mode for comfortable viewing. Adjust font sizes within your PDF reader for optimal readability.

For e-readers, ensure the PDF reflows text correctly; some may require conversion. On computers, zoom functions and full-screen mode are beneficial. Downloading the PDF and storing it locally often improves loading speeds compared to cloud-based access. Regularly updating your PDF reader ensures compatibility and access to the latest features, maximizing enjoyment of Rushdie’s novel.

Troubleshooting Common PDF Issues

Encountering problems with your Haroun and the Sea of Stories PDF? Corrupted files can often be repaired using “Open with” and selecting a different PDF reader. If text appears garbled, ensure the font embedding is correct within the PDF settings. Slow loading times suggest a large file size; consider compressing it.

For security restrictions preventing copying or printing, check the document properties. If the PDF won’t open, update your PDF reader to the latest version. Regularly scanning for malware can also resolve access issues. Remember legitimate sources offer functional PDFs, avoiding piracy risks.

london ontario rogers tv guide

London Ontario Rogers TV Guide: A Comprehensive Plan

Rogers TV London offers a diverse range of programming, including local sports like OHL Hockey (London Knights), Fanshawe Esports, and community-focused Spotlight Features.

Stay informed with local news and coverage of local government meetings. Explore arts and entertainment options, and access the TV schedule online for convenient viewing.

Rogers TV London serves as a vital hub for local programming, dedicated to showcasing the unique stories, events, and personalities of the London, Ontario community. Unlike national broadcasts, Rogers TV focuses intently on hyper-local content, fostering a strong connection with residents and providing a platform for community voices.

The channel offers a diverse lineup, ranging from live coverage of London Knights OHL hockey games – a significant draw for local sports enthusiasts – to engaging Fanshawe Esports programming, reflecting the growing popularity of competitive gaming. Beyond sports, viewers can access local news updates, insightful Spotlight Features highlighting local individuals and organizations, and coverage of important local government meetings.

Rogers TV London isn’t simply a television channel; it’s a community resource. It actively seeks to reflect the diversity of London, Ontario, offering programming that appeals to a broad audience and provides opportunities for local participation and engagement. It’s a place to discover what’s happening right in your neighbourhood.

Understanding the Rogers TV Channel Lineup

The Rogers TV London channel lineup is designed to cater to a wide range of interests within the community. While specific channel numbers can vary depending on your Rogers package, core offerings consistently include dedicated channels for local programming, sports, and community events.

Key channels feature live and rebroadcast coverage of London Knights OHL hockey, providing extensive access to games and related content. A dedicated channel showcases Fanshawe Esports competitions and programming, appealing to the growing esports audience. Further channels are devoted to local news, Spotlight Features, and recordings of local government meetings, ensuring residents stay informed about civic affairs.

Beyond these core offerings, the lineup often includes channels dedicated to arts, culture, and community-produced content. Accessing the full, up-to-date channel listing is best achieved through the Rogers TV Guide online or via the Rogers cable guide itself, allowing viewers to easily navigate and discover available programming.

Accessing the Rogers TV Guide Online

Rogers TV London provides a convenient online TV guide, allowing viewers to easily browse schedules and discover programming. Accessing this guide is straightforward: simply visit the official Rogers TV website and navigate to the London-specific listings. The online guide offers a user-friendly interface, enabling searches by channel, time, or program title.

The digital guide displays a comprehensive schedule, including start and end times for each program, along with brief descriptions. Users can plan their viewing in advance, identifying upcoming London Knights games, Fanshawe Esports events, local news broadcasts, and Spotlight Features.

Furthermore, the online guide often includes on-demand options, allowing viewers to catch up on missed programs. It’s a valuable resource for maximizing your Rogers TV experience, ensuring you never miss your favourite local content. Regularly checking the online guide is recommended, as schedules are subject to change.

Rogers TV London: Current Programming Highlights

Rogers TV London currently showcases a vibrant mix of local programming, catering to diverse interests within the community. Sports enthusiasts can enjoy extensive coverage of the OHL Hockey season, with live broadcasts and highlights featuring the London Knights. The rapidly growing world of Fanshawe Esports also receives dedicated airtime, providing a platform for local competitive gaming.

Beyond sports, Rogers TV London prioritizes community engagement through its Spotlight Features, which showcase local stories, events, and individuals; Viewers can stay informed with comprehensive local news coverage, keeping them up-to-date on important happenings in London and Ontario;

The channel also features programming dedicated to arts and entertainment, and coverage of local government meetings, promoting transparency and civic participation. Regularly updated schedules ensure there’s always something relevant and engaging for viewers across the region.

Sports Coverage on Rogers TV London

Rogers TV London is a key destination for local sports fans, providing extensive coverage of amateur and professional athletic events. A cornerstone of their sports programming is dedicated coverage of the Ontario Hockey League (OHL), specifically following the London Knights. Viewers can expect live game broadcasts, pre- and post-game analysis, and exclusive interviews with players and coaches.

Recognizing the growing popularity of competitive gaming, Rogers TV London also features programming dedicated to Fanshawe Esports. This includes coverage of tournaments, player profiles, and insights into the local esports scene. The channel aims to provide a platform for showcasing the talent and dedication of local esports athletes.

Beyond these highlights, Rogers TV London often broadcasts other local sporting events, contributing to a comprehensive sports viewing experience for residents of London and surrounding areas.

OHL Hockey: London Knights Schedule

Rogers TV London proudly broadcasts a significant portion of the London Knights’ OHL season, bringing the excitement of junior hockey directly to local viewers. The broadcast schedule typically includes regular season games, and potentially playoff matchups, depending on broadcast rights and availability;

As of December 21, 2025, a recent example of scheduled coverage includes the game between the Oshawa Generals at London Knights, airing at 12:30 PM. Viewers can find the most up-to-date schedule information through the Rogers TV online guide, or by checking local listings.

Broadcasts often feature commentary from local hockey experts, providing insightful analysis and play-by-play coverage. Rogers TV aims to enhance the viewing experience with pre-game interviews and post-game recaps, offering a complete package for London Knights fans. Check the schedule regularly to not miss a game!

Fanshawe Esports Programming

Rogers TV London is committed to showcasing the growing world of competitive gaming with dedicated Fanshawe Esports programming. Recognizing the increasing popularity and local talent within the esports scene, Rogers TV provides a platform for students and fans to engage with this dynamic activity.

Currently, “The Week in Fanshawe Esports” airs at 2:00 PM, offering a comprehensive look at recent tournaments, player spotlights, and upcoming events within the Fanshawe College esports program. This show highlights the skills and dedication of local gamers, bringing their achievements to a wider audience.

Coverage extends beyond just game highlights, often including interviews with players, coaches, and organizers. Rogers TV aims to educate viewers about the various esports titles and the strategies involved, fostering a greater understanding and appreciation for this rapidly evolving field. Check the schedule for updated air times and special event coverage.

Local News and Community Events

Rogers TV London serves as a vital source of information for residents, delivering comprehensive coverage of local news and happenings within the city and surrounding areas. Beyond national and international headlines, the channel prioritizes stories that directly impact the London, Ontario community.

Viewers can expect regular updates on city council meetings, providing insights into local government decisions and initiatives. Rogers TV also actively covers significant community events, from festivals and parades to charitable fundraisers and local sports tournaments. This commitment ensures residents stay informed about opportunities to participate and connect with their neighbors.

The channel frequently features interviews with local leaders, community organizers, and residents, offering diverse perspectives on important issues. This localized approach to news and events distinguishes Rogers TV as a trusted resource for staying connected to the heart of the London area.

Rogers TV London: Spotlight Features

Rogers TV London’s “Spotlight Features” showcase the unique individuals, organizations, and stories that define the city’s vibrant character. These segments go beyond traditional news reporting, offering in-depth profiles and compelling narratives that highlight the positive contributions of local citizens.

The series frequently features local artists, musicians, and performers, providing a platform to share their talents and connect with a wider audience. Businesses and entrepreneurs also receive spotlight coverage, allowing them to share their stories and promote their services to the community.

“Spotlight Features” often delve into the work of local charities and non-profit organizations, raising awareness about their missions and encouraging community involvement. These segments aim to inspire, inform, and celebrate the spirit of London, Ontario, fostering a stronger sense of community pride and connection among viewers. It’s a core element of their local programming.

Exploring Arts and Entertainment Programming

Rogers TV London dedicates significant airtime to showcasing the rich arts and entertainment scene within the city and surrounding areas. Programming extends beyond simply broadcasting events; it delves into the creative processes and stories behind the performances.

Viewers can expect coverage of local theatre productions, musical performances, art exhibitions, and festivals. Interviews with artists, actors, and musicians provide insights into their work and inspirations. The channel actively supports local talent, offering a valuable platform for exposure and recognition.

Beyond established venues, Rogers TV London also highlights emerging artists and independent productions. This commitment to diverse artistic expression ensures a broad range of entertainment options for its audience. Expect to find features on community choirs, dance troupes, and independent filmmakers, enriching the cultural landscape presented on screen and fostering local appreciation.

Political Coverage and Local Government Meetings

Rogers TV London plays a crucial role in keeping citizens informed about local politics and government proceedings. A core component of their programming involves broadcasting live and archived recordings of London City Council meetings, committee meetings, and other key municipal events.

This direct access to local government allows residents to observe decision-making processes firsthand and stay abreast of important policy discussions. The channel often provides extended coverage of significant debates and public hearings, ensuring transparency and accountability.

Beyond simply broadcasting meetings, Rogers TV London may also feature interviews with local politicians and community leaders, offering insights into their perspectives on current issues. This coverage aims to foster informed civic engagement and encourage participation in the democratic process, strengthening the connection between residents and their elected officials.

Rogers TV London: Interactive Features

Rogers TV London strives to enhance viewer engagement beyond traditional broadcasting through several interactive features. While specific details may evolve, the platform generally offers ways for the community to connect with local programming and contribute to the content.

Historically, Rogers TV has utilized social media platforms – like Facebook and X (formerly Twitter) – to facilitate real-time discussions during live broadcasts, particularly during political debates or community events. Viewers can submit questions and comments, potentially influencing the conversation.

Furthermore, the online TV guide often includes options for viewers to provide feedback on programs, suggest topics for future coverage, or even submit their own video content for potential broadcast. This commitment to two-way communication aims to transform Rogers TV London from a passive broadcasting service into a dynamic community hub.

How to Find Specific Shows

Locating your favourite programs on Rogers TV London is straightforward, offering multiple avenues for discovery. The primary method is utilizing the online TV guide, accessible through the Rogers website. Here, you can browse listings by channel, date, and time, or employ a keyword search to pinpoint specific shows or events.

For those preferring a more traditional approach, the printed TV guide – often distributed with local newspapers – provides a comprehensive overview of upcoming programming. However, online listings are typically updated more frequently, reflecting last-minute schedule changes.

Additionally, Rogers often highlights current programming on its social media channels. Checking these platforms can reveal featured shows, upcoming events like OHL Hockey games featuring the London Knights, or Fanshawe Esports broadcasts. Remember to utilize the “Whats on TV Tonight” feature for immediate viewing options.

Utilizing the Rogers TV Schedule

The Rogers TV London schedule is your key to unlocking a world of local content. Whether accessed online or in print, understanding its features maximizes your viewing experience. The schedule details program timings, channel numbers, and brief descriptions, allowing for efficient planning.

Pay close attention to program categories – local news, sports (including OHL Hockey with the London Knights and Fanshawe Esports), arts and entertainment, and political coverage. Note that schedules are subject to change, so checking for updates, particularly before a highly anticipated event, is advisable.

The online schedule often includes options for setting reminders or adding programs to a watchlist. Utilize these features to avoid missing your favourite shows. Remember to consider time zone differences when interpreting the schedule, and explore on-demand options for programs you may have missed. Regularly consulting the schedule ensures you stay informed about what’s on TV.

Rogers TV London: On-Demand Options

Rogers TV London enhances your viewing flexibility with a robust selection of on-demand content. This feature allows you to watch your favourite local programs whenever it suits your schedule, bypassing the constraints of live broadcast times. Explore a diverse library encompassing local news segments, captivating Spotlight Features, and thrilling sports action, including highlights from London Knights games and Fanshawe Esports competitions.

Accessing on-demand content is typically straightforward through the Rogers TV website or a dedicated app. Browse by program title, category, or channel. Many programs remain available for a limited time after their initial broadcast, providing a convenient catch-up option.

On-demand services often include exclusive content not aired during regular programming. Take advantage of this feature to delve deeper into local stories and events. Regularly check the on-demand library for new additions and rediscover past favourites, maximizing your Rogers TV experience.

Understanding Channel Numbers and Packages

Rogers TV London channel availability is determined by your specific subscription package. Basic packages typically include local channels and community programming, while higher-tier packages unlock access to a wider range of content, including specialized sports channels featuring London Knights coverage and Fanshawe Esports events.

Channel numbers can vary depending on your location within the London, Ontario area and any recent channel re-alignments. Refer to the official Rogers TV channel lineup, accessible online or through your set-top box guide, for the most accurate and up-to-date information.

Understanding your package details is crucial for maximizing your viewing experience. Rogers offers various bundles combining TV, internet, and phone services. Contact Rogers customer support or visit their website to review your current package and explore upgrade options to access preferred channels and programming, including local news and arts programming.

Rogers TV London: Technical Support and FAQs

Rogers TV London provides comprehensive technical support to assist customers with any issues they may encounter. Common FAQs address topics like troubleshooting signal problems, navigating the on-screen guide, and understanding on-demand features. If you’re experiencing difficulties accessing channels, particularly during OHL Hockey or Fanshawe Esports broadcasts, first try restarting your set-top box.

For more complex issues, Rogers offers multiple support channels, including a dedicated online help center, a 24/7 customer service hotline, and in-person assistance at local Rogers stores in the London, Ontario area. The website features troubleshooting guides and a searchable knowledge base.

Before contacting support, have your account number and a detailed description of the problem ready. Check the Rogers website for known outages or maintenance affecting service in your region. Accessing the TV guide and utilizing on-demand options may also require specific steps outlined in the FAQs.

Rogers TV London: Community Involvement

Rogers TV London is deeply committed to serving the local community, going beyond simply broadcasting programming. They actively support local events and organizations, providing coverage of community gatherings, festivals, and charitable initiatives. This commitment extends to showcasing local talent and stories through Spotlight Features and community-produced content.

A significant aspect of their involvement includes broadcasting local news and local government meetings, fostering civic engagement and transparency. Coverage of events like OHL Hockey featuring the London Knights and Fanshawe Esports programming also strengthens community spirit and provides a platform for local athletes and gamers.

Rogers actively seeks partnerships with local businesses and organizations for advertising and sponsorship opportunities, further investing in the London, Ontario area. They aim to be a vital resource for information and entertainment, reflecting the unique character and vibrancy of the region.

Rogers TV London: History and Background

Rogers TV London, as part of the broader Rogers communications network, has a rich history of serving the London, Ontario region with local programming. While specific founding details for the London station are less readily available, it evolved alongside Rogers’ expansion into community television across Canada.

Initially focused on providing a platform for local voices and community-produced content, Rogers TV London gradually expanded its offerings to include coverage of local sports – notably OHL Hockey with the London Knights – and events. The station’s programming has consistently reflected the interests and needs of the London area.

Over time, Rogers TV London adapted to the changing media landscape, incorporating digital platforms and on-demand options alongside traditional broadcast television. It remains dedicated to its core mission of connecting the community through relevant and engaging local content, including Fanshawe Esports and local news.

Rogers TV London vs. Other Local Channels

Rogers TV London distinguishes itself from other local channels in Ontario through its dedicated focus on hyper-local content. While other stations may offer regional news or syndicated programming, Rogers TV London prioritizes community-generated shows, local sports coverage – particularly the London Knights – and direct engagement with area events.

Compared to larger networks, Rogers TV provides a platform for local voices often absent from mainstream media. This includes coverage of Fanshawe Esports and in-depth reporting on local government meetings. The station’s Spotlight Features further highlight the unique stories and individuals within the London area.

Furthermore, Rogers TV London’s integration with Rogers’ broader services offers viewers convenient access to programming through various platforms, including on-demand options and online schedules. This accessibility sets it apart, fostering a stronger connection with the community it serves.

Rogers TV London: Future Programming Plans

Rogers TV London is committed to expanding its hyper-local programming, building upon its foundation of community-focused content. Future plans include increased coverage of local arts and culture, showcasing the diverse talent within the London, Ontario area. Expect more Spotlight Features highlighting unique individuals and organizations.

Recognizing the growing popularity of esports, Rogers TV London intends to broaden its Fanshawe Esports programming, potentially including live tournament coverage and player profiles. Continued dedication to local sports, particularly the London Knights’ OHL Hockey schedule, remains a priority.

The station also aims to enhance its interactive features, providing viewers with more opportunities to engage with programming and contribute to local discussions. Exploring options for increased political coverage and accessibility features are also under consideration, ensuring Rogers TV London remains a vital community resource.

Tips for Maximizing Your Rogers TV Experience

To fully enjoy Rogers TV London, utilize the online TV guide to plan your viewing schedule and discover upcoming local events and programming. Take advantage of the on-demand options to catch shows you may have missed, offering flexibility and convenience.

Familiarize yourself with channel numbers and your specific Rogers package to ensure you’re accessing all available content. Explore the interactive features, if available, to participate in polls or access additional information related to programs.

Stay updated on current programming highlights, including OHL Hockey games featuring the London Knights and Fanshawe Esports events. Don’t hesitate to utilize Rogers TV London’s technical support and FAQs for assistance with any issues. Remember to check for local news and community events coverage to stay connected to what’s happening in London, Ontario;

Rogers TV London: Contact Information

For general inquiries regarding Rogers TV London programming, schedules, or community involvement, reaching out directly is key. While specific local contact details aren’t readily available in the provided snippets, accessing support typically begins through the broader Rogers customer service channels.

Customers can find assistance online via the official Rogers website, where a comprehensive FAQ section addresses common questions. Alternatively, phone support is available for more personalized assistance. For advertising or sponsorship opportunities related to Rogers TV London programming, dedicated teams handle these requests.

Keep in mind that information regarding local news, sports coverage (like the London Knights), and Fanshawe Esports programming can often be found through social media channels associated with Rogers TV London. The London Free Press (Postmedia Network Inc.) may also carry relevant updates.

Rogers TV London: Accessibility Features

Information specifically detailing Rogers TV London’s accessibility features isn’t directly available within the provided text snippets. However, Rogers, as a major provider, generally adheres to accessibility standards to ensure inclusive viewing experiences for all customers.

Typically, these features include closed captioning (CC) for many programs, allowing viewers who are deaf or hard of hearing to follow the dialogue. Audio description services, narrating visual elements for those with visual impairments, may also be available on select content.

Rogers often provides options for adjusting display settings, such as font size and contrast, to enhance readability. Customers can explore accessibility settings within their Rogers set-top box or through the Rogers online account portal. For specific inquiries about accessibility on Rogers TV London programming – including OHL Hockey or Fanshawe Esports broadcasts – contacting Rogers customer support directly is recommended.

Rogers TV London: Programming for Diverse Audiences

Rogers TV London strives to reflect the community it serves, offering programming designed to appeal to a broad spectrum of viewers. While specific details aren’t explicitly outlined in the provided snippets, the channel’s focus on local content inherently caters to diverse interests.

Coverage of local events and community initiatives ensures representation of various groups within London, Ontario. The inclusion of Fanshawe Esports programming speaks to a younger demographic and the growing popularity of competitive gaming. Similarly, broadcasting OHL Hockey – featuring the London Knights – appeals to sports enthusiasts.

Spotlight Features likely showcase stories and individuals from different backgrounds, contributing to a more inclusive viewing experience. Furthermore, coverage of local government meetings and political events keeps citizens informed and engaged. Rogers TV generally aims to provide a platform for diverse voices and perspectives within the London area, fostering a sense of community connection.

Rogers TV London: Advertising and Sponsorship Opportunities

While specific details regarding Rogers TV London’s advertising and sponsorship packages aren’t directly available in the provided text snippets, it’s reasonable to infer opportunities exist for local businesses and organizations.

Given the channel’s strong community focus and diverse programming – including OHL Hockey (London Knights), Fanshawe Esports, and Spotlight Features – advertising would likely reach a highly targeted local audience. Sponsorship of specific programs, such as sports broadcasts or community events coverage, could provide significant brand visibility.

Businesses could benefit from associating themselves with popular local content, enhancing their reputation and building relationships with potential customers. Opportunities may include traditional commercial spots, program sponsorships, and branded content integration. Considering Rogers TV’s commitment to local programming in London, Ontario, advertising and sponsorship represent a valuable avenue for businesses to connect with the community and support local initiatives.

nclex 3500 practice questions with answers pdf download

NCLEX 3500 Practice Questions with Answers PDF Download: A Comprehensive Guide

Navigating the NCLEX requires diligent preparation, and resources like practice questions are vital. Accessing over 2,100 free sample questions, alongside comprehensive PDF downloads,
can significantly enhance your readiness for registration at portal.ncsbn.org.

Understanding the NCLEX Examination

The NCLEX (National Council Licensure Examination) is a standardized exam that every nursing graduate must pass to obtain licensure. It’s not a pass/fail test in the traditional sense; instead, it utilizes Computerized Adaptive Testing (CAT). This means the difficulty of questions adjusts based on your performance – answering correctly leads to harder questions, and vice versa.

Understanding this adaptive nature is crucial. The exam assesses not just knowledge recall, but also critical thinking, and the ability to apply nursing principles to real-world patient scenarios. The NCLEX-RN, specifically, evaluates your competency in four major client needs categories: Safe and Effective Care Environment, Health Promotion and Maintenance, Psychosocial Integrity, and Physiological Integrity.

Preparation isn’t simply about memorizing facts. It’s about developing the clinical judgment necessary to make sound nursing decisions. Resources like practice questions, particularly those found in comprehensive question banks, are designed to simulate this exam experience and help you build that crucial skillset. Registration details are available at portal.ncsbn.org, but mastering the exam’s core concepts is paramount before applying.

The Importance of Practice Questions

NCLEX preparation hinges on consistent practice, and utilizing practice questions is arguably the most effective study method. They bridge the gap between theoretical knowledge and practical application, forcing you to think like a registered nurse. A substantial question bank, like one containing 3500 questions, provides extensive exposure to various question formats and content areas.

Practice questions aren’t merely about identifying the correct answer; they’re about understanding why an answer is correct or incorrect. Analyzing rationales strengthens your comprehension of nursing concepts and helps you avoid similar mistakes in the future. The adaptive nature of the NCLEX demands this level of nuanced understanding.

Furthermore, consistent practice builds stamina and reduces test anxiety. Simulating the exam environment through timed practice sessions prepares you for the pressure of the actual NCLEX. Resources offering over 2,100 free sample questions, alongside comprehensive PDF downloads, are invaluable tools in this process, ultimately boosting your confidence and increasing your chances of success. Remember to register at portal.ncsbn.org.

Where to Find NCLEX Practice Resources

Locating reliable NCLEX practice resources is crucial for effective preparation. The official NCLEX website, portal.ncsbn.org, serves as a primary starting point for registration and provides essential exam information. Beyond this, numerous commercial providers offer extensive question banks, often available as downloadable PDFs.

Many nursing schools also provide students with access to practice question resources, so check with your academic institution. Online platforms dedicated to nursing education frequently feature practice quizzes and simulated exams. A significant number offer over 2,100 free sample questions, providing a valuable starting point.

When searching for resources, prioritize those with a proven track record of accuracy and alignment with the current NCLEX blueprint. Be cautious of free resources of questionable origin, as their quality can vary significantly. Always verify the source’s credibility before investing time and effort. Remember to prioritize data security when downloading PDFs, ensuring they come from reputable sources.

NCLEX Question Formats and Content

The NCLEX utilizes a variety of question formats designed to assess critical thinking and clinical judgment. These include multiple-choice, select-all-that-apply (SATA), fill-in-the-blank, ordered response, and drag-and-drop questions. Familiarity with each format is essential for success.

Content is organized around the NCLEX Client Needs categories: Safe and Effective Care Environment, Health Promotion and Maintenance, Psychosocial Integrity, and Physiological Integrity. Within these categories, questions cover a broad range of nursing topics, from basic medical-surgical concepts to advanced pharmacology and mental health nursing.

Practice question banks, like those offering over 2,100 sample questions, should mirror this diversity. Effective preparation involves not only answering questions correctly but also understanding the rationale behind each answer. PDF downloads often include detailed explanations, aiding in comprehension. Mastering these formats and content areas is key to passing the exam and securing your nursing license.

Benefits of Using a 3500 Question Bank

Utilizing a 3500-question bank for NCLEX preparation offers substantial advantages. The sheer volume allows for comprehensive content coverage, reinforcing knowledge across all NCLEX Client Needs categories. This extensive practice builds stamina and reduces test-day anxiety.

A large question bank facilitates targeted practice. Students can identify and focus on weak areas, improving their understanding of challenging concepts. Detailed rationales, often included in PDF downloads, explain both correct and incorrect answers, promoting deeper learning.

Exposure to diverse question formats – multiple-choice, SATA, fill-in-the-blank, and more – prepares candidates for the unpredictable nature of the NCLEX. Access to resources with over 2,100 free sample questions, alongside comprehensive PDF options, provides a significant advantage. Consistent practice with a substantial question bank dramatically increases the likelihood of success and licensure.

Evaluating the Quality of Practice Questions

Not all NCLEX practice questions are created equal. Assessing quality is crucial for effective preparation. Questions should mirror the NCLEX’s cognitive level – from recall to analysis – and avoid simple rote memorization.

Look for questions with realistic scenarios, reflecting the complexities of nursing practice. Detailed rationales are essential; they should explain why an answer is correct or incorrect, not just state the answer. Beware of questions with ambiguous wording or illogical answers.

Reputable sources, offering resources like the over 2,100 free sample questions available online, often prioritize quality control. PDF downloads should be regularly updated to reflect current NCLEX standards. Prioritize resources that emphasize critical thinking and clinical judgment, ensuring you’re prepared for the challenges of the exam and beyond.

PDF Download Considerations: Security and Legality

Downloading NCLEX practice PDFs requires caution regarding security and legality. With increasing data breaches, handling sensitive information demands diligence; Ensure the source is reputable to avoid malware or viruses embedded within the file.

Prioritize websites with secure connections (HTTPS) and clear privacy policies. Be wary of free downloads from unknown sources, as these may infringe on copyright or contain compromised content. Companies handling sensitive data must do so correctly, facing potential financial and reputational damage from breaches.

Strengthen your cybersecurity framework by scanning downloaded files with updated antivirus software. Secure data management involves protecting data throughout its lifecycle – from collection to disposal. Always verify the legitimacy of the provider and understand the terms of use before downloading any NCLEX preparation materials.

Reputable Sources for NCLEX Practice PDFs

Finding trustworthy NCLEX practice PDFs is crucial for effective preparation. The National Council of State Boards of Nursing (NCSBN) offers official registration information at portal.ncsbn.org, a primary starting point.

While direct PDF downloads from NCSBN may be limited, numerous established nursing education companies provide comprehensive question banks in PDF format. Look for providers with proven track records and positive reviews from other nursing students. These sources often invest in high-quality content and adhere to copyright regulations.

Consider resources offering over 2,100 free sample questions as a benchmark for quality. Prioritize platforms emphasizing secure data handling, protecting your personal information during transactions. Remember, secure data management involves protecting data throughout its lifecycle, ensuring the integrity of your study materials. Always verify the source’s credentials before committing to a purchase or download.

Free vs. Paid Practice Question Resources

The NCLEX preparation landscape offers both free and paid practice question resources, each with distinct advantages. Over 2,100 free sample questions are available, providing a valuable starting point for assessment and familiarization with question formats, accessible through various online platforms.

However, free resources often have limitations in scope, depth, and answer rationales. Paid resources, like comprehensive 3500-question banks, typically offer more realistic NCLEX simulations, detailed explanations, and performance tracking. These investments can significantly enhance your understanding and identify areas needing improvement.

When choosing, consider your learning style and budget. Secure data handling is paramount; ensure any platform, free or paid, prioritizes your personal information. Remember, effective data management protects your data throughout its lifecycle. A blended approach – utilizing free resources for initial practice and supplementing with a paid bank – can be highly effective.

Utilizing Practice Questions Effectively: Study Strategies

Maximizing the benefit of NCLEX practice questions, even a substantial 3500-question bank, requires strategic study habits. Don’t simply answer questions; actively analyze each one. Understand why an answer is correct or incorrect, focusing on the underlying concepts and rationales.

Implement spaced repetition – revisit questions you struggled with at increasing intervals. Simulate the NCLEX environment by timing yourself and minimizing distractions. Utilize question banks that offer performance tracking to pinpoint your weaknesses.

Integrate practice questions with content review. If a question reveals a knowledge gap, revisit the relevant material. Remember secure data handling principles when accessing PDFs; prioritize reputable sources. Effective data management is crucial for a focused study experience. Prioritize cybersecurity framework strengthening with these procedures.

Analyzing Your Performance: Identifying Weaknesses

Effective NCLEX preparation hinges on a thorough analysis of your practice question performance. Don’t just note your score; dissect why you missed questions. Categorize errors – were they due to content gaps, misinterpreting the question, or test-taking strategies?

Utilize the data provided by a 3500-question bank’s tracking features. Identify recurring themes in your incorrect answers. Are you consistently struggling with prioritization, delegation, or a specific body system? Focus your study efforts on these areas.

Remember the importance of secure data handling when reviewing your results from downloaded PDFs. Ensure your personal information remains protected. Strengthening your cybersecurity framework is vital. Effective data handling procedures are key to minimizing risks and maintaining compliance.

NCLEX Registration and Eligibility Requirements

Before diving into NCLEX practice questions, ensure you meet all registration requirements. The National Council of State Boards of Nursing (NCSBN) portal (portal;ncsbn.org) is your primary resource for accurate, up-to-date information.

Eligibility typically involves graduating from an accredited nursing program and receiving authorization to test (ATT) from your board of nursing. Thoroughly review the specific requirements of your state, as they can vary.

While preparing with a 3500-question bank PDF, remember data security best practices. Protect your personal information during online transactions related to registration. Secure data management involves protecting data throughout its lifecycle – including registration details.

Strengthen your cybersecurity framework and ensure compliance with data protection regulations. Prioritize secure data handling to avoid potential breaches and maintain your information’s integrity throughout the registration process.

Data Security Best Practices When Downloading PDFs

When downloading NCLEX practice question PDFs, especially large 3500-question banks, prioritize data security. Companies handle increasingly sensitive data, making correct handling essential to avoid financial loss and reputational damage.

Always download from reputable sources to minimize the risk of malware or compromised files. Scan downloaded PDFs with updated antivirus software before opening them. Implement encryption and access control measures to protect the files on your device.

Secure data management involves protecting data throughout its lifecycle, from download to disposal. Be cautious of phishing attempts and never share your personal information with untrusted sources.

Strengthen your cybersecurity framework with effective data handling procedures. Understand the importance of data classification and implement necessary steps to handle sensitive information securely, ensuring comprehensive data protection.

Protecting Personal Information During Online Transactions

Purchasing NCLEX practice question PDFs often involves online transactions, demanding vigilant protection of your personal information. With companies handling more sensitive data than ever, safeguarding your details is paramount to prevent financial loss and reputational harm.

Only transact on websites with “https” in the URL and a valid SSL certificate, indicated by a padlock icon. Avoid using public Wi-Fi for financial transactions, as these networks are often unsecured. Be wary of phishing attempts requesting personal or financial information via email or suspicious links.

Utilize strong, unique passwords for all online accounts and consider using a password manager. Regularly review your bank and credit card statements for unauthorized activity.

Remember, secure data handling is crucial in today’s digital landscape. By understanding these risks and implementing protective measures, you can minimize vulnerability during online purchases.

Staying Updated with NCLEX Changes and Resources

The NCLEX examination is periodically updated to reflect current nursing practice. Staying informed about these changes is crucial when utilizing practice question PDFs. The National Council of State Boards of Nursing (NCSBN) is the primary source for official updates and registration information (portal.ncsbn.org).

Regularly check the NCSBN website for announcements regarding test plan modifications, question formats, and passing standards. Subscribe to nursing newsletters and follow reputable nursing education platforms for updates on exam preparation resources.

Ensure your practice question bank aligns with the latest NCLEX test plan. Outdated materials may not accurately reflect the current exam content. Strengthen your cybersecurity framework with effective data handling procedures, a key pillar of IT Information Security.

Continuous learning and adaptation are essential for NCLEX success. Proactive monitoring of changes ensures your preparation remains relevant and effective.

jb weld plastic bonder instructions

JB Weld Plastic Bonder is a versatile, quick-setting urethane adhesive, ideal for robust repairs involving diverse materials like metals, wood, and fiberglass.

This two-part system delivers a strong, lasting bond through a simple, four-step process, making it a favored choice for various applications.

Notably, Plastic Bonder differs significantly from traditional epoxy, exhibiting superior adhesion specifically to plastic surfaces, enhancing repair durability.

For structural repairs, the High-Strength Plastic Bonder variant is recommended, offering rapid setting and exceptional strength upon full curing.

What is JB Weld Plastic Bonder?

JB Weld Plastic Bonder represents a significant advancement in adhesive technology, specifically engineered to address the challenges of bonding plastics effectively. Unlike standard epoxy formulations, this product is a two-part, urethane-based adhesive system designed for quick setting and exceptional durability.

It’s formulated to create strong, lasting repairs on a wide array of plastic types, including those commonly found in automotive components, machinery, and household items. The adhesive boasts a unique chemical composition that promotes a superior bond with plastic surfaces, overcoming the limitations often encountered with conventional adhesives.

This bonder isn’t limited to plastics alone; it also demonstrates excellent adhesion to metals, wood, fiberglass, and other materials, making it a versatile solution for diverse repair needs. Its quick-setting nature – achieving a set in as little as 15 minutes – minimizes downtime and accelerates project completion. When fully cured, it provides a robust and reliable bond capable of withstanding significant stress and environmental factors.

Essentially, JB Weld Plastic Bonder is a specialized adhesive designed to deliver professional-grade results in plastic repair applications.

Key Differences from Epoxy

While both JB Weld Plastic Bonder and epoxy adhesives serve as powerful bonding agents, fundamental differences dictate their suitability for specific applications, particularly concerning plastics. Traditional epoxy often struggles to achieve a strong, lasting bond with many plastic types due to inherent material incompatibility;

Plastic Bonder, however, is specifically formulated with a urethane base, enhancing its adhesion properties on plastics. This chemical composition allows it to penetrate and interact more effectively with the plastic’s molecular structure, resulting in a significantly stronger and more durable bond.

Furthermore, Plastic Bonder generally exhibits a faster setting time compared to many epoxies, streamlining the repair process. While epoxy often requires extended curing periods, Plastic Bonder can achieve a set in as little as 15 minutes. This makes it ideal for projects demanding quick turnaround times.

In essence, JB Weld Plastic Bonder offers a specialized solution optimized for plastic bonding, overcoming the limitations often associated with conventional epoxy adhesives.

Materials and Preparation

JB Weld Plastic Bonder excels with thermoset plastics, metals, wood, and fiberglass, but proper surface preparation is crucial for optimal adhesion and long-lasting results.

Compatible Plastics

JB Weld Plastic Bonder demonstrates excellent compatibility with a wide array of plastic types, making it a versatile solution for numerous repair scenarios. This adhesive is specifically formulated to effectively bond with thermoset plastics, a category encompassing materials like fiberglass reinforced plastics commonly found in automotive components and durable goods.

However, it’s important to note that compatibility can vary depending on the specific plastic composition. While generally effective, testing a small, inconspicuous area is always recommended before undertaking a full repair, particularly with unfamiliar plastic types. The adhesive performs well on materials requiring a strong, lasting bond, offering a reliable alternative to traditional welding or mechanical fastening methods.

Successful bonding also relies on the plastic’s surface condition; clean, properly prepared surfaces significantly enhance adhesion. Consider the plastic’s flexibility and thermal expansion properties when selecting JB Weld Plastic Bonder for your application, ensuring a durable and long-lasting repair.

Surface Preparation Techniques

Proper surface preparation is paramount for achieving a robust and enduring bond with JB Weld Plastic Bonder. Begin by thoroughly cleaning the surfaces to be bonded, removing any contaminants like dirt, grease, oil, or mold release agents. A solvent-based cleaner, followed by wiping with a clean, lint-free cloth, is highly recommended.

For optimal adhesion, lightly roughening the plastic surfaces with sandpaper (typically 80-120 grit) creates a mechanical key for the adhesive to grip. This abrasion increases the surface area and enhances bonding strength. Ensure all sanding dust is removed before application.

Avoid using harsh chemicals or abrasive cleaners that could damage the plastic. A final wipe with isopropyl alcohol can further ensure a pristine surface. Remember, a clean, slightly textured surface is crucial for maximizing the effectiveness of JB Weld Plastic Bonder and guaranteeing a long-lasting repair.

Tools Required for Application

Successfully applying JB Weld Plastic Bonder requires a few essential tools. Firstly, you’ll need mixing sticks – wooden coffee stirrers or similar are ideal – for thoroughly combining the adhesive components. Disposable gloves are crucial to protect your skin from direct contact with the adhesive.

For precise application, consider using a small spatula or applicator brush to spread the mixed adhesive evenly across the surfaces. Clamps, or even readily available items like plastic spoons (for holding parts in position), are vital for maintaining consistent pressure during the curing process.

Sandpaper (80-120 grit) is needed for surface preparation, as is a lint-free cloth for cleaning. A solvent-based cleaner and isopropyl alcohol are also recommended. Having these tools readily available will streamline the repair process and contribute to a professional, durable result.

Application Instructions: Step-by-Step

JB Weld Plastic Bonder application involves mixing, applying a tacky even layer to both surfaces, clamping for positioning, and allowing sufficient curing time for optimal strength.

Step 1: Mixing the Adhesive

JB Weld Plastic Bonder is a two-part system, requiring thorough mixing for optimal performance. Begin by ensuring your work area is clean and well-ventilated. Carefully remove the caps from both the resin and hardener tubes.

Dispense equal amounts of resin and hardener onto a clean mixing surface – a disposable plastic palette or piece of cardboard works well. The ratio is crucial; a 1:1 mix ensures proper curing and bond strength.

Using a mixing stick or similar tool, meticulously blend the two components together. Scrape the sides and bottom of the mixing surface to incorporate all of the material. Continue mixing for at least two minutes, or until a uniform, consistent color is achieved.

Avoid introducing air bubbles during mixing, as these can weaken the bond. A smooth, homogenous mixture indicates readiness for application. Work promptly, as the adhesive begins to set after mixing.

Step 2: Applying to Surfaces

Once the JB Weld Plastic Bonder is thoroughly mixed, application to the prepared surfaces is the next crucial step. Apply a generous, even layer of the adhesive to both surfaces being joined. Ensure complete coverage, particularly in areas requiring maximum strength.

A slight tackiness developing on the surfaces before joining can aid in alignment and bond formation. However, avoid waiting too long, especially with fast-drying formulations, to prevent premature setting.

For optimal adhesion, spread the adhesive using a brush, spatula, or similar tool, ensuring it penetrates any textured surfaces or gaps. Avoid applying excessive pressure during this stage, as it can squeeze out the adhesive and weaken the bond.

Remember to work quickly and efficiently, as the adhesive’s working time is limited. Consistent application thickness across both surfaces is key for a uniform and durable repair.

Step 3: Clamping and Positioning

After applying the JB Weld Plastic Bonder to both surfaces, carefully position the parts to be joined, ensuring proper alignment. Immediate clamping is vital to maintain consistent pressure during the curing process, maximizing bond strength.

Utilize clamps, tape, weights, or any suitable method to securely hold the parts together. For complex shapes or angles, consider using a plastic spoon or similar support to maintain the desired position while the adhesive sets.

Apply firm, even pressure across the entire bonded area. Avoid over-tightening clamps, which could squeeze out the adhesive and compromise the bond. Ensure the clamped parts remain stable and undisturbed throughout the curing time.

Proper clamping prevents movement and ensures intimate contact between the surfaces, resulting in a strong, lasting repair. Regularly check the clamp’s position during the initial setting phase.

Step 4: Curing Time and Temperature

Allow the JB Weld Plastic Bonder to set for a minimum of 15 minutes before subjecting the repaired item to any stress or load. Full curing, however, requires approximately 30 minutes to achieve optimal bond strength;

Ambient temperature significantly impacts curing time. If the working temperature is below 40°F (4.4°C), the setting and curing times will be considerably extended. Warming the parts slightly can accelerate the process, but avoid excessive heat.

While the adhesive begins to harden relatively quickly, complete curing ensures the highest possible bond integrity. Avoid disturbing or manipulating the bonded parts during the entire curing period.

Once fully cured, the repaired item can be returned to service. Remember that complete curing allows the adhesive to reach its maximum strength and resistance to environmental factors.

Specific Applications

JB Weld Plastic Bonder excels at repairing automotive plastics, machine parts, and thermoset plastics, offering durable solutions for various structural and non-structural needs.

It’s ideal for fixing car panels and reinforcing small machine components, providing a lasting and reliable bond in diverse scenarios.

Repairing Automotive Plastics

JB Weld Plastic Bonder is exceptionally well-suited for repairing damaged automotive plastic components, ranging from bumpers and dashboards to interior trim pieces and light housings.

Before application, thoroughly clean the damaged area with a suitable degreaser to remove any dirt, oil, or contaminants, ensuring optimal adhesion.

For cracks, roughen the surface around the break with sandpaper to create a mechanical key for the adhesive, enhancing the bond’s strength and longevity.

Apply a generous, even layer of mixed Plastic Bonder to both sides of the crack or broken area, ensuring complete coverage.

Utilize clamps or tape to firmly hold the pieces together in their correct alignment during the curing process, maintaining consistent pressure.

Allow the adhesive to set for at least 15 minutes before applying full stress, and allow a full 30 minutes for complete curing, though longer times may be needed in colder temperatures.

For larger repairs, consider reinforcing the bond with fiberglass cloth or mesh embedded within the adhesive for increased structural integrity.

Remember to follow all safety precautions, including wearing appropriate protective gear and ensuring adequate ventilation.

Fixing Machine Parts

JB Weld Plastic Bonder proves invaluable for repairing broken or cracked plastic components in various machines, including power tools, appliances, and industrial equipment.

Prior to applying the adhesive, meticulously clean the surfaces to be bonded, removing any grease, oil, or debris that could compromise adhesion.

Lightly sand the surfaces to create a textured profile, promoting a stronger mechanical bond between the adhesive and the plastic substrate.

Mix the Plastic Bonder thoroughly according to the manufacturer’s instructions, ensuring a consistent and homogenous mixture for optimal performance.

Apply an even coat of the mixed adhesive to both surfaces, aiming for complete coverage without excessive buildup.

Securely clamp or fixture the parts together, maintaining consistent pressure during the setting and curing phases.

Allow a minimum of 15 minutes for the adhesive to initially set, followed by a 30-minute cure time for full strength, adjusting for lower temperatures.

Reinforce repairs with mesh or cloth for added durability, especially in high-stress applications.

Bonding Thermoset Plastics

JB Weld Plastic Bonder excels at bonding thermoset plastics, materials that undergo irreversible chemical changes during curing, like those found in certain automotive parts and durable goods.

Surface preparation is paramount; thoroughly degrease the thermoset plastic surfaces with isopropyl alcohol to eliminate contaminants hindering adhesion.

Light abrasion using fine-grit sandpaper enhances the bonding surface, creating microscopic irregularities for the adhesive to grip.

Precisely mix the two-part Plastic Bonder formula, ensuring a uniform consistency for optimal bonding strength and performance.

Apply a generous, even layer of the mixed adhesive to both surfaces, ensuring complete contact when joined;

Employ clamping or weighting mechanisms to maintain firm, consistent pressure during the adhesive’s setting and curing stages.

Allow a minimum of 15 minutes for initial set, followed by a 30-minute cure, extending the time if ambient temperatures are below 40°F.

Consider reinforcing the bond with fiberglass cloth for increased structural integrity in demanding applications.

Troubleshooting and Tips

For low temperatures, extend curing times; a tacky application followed by immediate joining is best, and reinforcing repairs boosts overall bond strength significantly.

Dealing with Low Temperatures

JB Weld Plastic Bonder’s curing process is notably affected by temperature, requiring adjustments when working in colder environments. The standard set time of 15 minutes can be considerably prolonged if the ambient temperature dips below 40°F (4.4°C). This is because the chemical reaction responsible for hardening slows down as the temperature decreases.

To mitigate this, pre-warming the adhesive components – both the resin and the hardener – can help initiate the curing process more effectively. Gently warming the surfaces to be bonded can also be beneficial, but avoid excessive heat that could damage the plastic. Ensure the surfaces are clean and properly prepared, as adhesion is more critical when dealing with slower curing times.

Allowing for a longer curing period is crucial; potentially extending it to several hours or even overnight, depending on the temperature. Patience is key to achieving a strong and durable bond in colder conditions. Consider using a heat lamp cautiously, maintaining a safe distance to avoid overheating or melting the plastic.

Achieving a Stronger Bond

Maximizing the bond strength with JB Weld Plastic Bonder relies on meticulous preparation and application techniques. A key step is ensuring both surfaces are thoroughly cleaned and slightly roughened to create a mechanical key for the adhesive. Degreasing with isopropyl alcohol removes contaminants that hinder adhesion.

Applying a generous, even layer of the mixed adhesive to both surfaces is recommended, allowing for complete contact. Letting the adhesive become slightly tacky before joining the parts can improve initial grab and alignment. Consistent clamping pressure during the curing process is vital, ensuring intimate contact between the surfaces.

Avoid excessive movement or stress on the bonded area during curing. For optimal results, consider reinforcing the repair with mechanical fasteners, like screws or rivets, especially for high-stress applications. A properly cured bond, combined with these techniques, will deliver a robust and long-lasting repair.

Safety Precautions

JB Weld Plastic Bonder requires careful handling; ensure adequate ventilation during use, and avoid prolonged skin contact with the adhesive components.

Always wear appropriate protective gear, including gloves and eye protection, to prevent irritation or injury during application and curing.

Handling and Ventilation

JB Weld Plastic Bonder, while incredibly effective, necessitates responsible handling to ensure user safety and optimal results. Prioritize working in a well-ventilated area, as the adhesive releases fumes during mixing and curing. Opening windows or utilizing a fan can significantly improve air circulation, minimizing inhalation of vapors.

Avoid direct skin contact with both the adhesive and the hardener. These components can cause irritation, so wearing appropriate gloves is crucial. If contact occurs, immediately wash the affected area with soap and water. Similarly, protect your eyes by wearing safety glasses or goggles to prevent accidental splashes.

Proper disposal of used mixing sticks, containers, and any excess adhesive is also essential. Consult local regulations for guidelines on disposing of chemical waste responsibly. Remember, a safe working environment contributes to a successful and durable repair.

Protective Gear Recommendations

When working with JB Weld Plastic Bonder, prioritizing personal protection is paramount. We strongly recommend wearing nitrile gloves to prevent skin contact, as both the adhesive and hardener can cause irritation or allergic reactions in sensitive individuals. These gloves offer excellent chemical resistance and maintain dexterity.

Safety glasses or goggles are essential to shield your eyes from potential splashes during mixing and application. Consider a face shield for larger projects or when working overhead. Adequate ventilation is also crucial; if a well-ventilated area isn’t available, a respirator with an organic vapor cartridge is advised.

Old clothing or an apron will protect your garments from accidental spills. Finally, ensure a clean workspace, free from distractions, to minimize the risk of accidents. Following these guidelines will ensure a safe and successful bonding experience.