Miele Induction Cooktop Manual: A Comprehensive Guide
Welcome! This manual provides detailed instructions for your Miele induction cooktop, model KM 7745 FL and others.
It covers setup, operation, cleaning, and troubleshooting.
Discover features like TempControl and the bridge function for optimal cooking.
Understanding Your Miele Induction Cooktop
Miele induction cooktops represent a pinnacle of kitchen technology, offering precise control and efficient heating. These cooktops utilize electromagnetic energy to directly heat compatible cookware, resulting in faster cooking times and reduced energy consumption. Available in various sizes and designs – including frameless and steel-frame options – Miele caters to diverse kitchen aesthetics.
Key to the Miele experience is innovation. Features like TempControl maintain consistent temperatures for perfect results, while the bridge function combines two cooking zones for larger pots and pans. Understanding these features is crucial for maximizing your cooktop’s potential. The cooktop’s fuel type is electric, and models like KM7999FL weigh approximately 22 kg with dimensions of 520mm depth and 520mm width.
Before operation, ensure you’ve located your appliance’s model and serial number, found on the data plate. Familiarizing yourself with the control panel and safety precautions outlined in this manual will ensure safe and effective use. Miele cooktops are designed for longevity and performance, offering a premium cooking experience.
Locating the Model and Serial Number
Identifying your Miele induction cooktop’s model and serial number is essential for warranty claims, accessing support, and ordering replacement parts. This information is located on the appliance’s data plate, a sticker typically found in a discreet location.
Where to find it: The data plate is usually positioned on the underside of the cooktop itself. You may need to carefully turn or tilt the appliance to access it. Alternatively, it could be located on the rear of the cooktop, visible when the unit is pulled slightly forward from the countertop.
What you’ll find: The data plate displays several key pieces of information, including the model number (e.g., KM 7745 FL, KM7999FL) and the serial number. The serial number is a unique identifier for your specific appliance. Record both numbers in a safe place for future reference. Having this information readily available will streamline any service requests or inquiries with Miele customer support.
Initial Setup and Installation
Proper installation is crucial for the safe and efficient operation of your Miele induction cooktop. Before beginning, ensure your countertop meets the specified dimensions outlined in the full installation guide. A qualified technician is recommended for electrical connections, adhering to local codes and regulations.
Electrical Requirements: Miele cooktops require a dedicated electrical circuit. Verify your home’s electrical system is compatible with the cooktop’s voltage and amperage requirements. Incorrect wiring can lead to malfunction or safety hazards.

Installation Steps: Carefully remove the packaging and inspect the cooktop for any damage. Position the cooktop into the countertop opening, ensuring a snug fit. Secure it using the provided mounting brackets and screws. Connect the electrical supply, following the wiring diagram. Always test the cooktop after installation to confirm proper functionality. Refer to the complete installation manual for detailed diagrams and instructions.
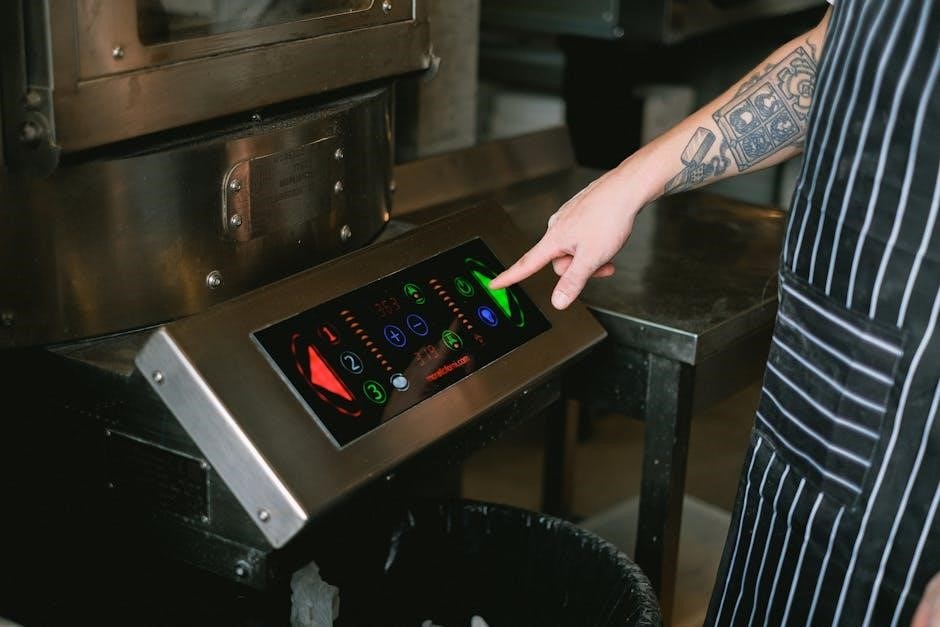
Control Panel Overview
The Miele induction cooktop features an intuitive control panel designed for ease of use. Sensor controls, including numerical buttons (0-9) and symbols, allow precise adjustments. The panel displays power levels, timer settings, and active functions.
Key Controls: The ‘0’ button turns off selected cooking zones. Numerical buttons directly select power levels from 1 to 9, with ‘4’ often initiating a quick heat-up function. Symbol controls activate features like TempControl, the bridge function, and timers. A lock function prevents accidental activation, especially important for households with children.
Display Indicators: The display shows the selected cooking zone, power level, and remaining time for timers. Indicator lights illuminate when a cooking zone is active or when cookware is not induction-compatible. Familiarize yourself with these indicators to optimize your cooking experience. Detailed explanations of each symbol are found within this manual.
Understanding Induction Cooking Technology
Induction cooking utilizes electromagnetic energy to directly heat cookware, offering superior efficiency and control compared to traditional methods. Unlike gas or electric resistance cooktops, the cooktop surface itself remains relatively cool, enhancing safety. Miele induction cooktops generate a magnetic field that interacts with ferrous (magnetic) cookware, creating heat within the pot or pan itself.
This direct heating process results in faster heating times and precise temperature regulation. Energy isn’t wasted heating the cooktop surface; it’s focused solely on the cookware. The cooktop only activates when compatible cookware is present, further improving safety and energy conservation.
Key Benefits: Rapid heating, precise temperature control, energy efficiency, and enhanced safety. However, it’s crucial to use induction-compatible cookware for optimal performance. Non-magnetic cookware will not work on an induction cooktop.
Compatible Cookware
Not all cookware is suitable for Miele induction cooktops. To function correctly, cookware must have a magnetic base – meaning a base made of ferrous metal. A simple test: if a magnet firmly attaches to the bottom of your pot or pan, it’s likely induction-compatible. Materials like cast iron, enameled steel, and many stainless steel options work well.
Aluminum, copper, and glass cookware will not work unless they have a special magnetic base layer. Miele recommends cookware with a fully flat bottom for optimal heat transfer and efficiency. Warped or uneven bottoms can reduce performance. The diameter of the cookware should also match the size of the induction zone for best results.
Look for cookware specifically labeled as “induction-ready.” Miele offers a range of compatible cookware designed to maximize the performance of your cooktop. Using the correct cookware ensures efficient heating, precise temperature control, and the full benefits of induction technology.
Using the Basic Functions
Starting with the basics, ensure the cooktop is switched on. Place your induction-compatible cookware onto a cooking zone. To activate a zone, simply press the corresponding sensor control – typically a number on the control panel. The display will illuminate, indicating the zone is ready for use.
Adjusting power levels is done using the ‘+’ and ‘-’ buttons, or by directly selecting a number on the numerical display (0-9). Lower numbers represent lower power, while higher numbers indicate greater heat. Many models feature a ‘boost’ function for rapid heating, indicated by a ‘P’ symbol.
To switch off a zone, press the corresponding sensor control again, or select ‘0’. The zone will deactivate, and the display will go dark. Remember that the cooktop surface will remain warm for a period after use. Always exercise caution and allow the surface to cool before touching it.

Power Levels and Temperature Control
Miele induction cooktops offer precise power control, ranging from low simmering settings to rapid boiling. Power levels are typically indicated by numbers 1-9, with 1 being the lowest and 9 the highest. Each level corresponds to a specific wattage output, allowing for tailored cooking.
Temperature control goes beyond simple power adjustments. Utilizing the intuitive controls, you can select a specific temperature in degrees Celsius or Fahrenheit. The cooktop will automatically regulate the power to maintain that precise temperature, preventing burning or undercooking.
The ‘boost’ function provides a temporary surge of power, ideal for quickly bringing liquids to a boil. However, use this feature sparingly, as it consumes significant energy. Remember that the selected power level or temperature influences cooking time and results. Experiment to find the optimal settings for your favorite recipes.
Special Features: TempControl
TempControl is a revolutionary Miele feature ensuring consistently perfect cooking results. Unlike traditional methods relying on time and power, TempControl allows you to set a precise target temperature for your pan. The cooktop intelligently monitors the pan’s temperature and automatically adjusts power to maintain it, preventing burning or overcooking.
To use TempControl, select the desired temperature using the control panel. The cooktop will then regulate the heat, even reducing power if the pan gets too hot. This is especially useful for delicate sauces, chocolate, or dishes requiring precise temperature control.
Compatible cookware is essential for TempControl to function correctly. Miele recommends using cookware with a ferromagnetic base for optimal sensor performance. The feature enhances cooking precision, offering peace of mind and consistently delicious outcomes. It’s a key innovation for both novice and experienced cooks.
Special Features: Bridge Function
The Bridge Function on your Miele induction cooktop offers enhanced flexibility for larger cookware. This feature intelligently combines two adjacent cooking zones into a single, larger zone, accommodating items like griddles, roasting pans, or long casserole dishes that wouldn’t normally fit on a standard zone.
Activating the Bridge Function is simple – typically, it involves selecting the desired zones and then activating the bridge icon on the control panel. The cooktop then treats the combined area as one continuous heating surface. Temperature and power settings can be adjusted uniformly across the bridged zone.
This is particularly useful when preparing meals for larger gatherings or when using specialty cookware. The Bridge Function streamlines the cooking process, eliminating the need to move food between zones. Ensure your cookware is appropriately sized to cover the bridged area for optimal heating efficiency and even cooking results.
Cleaning and Maintenance
Maintaining your Miele induction cooktop is crucial for optimal performance and longevity. After each use, allow the surface to cool completely before cleaning. For everyday spills and residue, a damp cloth with mild dish soap is usually sufficient. Avoid abrasive cleaners, scouring pads, or harsh chemicals, as these can damage the glass ceramic surface.
For stubborn stains or burnt-on food, use a Miele-recommended ceramic cooktop cleaner and a plastic scraper. Apply the cleaner, let it sit for a few minutes, then gently scrape away the residue. Wipe clean with a damp cloth and polish with a dry microfiber cloth to restore shine.
Regular cleaning prevents buildup and ensures efficient heat transfer. Avoid sliding cookware across the surface, as this can cause scratches. Promptly address spills to prevent them from baking onto the cooktop. Proper care will keep your Miele induction cooktop looking and functioning like new for years to come.
Troubleshooting Common Issues
If your Miele induction cooktop isn’t heating, first ensure the cookware is induction-compatible; Check the power level setting and confirm the cooktop is properly connected to a functioning power outlet. An error code may be displayed – consult the ‘Error Codes’ section for details.
If a zone operates for too long without a pot, it may automatically shut off as a safety feature. If the control panel is unresponsive, try resetting the appliance by briefly switching off the power at the circuit breaker. For flickering lights during operation, this is normal and indicates the cooktop is adjusting power levels efficiently.

If you encounter unusual noises, ensure there are no objects underneath the cooktop. If problems persist, note the model and serial number (found on the data plate) and contact Miele’s customer support for assistance. Do not attempt repairs yourself, as this could void the warranty.
Safety Precautions
Always exercise caution when operating your Miele induction cooktop. The ceramic surface gets hot during and after use – avoid touching it until cool. Keep flammable materials away from the cooktop to prevent fire hazards. Never place metal objects on the control panel, as this could cause damage.

Individuals with pacemakers should consult their physician before using an induction cooktop, as the electromagnetic field may interfere with the device. Supervise children closely when the cooktop is in use. Do not use the cooktop if the surface is cracked or damaged – contact Miele service for repair.
Ensure proper ventilation during cooking to prevent the buildup of fumes. Avoid sliding cookware across the surface, as this could cause scratches. Disconnect the appliance from the power supply before cleaning. Never attempt to repair the cooktop yourself; contact authorized Miele technicians for service.
Error Codes and Their Meanings
Error codes on your Miele induction cooktop indicate specific issues requiring attention. “F0401” signals a communication error within the appliance, often resolved by briefly switching the power off and on. A “F0E02” code suggests an issue with the temperature sensor; contact Miele service for assessment.
“F1E01” indicates a potential problem with the fan motor, while “F2E03” points to a fault in the heating element of a specific zone. If you encounter “F0801”, it signifies a sensor malfunction. Repeated error codes suggest a more serious problem needing professional diagnosis.
Consult the full error code list in your Miele manual for a comprehensive understanding. Note the specific code and the cooking zone affected when contacting customer support. Do not attempt self-repair, as this could void your warranty and potentially cause further damage. Always prioritize safety and professional assistance.
Detailed Feature Explanations (e.g., Keep Warm)
Miele induction cooktops boast innovative features enhancing cooking convenience. TempControl, a standout function, automatically adjusts power to maintain a set temperature, preventing burning for delicate sauces or chocolate. The Bridge Function combines two cooking zones into one larger surface, ideal for griddles or oversized cookware.
The Keep Warm function maintains food at a low temperature, preventing it from cooling while you finish preparing other dishes. PowerBoost delivers intense heat for rapid boiling or searing. CountDown Timer allows precise cooking times, automatically switching off the zone when finished.
Individual Zone Settings offer customized control over each cooking area. Explore the FlexInduction zones for adaptable cooking space. Refer to your model’s manual for specific feature availability and detailed instructions on utilizing these advanced capabilities for optimal results.
Warranty Information and Support
Miele stands behind its appliances with a comprehensive warranty, offering peace of mind. Standard warranty coverage typically includes one year for parts and labor on the entire cooktop. Extended warranty options are available for purchase, providing additional years of protection against potential repairs.
For warranty claims or service requests, contact Miele’s dedicated customer support team. You can reach them via phone, email, or through the official Miele website. Have your model number (e.g., KM 7745 FL) and serial number readily available to expedite the process.
Miele also offers a network of authorized service technicians for in-home repairs. Online resources, including FAQs, troubleshooting guides, and downloadable manuals, are available on the Miele website to assist with common issues. Prioritize genuine Miele parts for optimal performance and warranty validity.