
Wooden jewelry box plans, often available as free PDF downloads, empower crafters to build beautiful storage. Numerous online resources, like Ana White, offer detailed guides.
These plans cater to all skill levels, from simple hinged boxes to elaborate carousel cases. Discover projects for elegant, personalized treasure storage today!
Why Build Your Own Jewelry Box?
Building your own wooden jewelry box offers a unique sense of accomplishment and personalization. Free PDF plans unlock creativity, allowing you to design a piece perfectly tailored to your needs and aesthetic preferences.
Unlike mass-produced items, a handmade box reflects individual style and craftsmanship. You gain control over wood selection, dimensions, and decorative finishes. Furthermore, constructing a jewelry box is a rewarding woodworking project, enhancing skills and providing a functional, beautiful heirloom.
These plans often cater to various skill levels, making it accessible for beginners and experienced woodworkers alike. It’s a cost-effective alternative to purchasing expensive, pre-made boxes.
Benefits of Using PDF Plans
PDF plans for wooden jewelry boxes offer numerous advantages to the woodworker. They provide a readily accessible, downloadable format, eliminating shipping costs and delays. Detailed diagrams and step-by-step instructions ensure clarity throughout the building process.
Many free PDF plans include comprehensive material lists, simplifying sourcing components. The digital format allows for easy printing and magnification of intricate details. Furthermore, PDFs are compatible with various devices, enabling convenient access in the workshop.
Resources like Ana White provide these plans, fostering a community of DIY enthusiasts and offering support for projects.
Types of Wooden Jewelry Boxes
Wooden jewelry box plans encompass diverse designs: simple hinged boxes, elegant carousel cases, and sophisticated multi-layered options, catering to varied skill levels.
Simple Hinged Box Plans
Simple hinged box plans represent an excellent starting point for beginner woodworkers seeking to craft a functional and attractive jewelry box. Many free PDF plans available online focus on straightforward construction techniques, often requiring minimal tools and materials.
These designs typically involve cutting wood pieces to size, assembling a rectangular box structure, and attaching a lid with hinges. The absence of complex joinery or intricate details makes them ideal for those new to woodworking. You can find plans for boxes with no fasteners!
These plans often emphasize clean lines and a classic aesthetic, providing a solid foundation for learning essential woodworking skills.
Carousel Jewelry Box Plans
Carousel jewelry box plans, often found as PDF downloads, introduce a more complex and visually appealing design. These plans feature a rotating central column, ideal for displaying necklaces and keeping them tangle-free. The display carousel keeps hanging necklaces within easy reach.
Construction typically involves creating a circular base, a rotating core, and a surrounding box structure. While more challenging than simple hinged boxes, detailed plans guide woodworkers through each step.
Expect to utilize more advanced techniques, such as precise cutting and assembly. These plans offer a rewarding project for intermediate woodworkers seeking to build a truly unique and functional piece.
Multi-Layered Jewelry Box Plans
Multi-layered jewelry box plans, readily available as PDF downloads, cater to those needing extensive storage. These designs incorporate multiple tiers or drawers, maximizing space for various jewelry types. They are ideal for collectors or individuals with a substantial collection.

Plans often detail the construction of individual trays and dividers, creating organized compartments. Building these boxes requires careful planning and precise measurements to ensure smooth operation of the layers.
Expect a more involved build process compared to simpler designs, but the result is a sophisticated and highly functional storage solution. These plans are suited for intermediate to advanced woodworkers.
Essential Tools and Materials
Wooden jewelry box plans necessitate tools like tablesaws and finishing supplies. Popular wood choices include walnut, offering luxurious results, as seen in detailed PDF guides.
Wood Selection: Popular Choices
Wooden jewelry box plans frequently recommend diverse wood types, each offering unique aesthetics and workability. Walnut emerges as a premium choice, celebrated for its rich color and luxurious feel, often showcased in advanced PDF projects. Pine provides an economical and easily workable option, ideal for beginners following simpler plans.
Cherry is another favored selection, known for its warm tones and ability to develop a beautiful patina over time. Maple offers a light, clean look, perfect for painting or applying delicate finishes. Consider the project’s complexity and desired appearance when selecting wood, referencing detailed PDF guides for specific recommendations.
Tools Required for Construction
Successfully executing wooden jewelry box plans, particularly those downloaded as PDF guides, necessitates a core set of woodworking tools. A tablesaw is frequently cited as essential for accurate cuts, though hand saws suffice for simpler designs. A miter saw ensures precise angled cuts for box corners and lid construction.
Essential tools also include a drill with various bits for pilot holes and hardware installation, along with a screwdriver set. Clamps are vital for secure assembly, while sandpaper, in varying grits, prepares surfaces for finishing. Detailed PDF plans often specify tool requirements based on project complexity.
Finishing Supplies: Stains, Varnishes, and Polishes
Completing a wooden jewelry box project, guided by PDF plans, demands appropriate finishing supplies. Wood stains enhance the grain and add color, available in various shades to suit personal preference. Following staining, varnish provides a protective layer against moisture and wear, offering different sheen levels – satin, gloss, or matte.
For a final touch, polishing compounds elevate the finish, creating a smooth, lustrous surface. Consider felt lining, often incorporated in plans, to protect delicate jewelry. Selecting high-quality finishes ensures durability and showcases the craftsmanship of your handmade box.

Finding Free Wooden Jewelry Box Plans (PDF)
Numerous websites offer free wooden jewelry box plans in PDF format, including Ana White and the Jewelry Box Guild project. Explore online resources!
Ana White’s Free Plans
Ana White is a fantastic resource for woodworking enthusiasts seeking free plans, and her collection includes several jewelry box designs available as downloadable PDFs. These plans are known for being clearly presented and suitable for various skill levels, making them accessible to both beginners and experienced woodworkers.
Typically, a detailed shopping list accompanies each plan, outlining the necessary tools and materials – including specific wood types and quantities – to complete the project successfully. Her designs range from simple, rustic boxes to more refined pieces, offering a variety of styles to choose from. You’ll find step-by-step instructions and helpful diagrams to guide you through the construction process, ensuring a rewarding building experience.
Jewelry Box Guild Project ‒ Free Version
The Jewelry Box Guild project offers a free version providing access to digital plans for constructing a beautiful and functional wooden jewelry box. While a more comprehensive, paid version exists, this introductory PDF allows builders to experience the Guild’s design quality without initial investment.
This project is ideal for those seeking a slightly more involved build than basic beginner boxes. Expect detailed instructions and diagrams to guide you through each stage of construction. Accessing the free plans grants immediate download, enabling you to start building your elegant treasure case quickly. It’s a great starting point for exploring advanced woodworking techniques.
Online Resources for Free Plans
Numerous websites provide free wooden jewelry box plans in PDF format, catering to diverse skill levels and design preferences. Ana White stands out, offering a selection of projects with detailed shopping lists and instructions. Beyond Ana White, a general internet search reveals various woodworking communities and individual creators sharing their designs.
These resources often feature simple hinged box plans perfect for beginners, alongside more complex designs like carousel jewelry cases. Remember to carefully review the plans before starting, ensuring you understand the required tools and materials. Explore these online hubs to discover the perfect project for your needs!
Step-by-Step Construction Guide (General)
Begin by precisely cutting wood pieces according to your chosen PDF plans. Then, carefully assemble the box structure, followed by securely adding the lid and hinges.
Cutting the Wood Pieces
Cutting the wood pieces accurately is paramount when following wooden jewelry box plans, especially PDF versions. Precisely measure and mark each component based on the dimensions provided in your chosen plan. Utilize a tablesaw for straight, clean cuts, ensuring safety precautions are followed diligently.
For intricate designs, a jigsaw might be necessary. Double-check all measurements before cutting, as errors can impact the final assembly. Sand the edges of each piece smoothly to prepare for joining, creating a professional finish. Accurate cuts guarantee a well-fitted and aesthetically pleasing jewelry box.
Assembling the Box Structure
Assembling the box structure, guided by your wooden jewelry box plans (often in PDF format), requires precision and patience. Begin by dry-fitting the pieces to ensure a snug fit before applying adhesive. Wood glue and clamps are essential for creating strong, lasting joints.
Consider using brad nails or screws for added reinforcement, particularly for larger boxes. Ensure all corners are square during clamping. Wipe away any excess glue immediately to prevent unsightly residue. A well-assembled structure forms the foundation for a beautiful and functional jewelry box.
Adding the Lid and Hinges
Adding the lid and hinges is a crucial step when following wooden jewelry box plans, frequently found as PDF downloads. Precise alignment is key for a smooth, functional lid. Carefully position the hinges on both the lid and the box, marking screw locations accurately.
Pre-drilling pilot holes prevents wood splitting. Select hinges appropriate for the box’s size and weight. Ensure the lid opens and closes freely without binding. Adjust hinge placement if necessary for a perfect fit. A securely attached lid protects treasured contents beautifully.
Advanced Techniques & Design Ideas
Explore PDF jewelry box plans featuring inset panels, dividers, and luxurious felt linings. These elevate designs, adding sophistication and protective features.
Walnut boxes showcase beautiful wood grain!
Creating Inset Door Panels
Wooden jewelry box plans often showcase the elegance of inset door panels, a technique that adds a refined touch to your woodworking project. These panels, frequently highlighted in PDF guides, are ideal for displaying beautiful wood grain or vibrant colors, enhancing the overall aesthetic appeal.
Successfully creating an inset panel requires precise cutting and fitting. Many plans detail methods for achieving a seamless integration, utilizing techniques like rabbeting or dado joints. The January 11, 2024, resource specifically mentions this feature as a key design element, transforming a simple box into a luxurious accessory. Careful attention to detail ensures a professional finish.
Incorporating Dividers and Compartments
Wooden jewelry box plans frequently emphasize organization through the inclusion of dividers and compartments. Detailed PDF guides often illustrate various configurations, catering to different jewelry types and storage needs. These internal structures maximize space and prevent tangling, keeping precious items neatly arranged.
Carousel jewelry box plans, for example, utilize dividers to keep necklaces tangle-free. Beyond simple separation, compartments can be customized for rings, earrings, and bracelets. Implementing these features requires accurate measurements and precise cuts, as outlined in many free online resources. Thoughtful design transforms a box into a functional treasure.
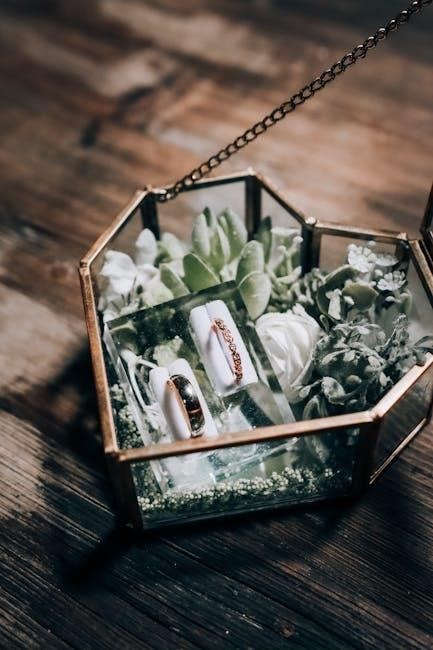
Adding Felt Lining for Protection
Wooden jewelry box plans often include instructions for adding felt lining, a crucial step for protecting delicate items. PDF guides detail how to cut and adhere felt to the interior surfaces, preventing scratches and tarnishing. This soft layer safeguards jewelry from damage while enhancing the box’s luxurious feel.
Many plans suggest using adhesive spray or fabric glue for secure attachment. Choosing the right felt color complements the wood finish and interior design. This finishing touch elevates a functional box into a cherished keepsake, ensuring long-lasting preservation of treasured possessions. It’s a simple addition with significant impact!

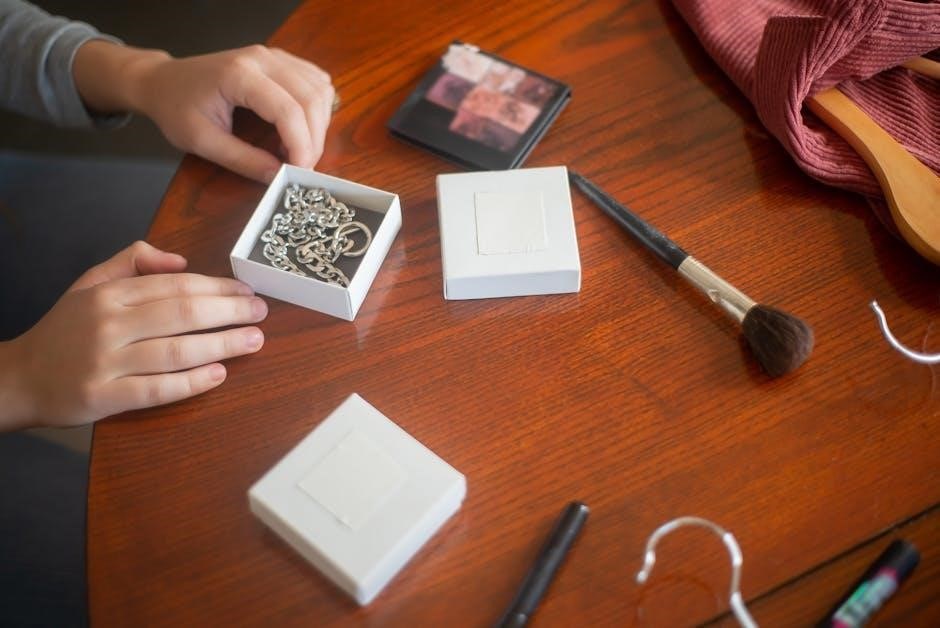
Customization and Personalization
Wooden jewelry box plans, often PDF based, inspire creativity! Explore wood burning, painting, and decorative finishes to personalize your project beautifully.
Add unique hardware like knobs and latches for a truly bespoke treasure storage solution.
Wood Burning and Carving Designs
Wooden jewelry box plans, particularly those found as PDF downloads, frequently inspire artisans to add personalized touches. Wood burning and carving are excellent methods for achieving this!
Consider intricate floral patterns, geometric shapes, or even initials for a unique aesthetic. A blank wooden box becomes a canvas for artistic expression.
Carefully transfer your design onto the wood surface before beginning. Practice your technique on scrap wood first to ensure precision. These details elevate a simple box into a cherished heirloom.
Remember to seal the carved or burned areas with a protective finish to preserve the design’s beauty for years to come.
Painting and Decorative Finishes
Utilizing wooden jewelry box plans, often accessed as convenient PDF files, opens doors to stunning decorative possibilities. Painting and applying various finishes transform a basic box into a personalized masterpiece.
Explore techniques like distressing for a vintage look, or opt for vibrant colors and glossy varnishes for a modern aesthetic. Consider layering paints for depth and visual interest.
Decorative finishes, such as crackle or metallic accents, add unique character. Ensure proper surface preparation – sanding and priming – for optimal paint adhesion and a professional result.
Seal your finished design with a protective coat to ensure longevity and preserve the beauty of your creation.
Adding Hardware: Knobs, Latches, and Locks
When following wooden jewelry box plans – readily available as PDF downloads – selecting appropriate hardware elevates both functionality and aesthetics. Knobs offer easy access, while latches secure the box’s contents.
Consider the style of your box; antique brass complements vintage designs, while sleek chrome suits modern aesthetics. Locks add an extra layer of security for valuable items.
Ensure hardware is appropriately sized for the box and securely fastened. Pre-drilling pilot holes prevents wood splitting during installation.
Experiment with different finishes and styles to personalize your creation and enhance its overall appeal.

Where to Purchase Detailed Plans
Detailed jewelry box plans, including PDF versions, are readily available on platforms like Etsy and dedicated woodworking plan websites for a small fee.
These often offer more intricate designs and comprehensive instructions than free options.
Etsy and Online Marketplaces
Etsy is a treasure trove for wooden jewelry box plans, offering a diverse range of designs from independent woodworkers and designers. You’ll find everything from simple, beginner-friendly PDF downloads to incredibly detailed plans for complex, multi-layered boxes.
Other online marketplaces, like woodworking-specific sites, also host a variety of plans. These often come with detailed cut lists, step-by-step instructions, and even video tutorials.
Purchasing plans ensures access to professionally designed projects, often with enhanced clarity and support compared to free resources. Expect to pay a small fee, but the investment can yield stunning results and a satisfying building experience.
Woodworking Plan Websites
Dedicated woodworking plan websites represent a fantastic resource for acquiring wooden jewelry box plans in PDF format. These platforms frequently specialize in detailed, downloadable plans catering to various skill levels, from novice to expert woodworkers.
Many sites offer a curated selection of projects, ensuring quality and accuracy. You can often filter searches by box type – hinged, carousel, or multi-layered – to quickly find the perfect plan.
Expect to find comprehensive instructions, material lists, and cutting diagrams. Some websites offer subscription services for unlimited access to their entire plan library, providing exceptional value for avid builders.
Safety Precautions
Wooden jewelry box plans often involve power tools; always wear safety gear like goggles and dust masks. Prioritize safe tool usage for a secure build!
Woodworking Safety Gear
Building a wooden jewelry box, even with detailed PDF plans, requires prioritizing safety. Essential gear includes safety glasses or a face shield to protect your eyes from flying debris. A dust mask or respirator is crucial when sanding or cutting wood, preventing inhalation of harmful particles.
Hearing protection, such as earplugs or earmuffs, is recommended when using loud power tools. Work gloves enhance grip and shield hands from splinters and abrasions. Finally, appropriate clothing – avoiding loose fits – minimizes risks. Remember, a safe workshop is a productive workshop!
Safe Use of Tools
Following wooden jewelry box plans (PDF or otherwise) demands careful tool operation. Always read and understand the manual for each tool before use. Secure your workpiece with clamps to prevent movement during cutting or sanding. Maintain sharp blades; dull tools require more force and increase accident risk.
Never reach over or around a running blade. Keep hands clear of the cutting path. Disconnect power tools before changing blades or making adjustments. Be mindful of your surroundings and avoid distractions. Prioritize controlled movements and focused attention for a safe build.