
Ford F250 Manual Locking Hub Problems: A Comprehensive Guide
Ford F-250 automatic locking hubs can be problematic, often failing to engage or disengage reliably due to vacuum leaks or solenoid issues. Converting to manual hubs offers a durable fix.
The Ford F-250, a workhorse for many, frequently encounters issues with its front wheel hubs, particularly those equipped with the automatic locking hub system (ESOF). These systems, designed for seamless transitions between 2WD and 4WD, can unfortunately become a source of frustration for owners. Common complaints include the inability to engage four-wheel drive when needed, or intermittent engagement and disengagement, leaving drivers uncertain about their vehicle’s drivetrain status.
These problems often stem from the complexity of the ESOF system, relying on vacuum lines and solenoids that are susceptible to wear, leaks, and failure. Recent discussions highlight that even after wheel hub/bearing replacements using genuine Ford parts, intermittent locking issues can persist, prompting consideration of a manual locking hub conversion as a more permanent solution. Addressing these concerns is crucial for maintaining the F-250’s capability and ensuring safe operation.
Understanding Automatic Locking Hubs (ESOF)
Ford’s ESOF (Electronic Shift-On-the-Fly) automatic locking hubs aim to provide convenience by automatically engaging when the transfer case is shifted into 4WD. This system utilizes vacuum or, in later models, electronic solenoids to actuate the hubs, eliminating the need for manual intervention. However, this convenience comes at a cost – increased complexity and potential failure points.
The system relies on a network of vacuum lines (or electrical connections) to function correctly. Damage to these lines, or a failing solenoid, can prevent proper engagement. While designed for ease of use, ESOF hubs are inherently more prone to issues than their manual counterparts due to their reliance on these auxiliary systems, leading many F-250 owners to explore manual conversion options for improved reliability.
The Appeal of Manual Locking Hubs
For Ford F-250 owners battling intermittent 4WD engagement, manual locking hubs present a compelling alternative. They bypass the complexities of the ESOF system, eliminating potential failure points like vacuum leaks and faulty solenoids. Manual hubs offer direct mechanical control, ensuring positive engagement when needed, and complete disengagement when 4WD isn’t required.
This simplicity translates to increased reliability, particularly in challenging conditions. While requiring driver intervention to lock and unlock, many find this a small price to pay for consistent performance. The conversion provides peace of mind, knowing that 4WD will function as intended, regardless of the condition of the original ESOF components, making them a popular upgrade.

Common Problems with Ford F250 ESOF Hubs
ESOF hubs on the F-250 frequently suffer from failure to engage 4WD, intermittent operation, vacuum leaks, solenoid malfunctions, and general component wear.
Failure to Engage 4WD
A common complaint among Ford F-250 owners is the inability to engage four-wheel drive. This often stems from issues within the ESOF (Electronic Shift-On-the-Fly) hub system. Vacuum leaks are a primary suspect, disrupting the pressure needed to activate the hubs. Solenoid failures can also prevent proper engagement, leaving the vehicle stuck in two-wheel drive when four-wheel drive is required.
Furthermore, internal wear and tear on ESOF components contribute to this problem. If the hubs aren’t engaging, inspecting the vacuum lines for cracks or disconnections is crucial. Testing the solenoid’s functionality is also recommended. Considering a conversion to manual locking hubs can provide a more reliable solution, bypassing the complexities of the ESOF system and ensuring consistent 4WD engagement.
Intermittent Engagement/Disengagement
Perhaps more frustrating than a complete failure to engage is the intermittent operation of the Ford F-250’s ESOF hubs. This manifests as 4WD engaging or disengaging randomly, creating unpredictable driving conditions. This erratic behavior is frequently linked to the same root causes as complete failures: vacuum leaks and failing solenoids. A small, fluctuating vacuum leak can cause inconsistent pressure, leading to sporadic engagement.
Additionally, worn ESOF components contribute to this issue. Diagnosing intermittent problems requires careful observation and testing. Manually locking one hub at a time can help isolate whether the issue lies with a single hub or the system as a whole. A conversion to manual locking hubs eliminates these inconsistencies, offering dependable performance.

Vacuum Leaks and Their Impact
The ESOF system relies heavily on engine vacuum to actuate the locking hubs. Vacuum leaks are a primary culprit behind many Ford F-250 hub problems, disrupting the necessary pressure for proper engagement. These leaks can occur anywhere along the vacuum lines – from the engine to the front axle – due to cracks, loose connections, or deterioration of the hoses.
Even a small leak can significantly reduce the system’s effectiveness, leading to failure to engage or intermittent operation. Inspecting these lines for damage is crucial. Capping the vacuum lines during testing can isolate whether a leak is indeed the source of the issue, confirming if the system functions correctly with direct vacuum application.
Solenoid Failures in ESOF Systems
Within the ESOF (Electronic Shift-On-the-Fly) system, solenoids play a vital role in directing vacuum to the locking hubs, enabling 4WD engagement. These solenoids can fail over time due to corrosion, electrical issues, or simply wear and tear, preventing proper vacuum flow. A malfunctioning solenoid will often manifest as an inability to engage the front axle, or inconsistent locking/unlocking behavior.
Diagnosing solenoid failure often requires testing with a multimeter to confirm electrical continuity and proper operation. Replacement of a faulty solenoid is typically necessary to restore the ESOF system’s functionality. Considering the system’s complexity, professional diagnosis is often recommended.
Wear and Tear on ESOF Components
The ESOF system, while convenient, contains numerous components susceptible to wear over time, contributing to intermittent or complete failure of the auto-locking hubs. Vacuum lines become brittle and crack, reducing vacuum pressure. Internal seals within the hub assembly degrade, leading to leaks and reduced engagement force. The ESOF gear itself can experience wear, hindering smooth operation.
Regular use, exposure to harsh environments, and age all accelerate this wear. Consequently, even with intact vacuum lines and functioning solenoids, worn ESOF components can prevent reliable 4WD engagement. This often prompts owners to consider a conversion to more durable manual locking hubs.

Diagnosing Ford F250 Locking Hub Problems
Proper diagnosis requires identifying your hub type, inspecting vacuum lines for damage, testing for leaks, and manually testing each wheel’s locking function.
Identifying Your Hub System Type
Determining whether your Ford F-250 has automatic (ESOF) or manual locking hubs is crucial for accurate troubleshooting. ESOF hubs engage automatically when the transfer case is shifted into 4WD, relying on vacuum or electronic signals. Manual hubs require the driver to physically lock them before engaging 4WD.
Visual inspection is a good starting point. Automatic hubs typically have an electrical connector and vacuum lines running to them, while manual hubs are simpler in appearance. Knowing which system you have dictates the diagnostic approach. If you’ve recently replaced wheel bearings, it’s especially important to confirm the original hub type to ensure compatibility with the new components. Understanding this distinction will streamline the repair process and prevent further complications.

Visual Inspection of Vacuum Lines
A thorough visual inspection of the vacuum lines connected to the front axle is a critical first step in diagnosing ESOF hub issues on your Ford F-250. Carefully trace each line from the hubs to the vacuum reservoir and any connecting junctions; Look for obvious signs of damage, such as cracks, breaks, or kinks in the rubber hoses.
Pay close attention to areas where the lines bend or rub against other components, as these are common failure points. Even small cracks can lead to vacuum leaks, preventing proper hub engagement. Check the connections at each end of the lines to ensure they are secure and free of corrosion. A systematic inspection can often reveal the source of the problem quickly and affordably.
Testing for Vacuum Leaks
After a visual inspection, actively testing for vacuum leaks is crucial. With the engine running, listen closely around the vacuum lines and hub assemblies for hissing sounds, which indicate escaping vacuum. A mechanic’s stethoscope can pinpoint the leak’s location. Alternatively, spray a small amount of carburetor cleaner or soapy water onto the lines and connections.
Bubbles forming reveal a leak. Be cautious when using flammable sprays near a hot engine! If leaks are detected, replace the damaged lines or repair connections. Remember, even a minor vacuum leak can compromise the ESOF system’s functionality, leading to intermittent or complete failure of 4WD engagement.
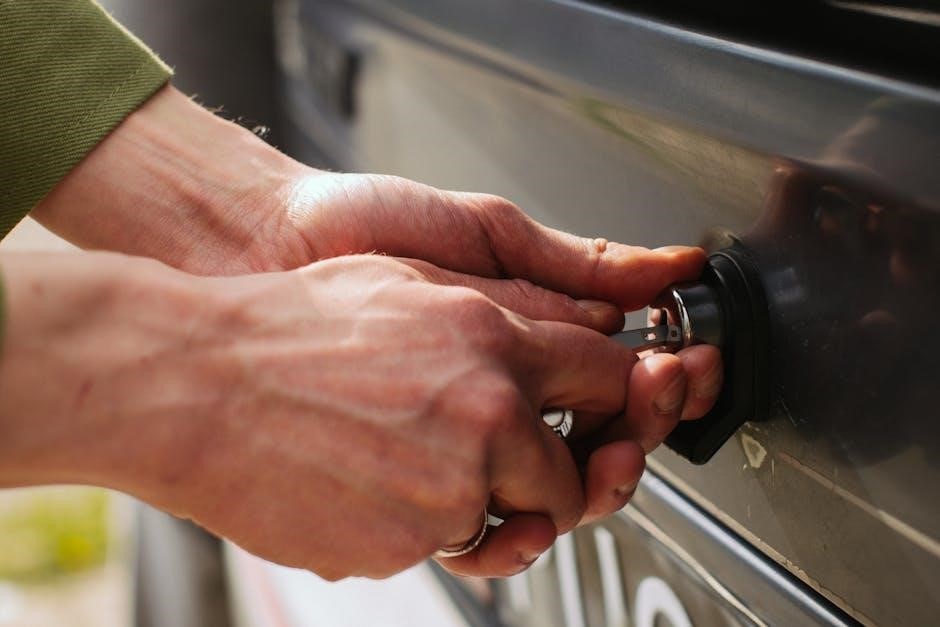
Manual Hub Lock Test (Individual Wheels)
To assess individual hub functionality, attempt to manually lock each hub while the vehicle is in two-wheel drive and the engine is running. You should feel a distinct click as the hub engages. Rotate each wheel by hand; a properly locked hub will rotate with the axle shaft. If a hub fails to lock or feels loose, it indicates an internal problem.
Repeat this test on both sides of the front axle. This isolated test helps determine if the issue lies with a single hub or a more widespread system failure. Remember to disengage the hubs after testing to avoid unnecessary wear and potential drivetrain binding.
Capping Vacuum Lines for Isolation Testing
A crucial diagnostic step involves capping the vacuum lines leading to each front wheel hub individually. Start by capping one line while the vehicle is in two-wheel drive. If the 4WD system now engages correctly, the issue likely resides within the hub associated with the capped line.
Repeat this process for the other side. This isolation technique pinpoints whether a vacuum leak or solenoid malfunction is affecting a single hub or both. Ensure caps are secure to prevent false readings. This method helps narrow down the source of the ESOF system’s intermittent engagement problems.
Converting to Manual Locking Hubs
Switching to manual locking hubs provides a robust solution for persistent ESOF issues, eliminating reliance on vacuum lines and electronic solenoids for reliable 4WD engagement.
Benefits of Manual Hub Conversion
Converting your Ford F-250 to manual locking hubs delivers significant advantages over the often-troublesome ESOF system. Primarily, it eliminates the common failure points associated with automatic hubs – namely, vacuum leaks and failing solenoids. This results in a more dependable 4WD engagement, crucial for off-road adventures or challenging conditions.
Manual hubs offer increased reliability and simplicity, reducing the potential for intermittent engagement issues. You gain direct control over when the front axle is locked, enhancing predictability. Furthermore, this conversion can save money in the long run by avoiding repeated repairs to the ESOF system. It’s a proactive step towards a more robust and trustworthy four-wheel-drive experience, especially for trucks experiencing persistent ESOF malfunctions.
Required Parts for Conversion
To successfully convert your Ford F-250 to manual locking hubs, several key components are necessary. First, you’ll need a set of manual locking hubs – part number 1C3Z-3B396-CB is frequently recommended. These typically come as a pair, one for each front wheel.
Additionally, you’ll require new hub seals to ensure a watertight fit and prevent contamination. Consider purchasing new spindle nuts, as the originals may be corroded or damaged during removal. Some kits include these. Finally, you may need a small amount of grease specifically designed for wheel bearings during installation. Ensure compatibility with your F-250’s year and model for a seamless conversion.
Step-by-Step Conversion Process
Begin by safely lifting the front of your F-250 and securing it with jack stands. Remove the front wheels and carefully disassemble the existing automatic locking hub assemblies. Clean the spindle thoroughly before installing the new manual hubs, applying a thin layer of grease to the hub seals.
Torque the spindle nuts to the manufacturer’s specifications – crucial for proper operation. Reinstall the wheels and lower the vehicle. After installation, manually lock and unlock each hub several times to ensure smooth functionality. Finally, test the 4WD system to confirm proper engagement and disengagement.
Tools Needed for Manual Hub Installation
Essential tools for converting your Ford F-250 to manual locking hubs include a socket set with various sizes, a torque wrench (critical for proper spindle nut tightening), and penetrating oil to loosen stubborn components. A hammer, punch, and pry bar will aid in disassembly.
You’ll also need a wheel chock, jack and jack stands for safe vehicle lifting, and potentially a hub puller if the automatic hubs are difficult to remove. Safety glasses and gloves are highly recommended. Having a service manual specific to your F-250 year is invaluable for torque specifications and diagrams.

Troubleshooting After Manual Hub Installation
Verify manual hubs engage and disengage smoothly. Check for wheel bearing interference and compatibility issues; proper operation ensures reliable 4WD performance and avoids damage.
Ensuring Proper Hub Operation
After installing manual locking hubs on your Ford F-250, confirming their correct function is crucial. Begin by testing each hub individually – attempt to lock and unlock it while the vehicle is stationary and then during a slow, controlled drive. Listen for any unusual clicking or grinding noises, which could indicate improper engagement or internal damage.
Verify that the hubs lock securely and remain locked when desired, and unlock easily when needed. If a hub feels stiff or doesn’t fully engage, double-check the installation and ensure all components are properly seated. Regularly inspect the hubs for any signs of wear, damage, or looseness, and address any issues promptly to maintain optimal 4WD performance and prevent further complications.
Addressing Potential Compatibility Issues
While generally straightforward, converting to manual locking hubs on a Ford F-250 can sometimes present compatibility challenges. Ensure the hubs you’ve chosen are specifically designed for your truck’s year and axle configuration. Incorrectly matched hubs might not seat properly, leading to vibration or premature wear.
Recent wheel bearing replacements, especially with genuine Ford parts, shouldn’t typically cause issues, but verifying bearing preload is essential. Interference between the new hubs and bearings is rare but possible; carefully inspect for any binding or resistance during installation. If problems arise, consult compatibility charts or seek advice from experienced Ford mechanics to guarantee a seamless and reliable conversion.
Checking for Wheel Bearing Interference
After installing manual locking hubs on your Ford F-250, meticulously check for wheel bearing interference. Rotate each wheel by hand, feeling for any resistance or binding. A smooth, free rotation indicates proper fitment. If you detect drag, carefully inspect the hub-to-bearing interface for contact points.
Slight interference can sometimes be resolved by gently loosening and reseating the hub. However, significant binding suggests a compatibility issue or incorrect installation. Don’t force the hub; address the problem immediately to prevent damage to the bearings or hubs. Proper clearance is crucial for optimal performance and longevity.
Maintenance and Prevention
Regular lubrication of hub components and careful 4WD usage are vital for preventing issues. Inspect vacuum lines frequently for cracks or leaks.
Regular Hub Lubrication
Consistent lubrication is paramount for the longevity and smooth operation of your Ford F-250’s locking hubs, whether automatic (ESOF) or manual. Over time, dirt, grime, and corrosion can accumulate within the hub assembly, hindering proper engagement and disengagement. This is especially crucial after exposure to harsh conditions like off-roading or winter weather.
Using a high-quality, waterproof grease designed for wheel bearings and hubs is recommended. During lubrication, thoroughly coat all moving parts, including the splines, gears, and internal surfaces. This minimizes friction, prevents rust, and ensures reliable performance. Regular checks – ideally during routine vehicle maintenance – will help identify and address any lubrication deficiencies before they escalate into more significant problems. Proper lubrication is a simple preventative measure that can save you considerable time and expense in the long run.
Inspection of Hub Components
Routine inspection of your Ford F-250’s locking hub components is vital for identifying potential issues before they lead to complete failure. Focus on checking for visible signs of wear, such as cracks, corrosion, or damaged splines. Pay close attention to the vacuum lines (for ESOF systems), ensuring they are free from breaks, kinks, or leaks.
Examine the hub housing for any deformation or damage. When inspecting manual hubs, verify that the locking mechanism engages and disengages smoothly. A thorough visual assessment, combined with a functional test, can reveal early warning signs of impending problems. Don’t overlook the wheel bearings during this inspection, as issues with bearings can often manifest as hub-related symptoms. Early detection allows for timely repairs, preventing more costly replacements.
Proper 4WD System Usage
Employing correct 4WD system usage is crucial for longevity and preventing issues with your Ford F-250’s locking hubs. Avoid engaging 4WD on dry pavement, as this induces unnecessary stress on the drivetrain and can cause binding. Always fully disengage 4WD when returning to dry roads.
When using automatic locking hubs (ESOF), understand their limitations and avoid abrupt acceleration or deceleration while engaged. For manual hubs, ensure they are fully locked before engaging 4WD and unlocked before returning to 2WD. Regular, mindful operation minimizes wear and tear, reducing the likelihood of encountering frustrating hub malfunctions. Proper technique extends the life of your system.
Genuine Ford Parts vs. Aftermarket Options
Using genuine Ford parts, like those recently installed wheel bearings, ensures compatibility and quality; however, aftermarket options exist, potentially at a lower cost.
Quality Considerations for Hubs and Bearings
When addressing Ford F-250 locking hub issues, the quality of replacement parts—specifically hubs and wheel bearings—is paramount. Genuine Ford parts are engineered to meet the vehicle’s precise specifications, ensuring optimal fit and performance, and minimizing potential compatibility problems. Aftermarket options can vary significantly in quality; cheaper alternatives may utilize inferior materials or manufacturing processes, leading to premature failure and potentially damaging related components.
Hubs endure substantial stress, and bearings are critical for smooth wheel rotation. Investing in high-quality components, even if more expensive upfront, can save money and frustration in the long run. Consider reputable brands known for durability and reliability. Recent wheel bearing replacements using genuine Ford parts demonstrate a commitment to quality, suggesting a preference for long-term dependability.
Cost Comparison: Genuine vs. Aftermarket
A significant factor in resolving Ford F-250 locking hub problems is the cost difference between genuine Ford parts and aftermarket alternatives. Genuine locking hubs, like part 1C3Z-3B396-CB, typically command a higher price point—often 50% to 100% more—than comparable aftermarket options. This price reflects Ford’s engineering, materials, and quality control standards.
While aftermarket hubs can offer substantial savings initially, it’s crucial to consider the potential for reduced lifespan and increased risk of failure. Repeated replacements of cheaper parts can ultimately exceed the cost of a single, high-quality genuine component. Furthermore, non-OEM parts may void warranties or create compatibility issues, leading to additional expenses. Weighing long-term value against initial cost is essential.
Potential Issues with Non-OEM Parts
Utilizing non-OEM (Original Equipment Manufacturer) parts for Ford F-250 locking hub repairs can introduce several potential complications. Lower quality materials and manufacturing tolerances often result in reduced durability and a shorter lifespan compared to genuine Ford components. This can necessitate more frequent replacements, ultimately increasing long-term costs.
Furthermore, aftermarket hubs may exhibit compatibility issues, potentially interfering with the proper function of the ESOF system or causing premature wear on related components like wheel bearings. Incorrect fitment can also lead to vibration or noise. While cost savings are attractive, prioritizing quality and compatibility with genuine Ford parts minimizes the risk of recurring problems and ensures reliable 4WD operation.

Recent Wheel Hub/Bearing Replacement Considerations
Recent bearing replacements, using genuine Ford parts, necessitate checking bearing preload and ensuring correct installation to avoid interference with hub functionality and ESOF operation.
Impact of New Bearings on Hub Function
Replacing wheel bearings on a Ford F-250, while addressing a separate issue, can directly influence the performance of the ESOF and auto-locking hub systems. New bearings, if improperly installed or possessing incorrect preload, can create binding or excessive play within the hub assembly. This interference disrupts the smooth engagement and disengagement crucial for 4WD operation.
Specifically, incorrect bearing preload can strain the hub’s internal components, potentially mimicking the symptoms of a failing locking hub – intermittent engagement or complete failure to lock. Ensuring the new bearings are seated correctly and adjusted to Ford’s specifications is paramount. A qualified technician should verify proper installation to avoid introducing new problems alongside the original hub concerns, especially after a recent replacement with genuine Ford parts.
Checking Bearing Preload After Replacement
After replacing wheel bearings on your Ford F-250, verifying correct preload is critical for optimal hub function and preventing premature failure. Preload ensures the bearings are neither too tight, causing binding and heat, nor too loose, leading to excessive play and potential damage.
Typically, preload is checked using a torque wrench while rotating the hub assembly. Ford provides specific torque specifications for F-250 bearings; adhering to these is essential. Improper preload can mimic failing locking hub symptoms, like intermittent engagement. A qualified mechanic can accurately assess and adjust preload, guaranteeing smooth operation. Ignoring this step risks negating the benefits of new bearings and exacerbating existing ESOF hub issues, particularly after a recent replacement with genuine Ford parts.
Potential for Incorrect Installation Affecting Hubs
Even with genuine Ford parts, incorrect wheel hub or bearing installation can directly contribute to ongoing ESOF and auto-locking hub problems on your F-250. Misalignment during installation, or failure to properly seat components, can introduce binding or stress, hindering hub engagement.
Incorrectly torqued fasteners are a common culprit, as are damaged seals allowing contaminants to enter. These issues can manifest as intermittent 4WD engagement or complete failure. If you’ve recently had bearings replaced and continue experiencing hub issues, revisiting the installation process with a qualified technician is crucial. A thorough inspection can identify and rectify installation errors, preventing further complications and ensuring proper functionality of the entire system.